Here is the second 3-d file, one more gazebo!
I hope you like gazebos because there will be more of them later. I have made in total seven different gazebos but I don’t have all the files ready for them yet. It takes a lot of time to prepare all the different file formats on each design.
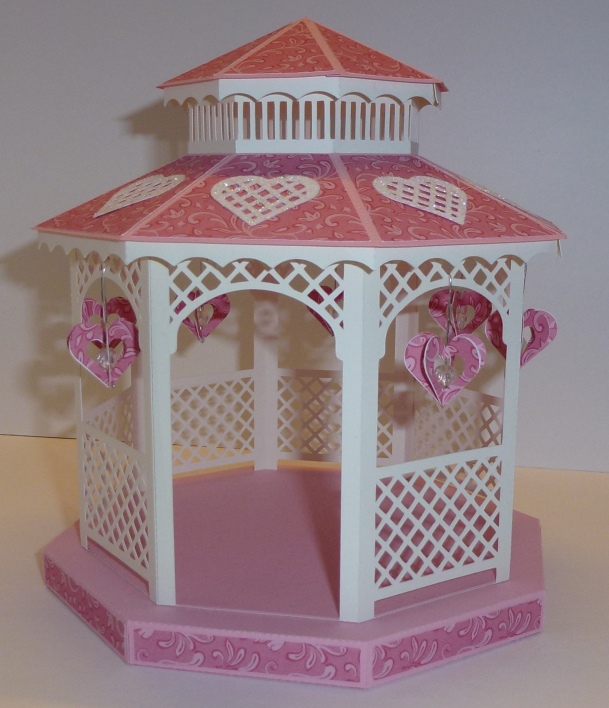
This gazebo is a beauty, I have made it in pink and with lots of hearts. I think it would look great with a silhouette of a wedding couple inside.
You can find the file here.
And here are two pictures of this Gazebo made by one of my Facebook friends. Isn’t it just gorgeous!


Assembly instructions

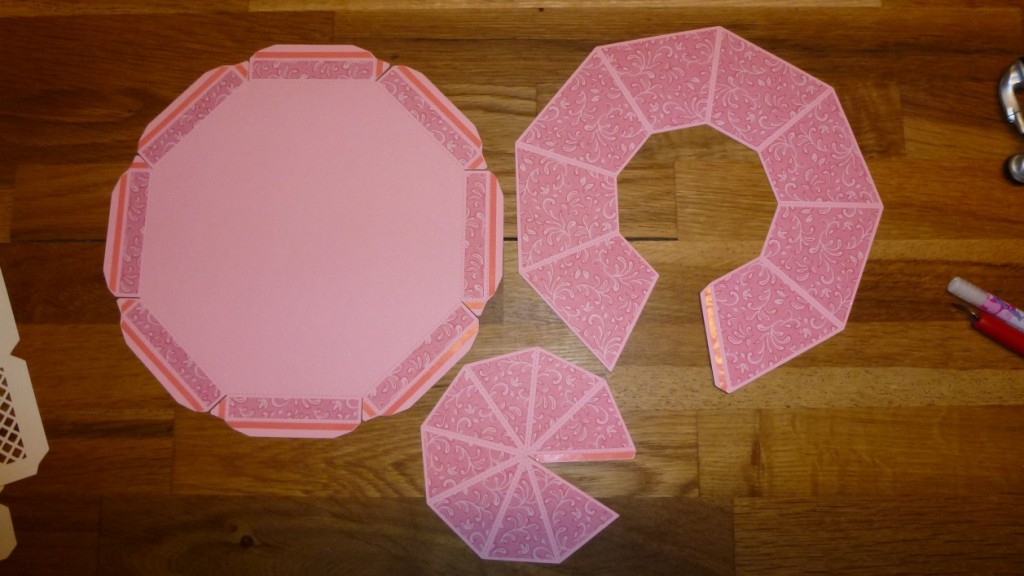
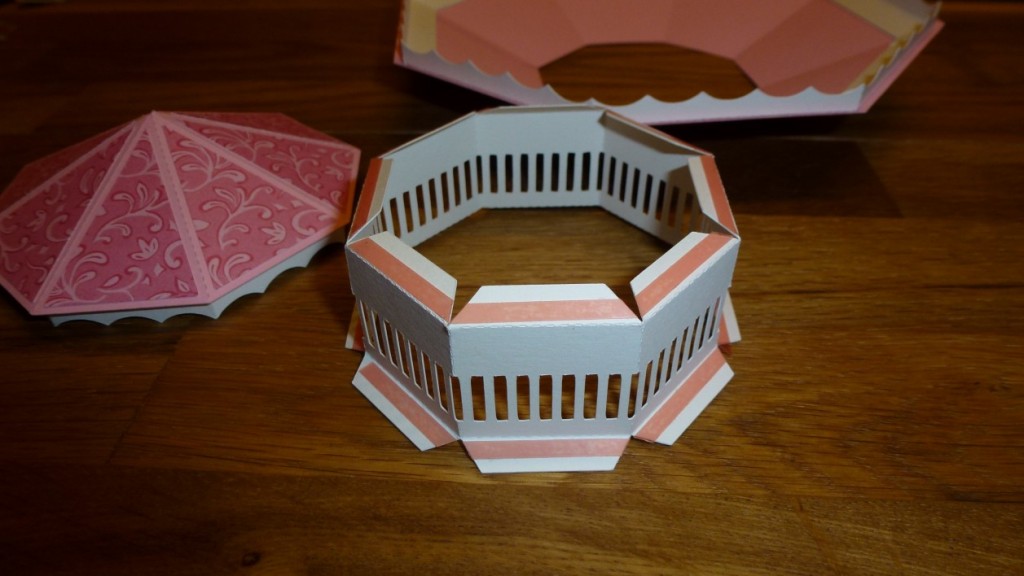
Cut all pieces out.
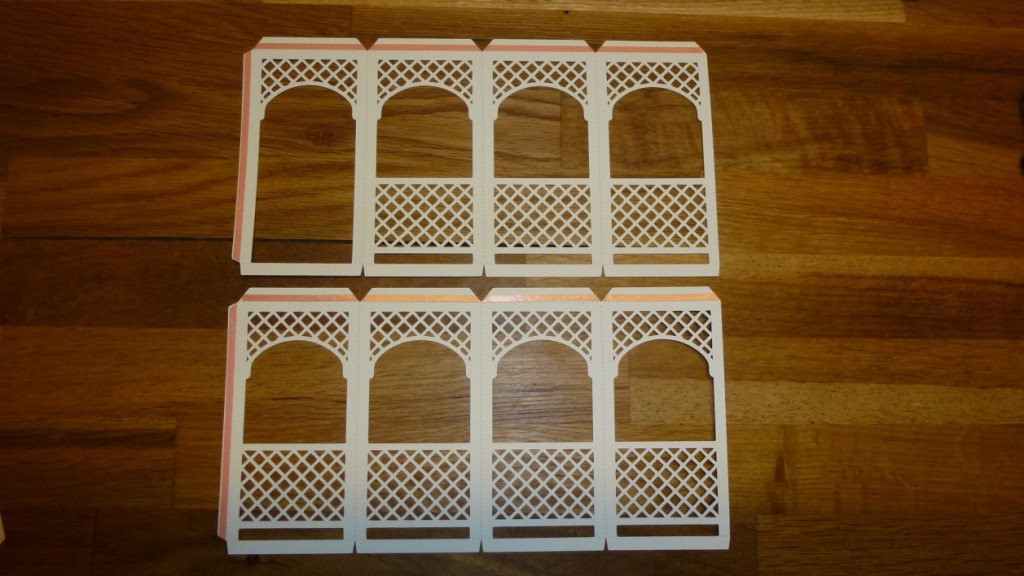
Put glue tape on all tabs except the ones in the bottom.
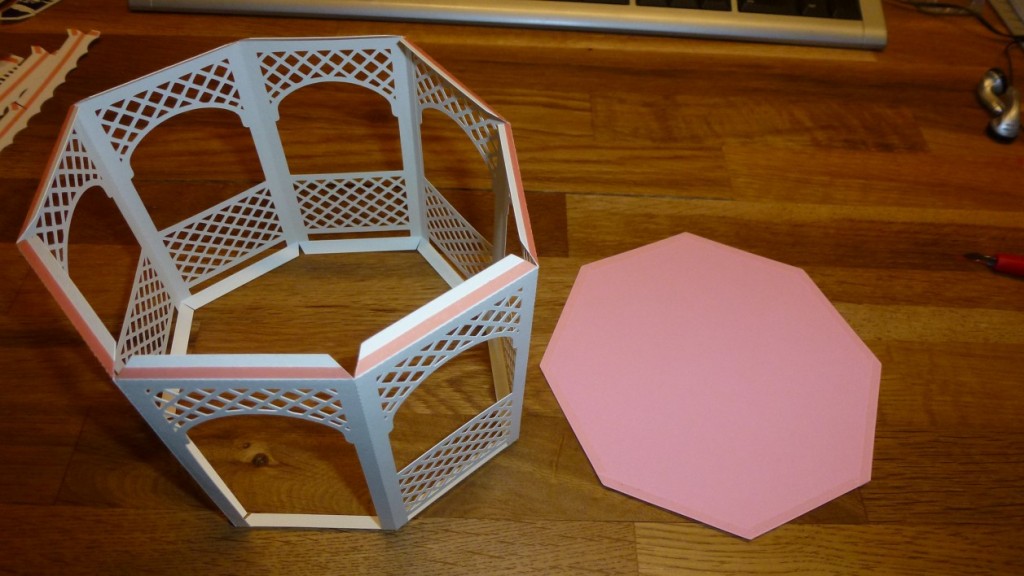
Put glue tape on the edges on the underside off the floor part.
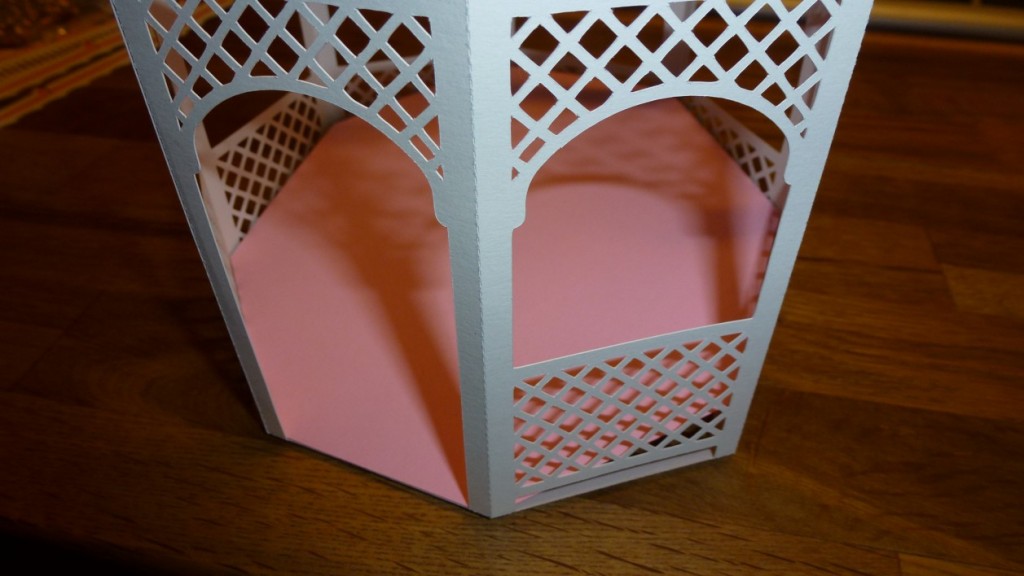
Put the floor inside the walls and press down.
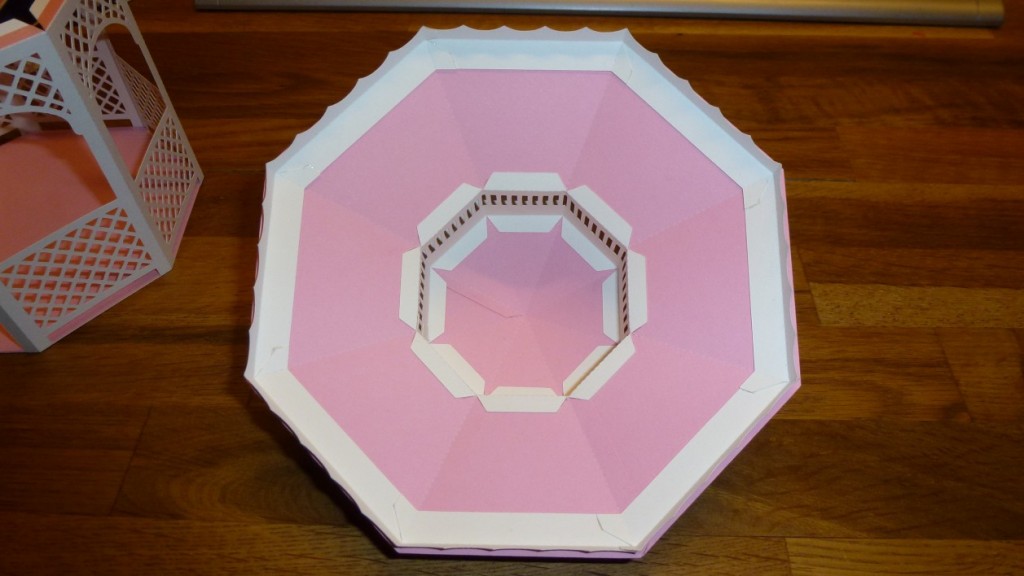
Glue the decoration bits on the roof and base parts.
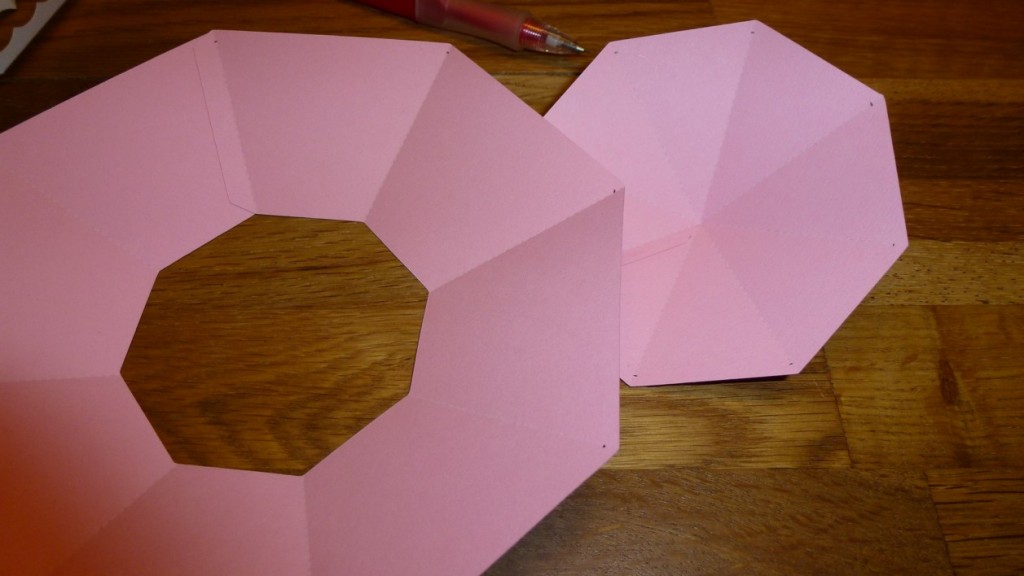
Glue the roof parts together. Here I have put a little mark in each corner for where to fit the edge strip. The mark should be x mm from the edge of the roof. This will help assembling the edge strip to the roof on the right spot.
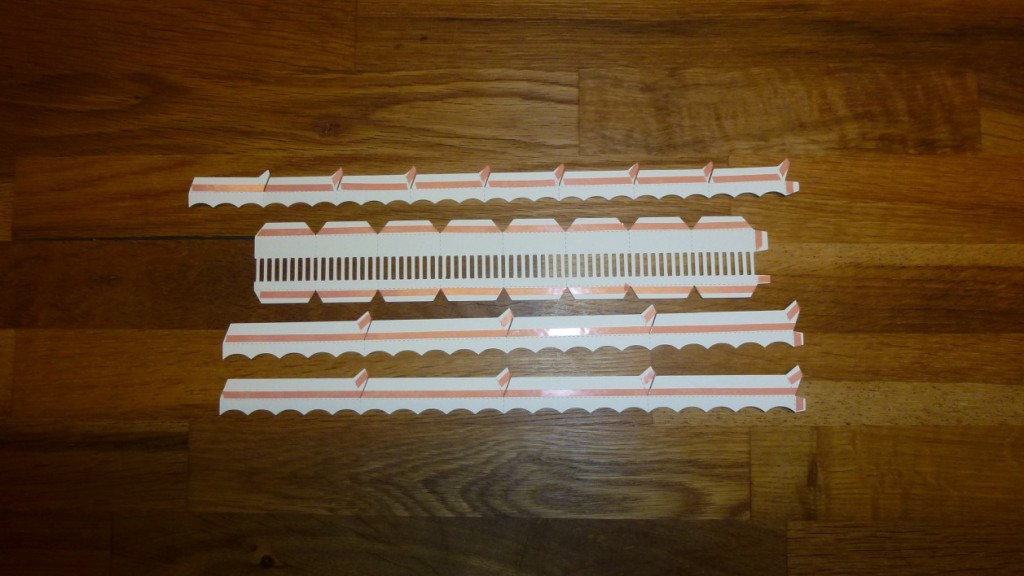
Put glue tape on all the tabs on the edge strips and the roof wall.
Now the edge strips are in place.
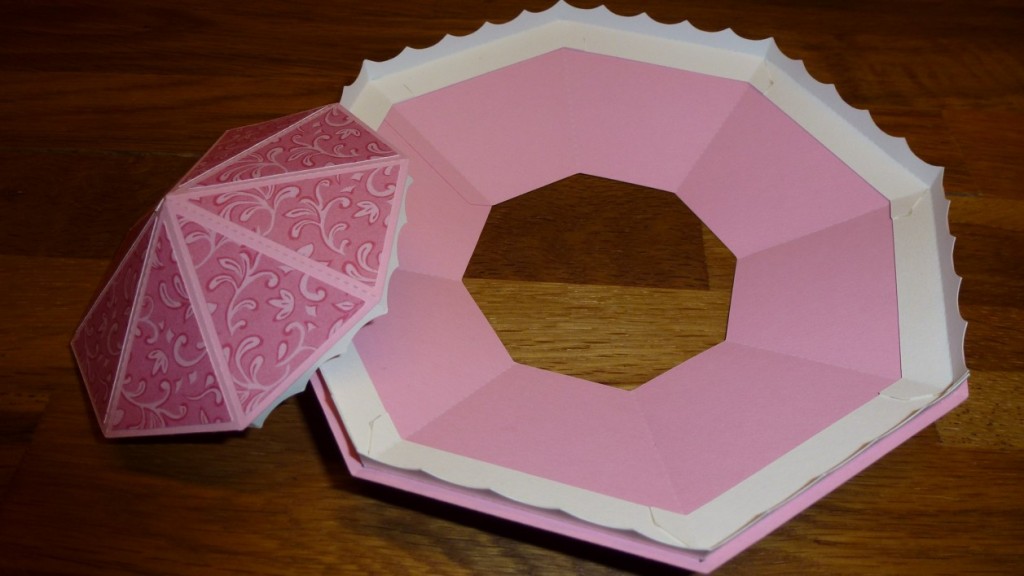
Glue the roof wall together and bend the tabs as in picture.
Glue together like this.
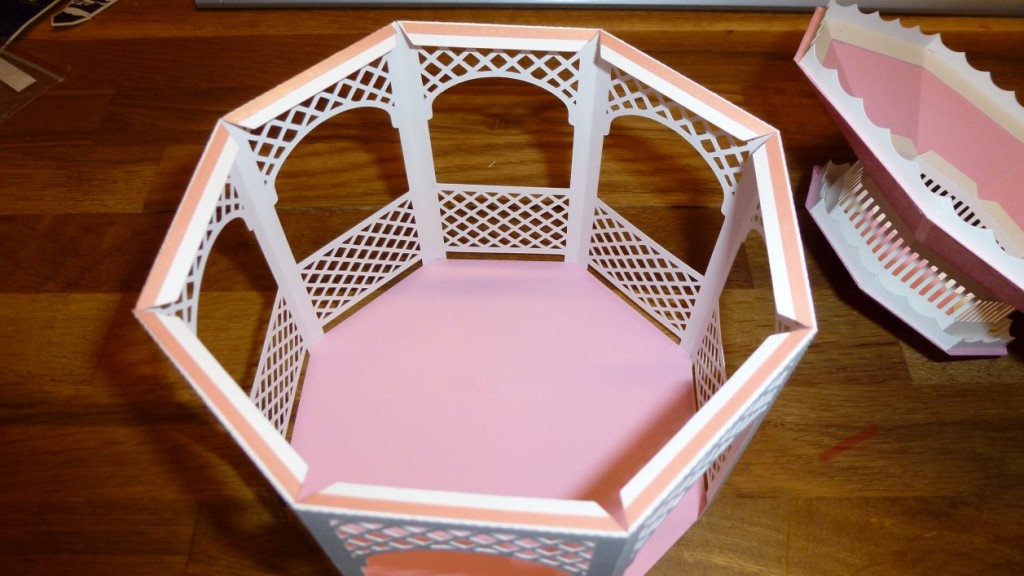
Bend the top tabs of the wall part down and take of the protection film before you put the roof on.
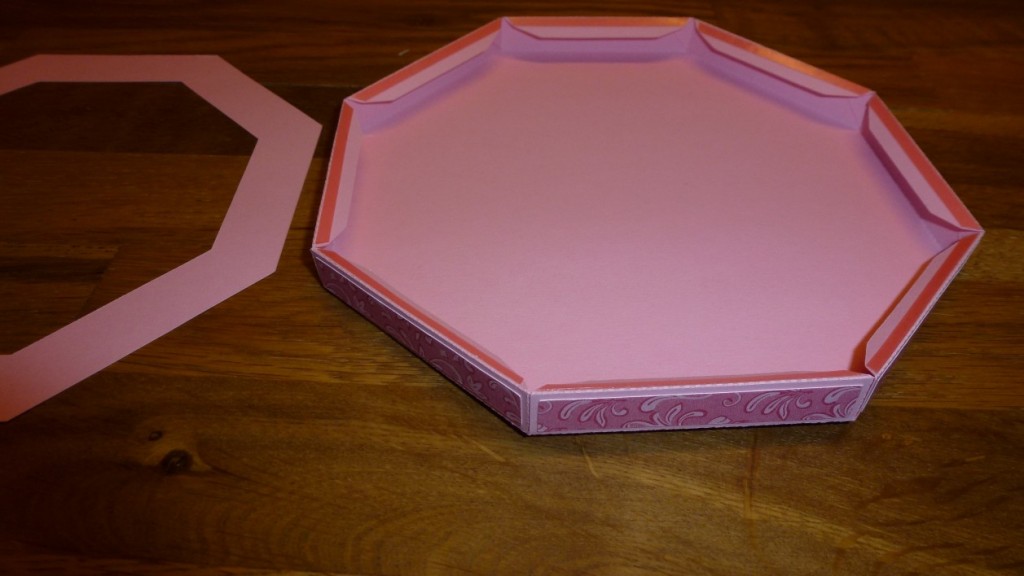
Glue the frame part on the base.
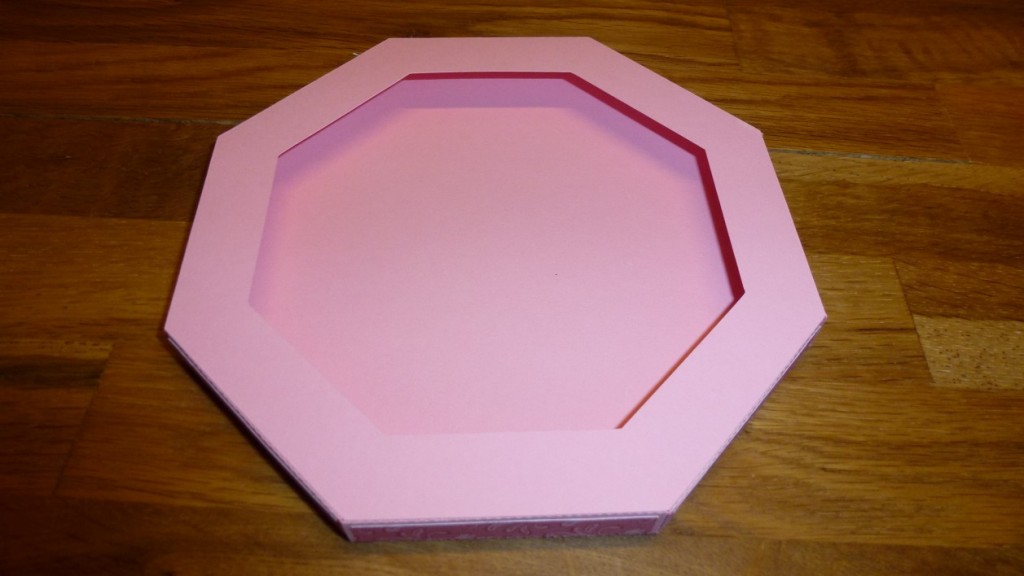
Like this!
Now, you just turn the base over and glue the gazebo down on the centre of the base.
Here I have decorated the roof with some lattice hearts that I have put glitter on and pendant hearts in the windows. I’ve glued together six hearts for each pendant. A gem in the middle and hung in silver thread.
Yet another beautiful design Monica 🙂 Thank you for sharing 🙂
This is absolutely gorgeous, thank you so much for sharing you talent xx
Amazing !
This is absolutely lovely, Monica – thanks!!!
This is stunning Monica, thank you for the photo tutorial. I’m going to try it this week!
Wow I really love all your cutting files.
Thank you so much for sharing this with us.
Big kiss 🙂
I love your new website! I enjoyed browsing through your post It’s great and thank you for your beautiful cut files.
This gazebo is stunning. I haven’t gotten past this page. I am awe struck. Thanks so much for sharing.
Helt fantastiskt!
wow, that’s a real beauty! your files are amazing, thank you so much for shering!
i’ve only had my zing cutting machine for a month now, so maybe i should take the time to know it a little better, but i can not wait to try this one out!
Monica – Once again AMAZING!
Thank you so much for sharing…
Thank you
merci pour cette belle balade sur vos pages , aussi bien votre jardin que vos papiers .Tout est très beau
thanks i,m new at this what is the cutting pressure etc for my snc please anyone know
Thankyou for sharing the files for this wonderful gazebo. Can I ask what scale you cut the design out in. Many thanks xxx
If I measure one of the wall parts it measures 4.67×8.895 inches in my file. You can resize it and cut it smaller if you want. If you are using Design Space the file will not open up with the correct size. Then you have to resize it to about 80% to get it as I have designed it.
Thank you
So what’s 80%not sure how to get it It would be helpful to have an excat size grouped together for the size. pls help ☺
It’s sad that different software doesn’t open svg files in the same size. In Make The Cut you have to resize the file to 80% and then export as svg. The new file will open in correct size in Design Space.
For this gazebo there is an additional svg file for Design Space included in the zip file. If you use this it should be fine.
Where do I find the instructions for cutting the gazebos out to build them. They are gorgeous an I want to make one. I have the building instructions but can’t find the cutting instructions.
If it’s the cutting files you want, you can find them here:
http://monicascreativeroom.se/category/cutting-files/3d-models
Hello Monica this is just stunning can you please advise as to where I can purchase the kit or dies and instructions as to how to make this most beautiful creation. My Email address is [email protected] and I live in Australia. Many Thanks Carmen
You can find the cutting files for download here:
https://monicascreativeroom.se/category/cutting-files/3d-models
Just click on the design you want, then a pop up window will appear where you get access to the files. You need a digital cutting machine to use the files.