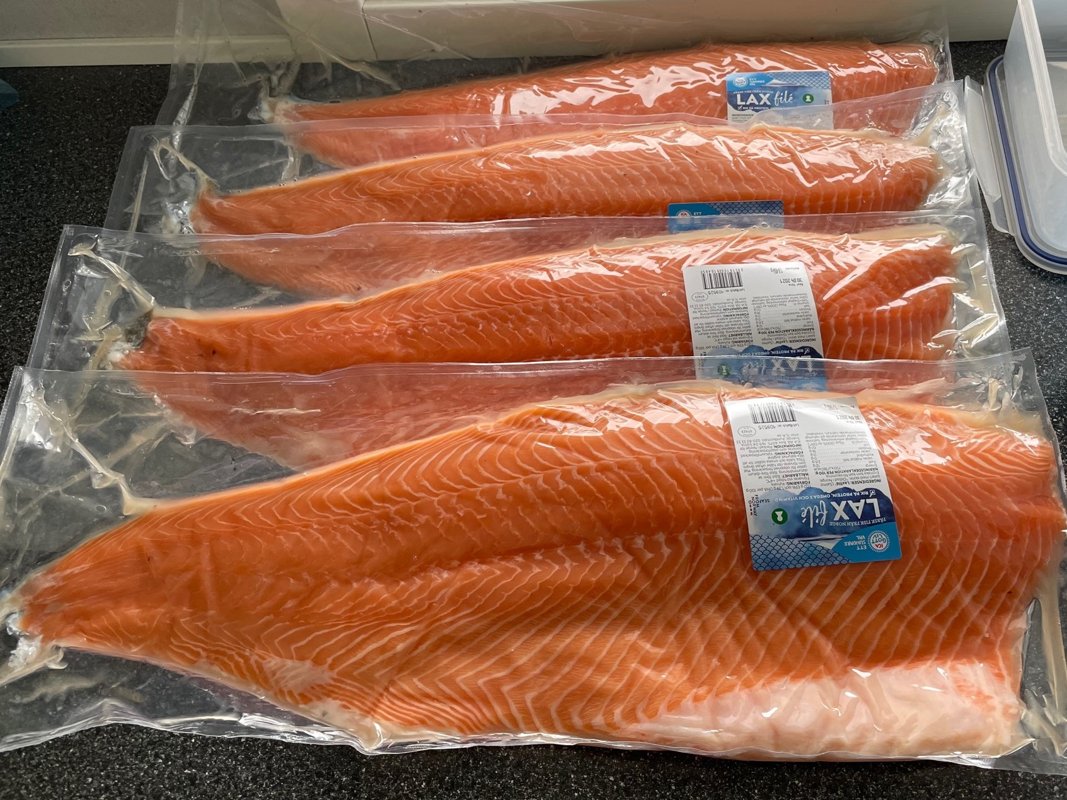
I often buy lot’s of salmon when I can find it at a good price. I love fried salmon seasoned with salt and black pepper. To this I serve oven-fried sweet potatoes seasoned with rosemary, salt, black pepper, garlic and a little olive oil. A good salad and hollandaise sauce goes perfectly to this.
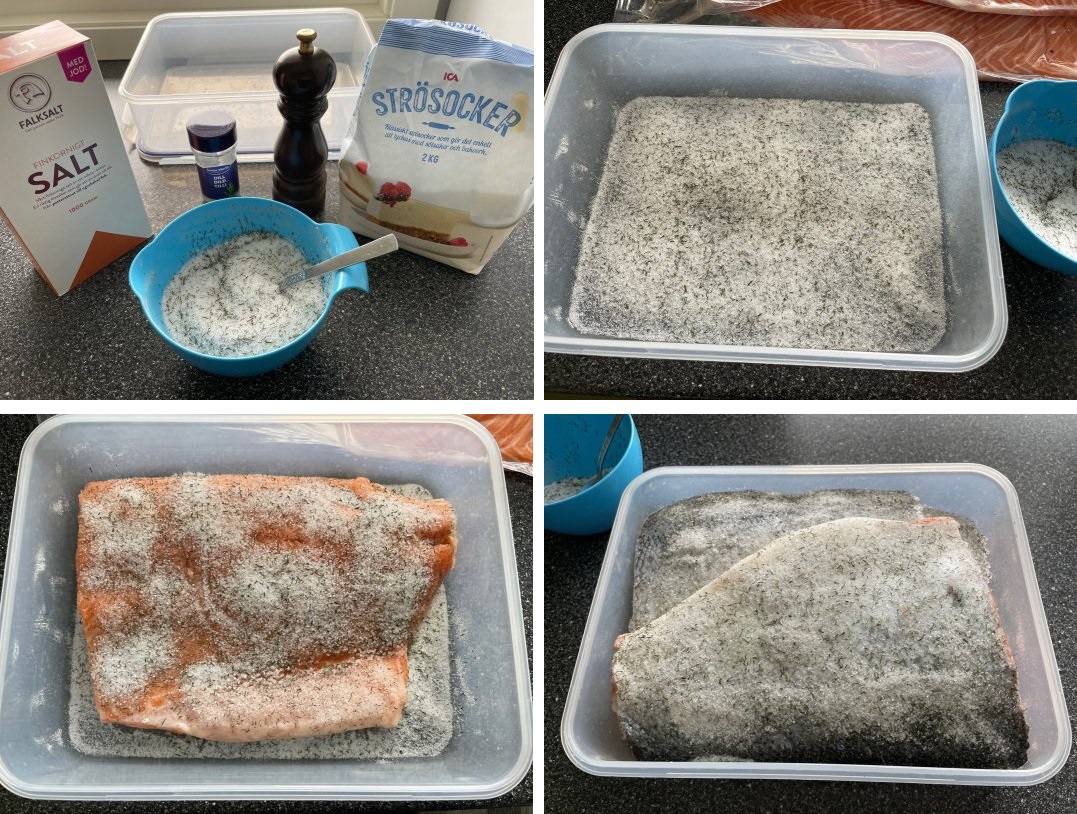
Cured salmon
Another thing I like to make is cured salmon. I do this every now and then because it tastes so good. It’s very easy to do Just mix sugar and salt in equal amounts, then add dill and black pepper. Place a layer of the mix in the bottom of a food container. Lay down a piece of salmon and spread more salt-sugar mix on it. Add more salmon and salt-sugar mix until the container is full. Put the lid on and put it in the fridge. Turn the salmon once a day for three days, then it is ready. Smaller pieces only need two days to be cured. You can check the taste to determine if it is ready. Store in the freezer.
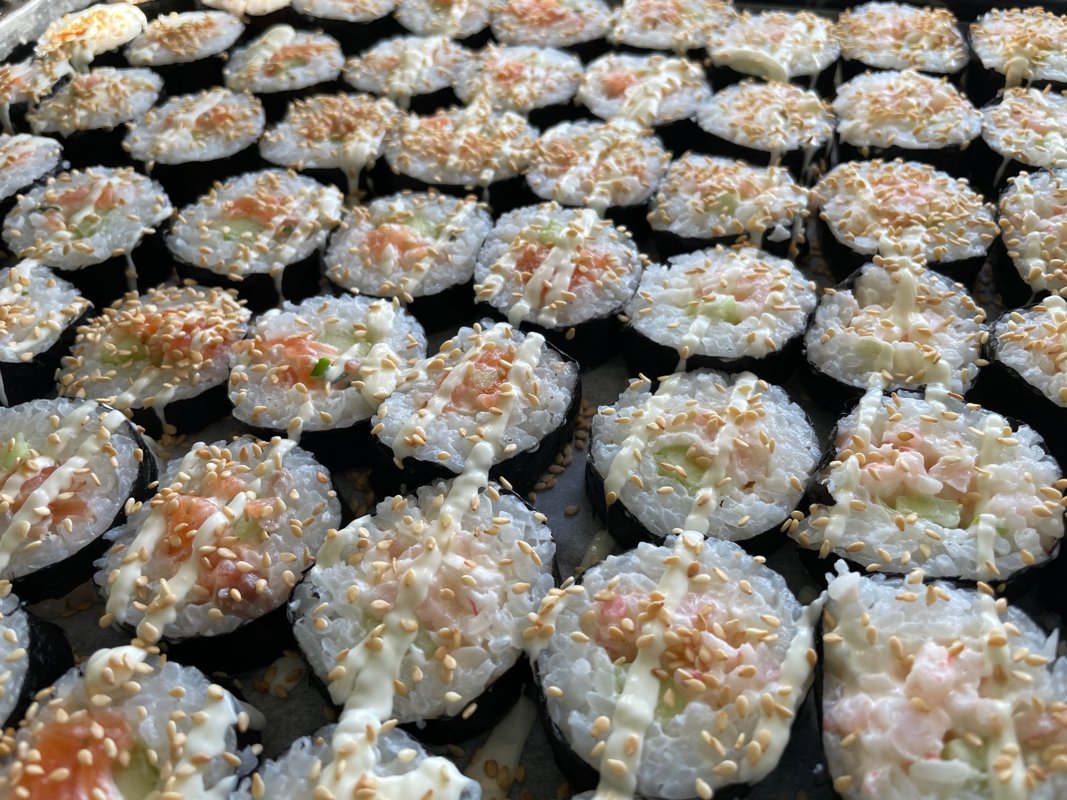
Sushi
This time I also made some home-made sushi. I love sushi and wanted to make some of my own. I don’t do sushi that often because it is so time-consuming. This is how they turned out.
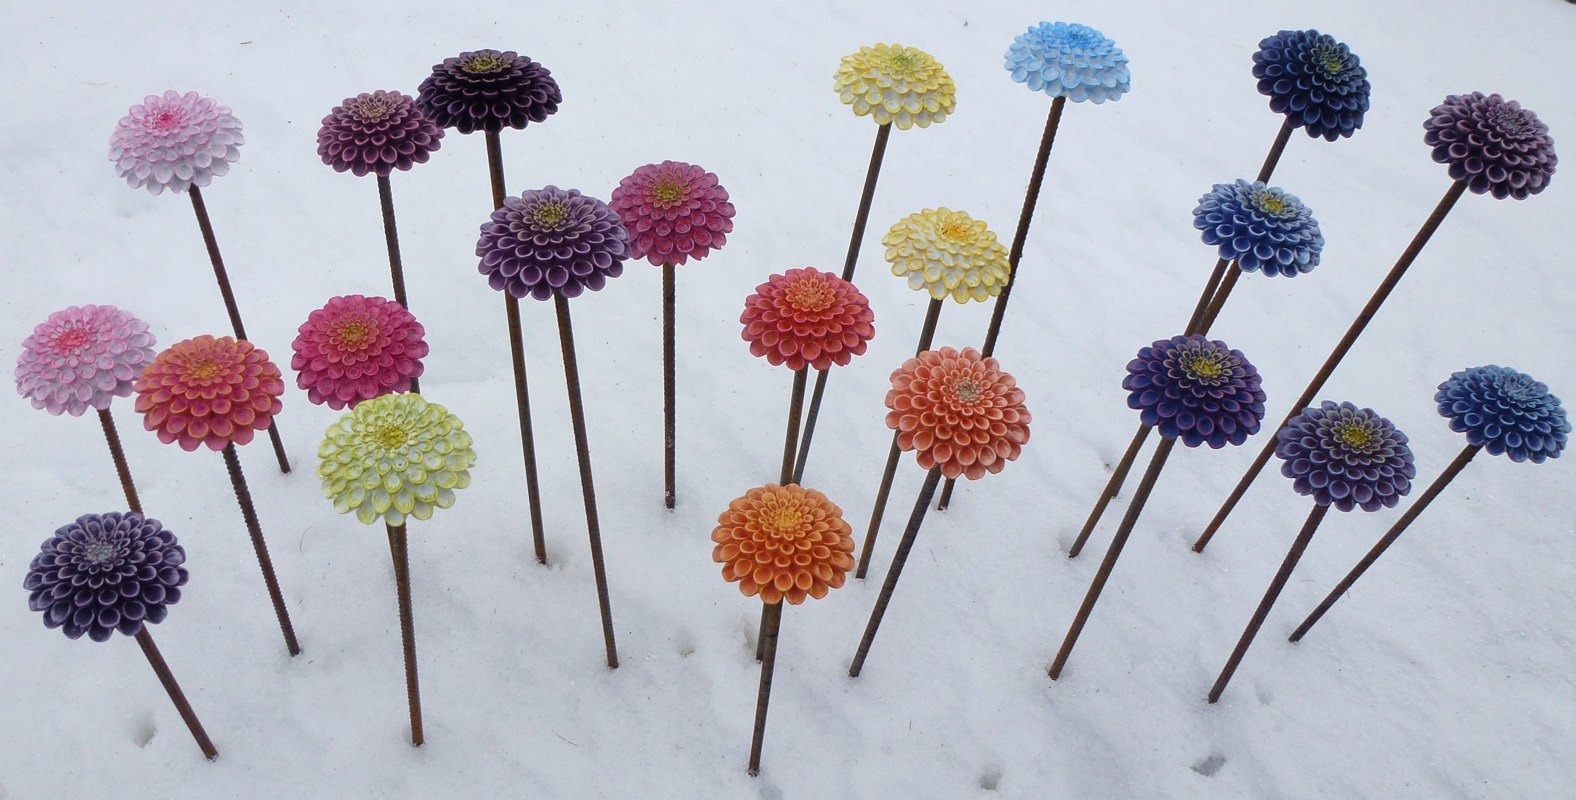
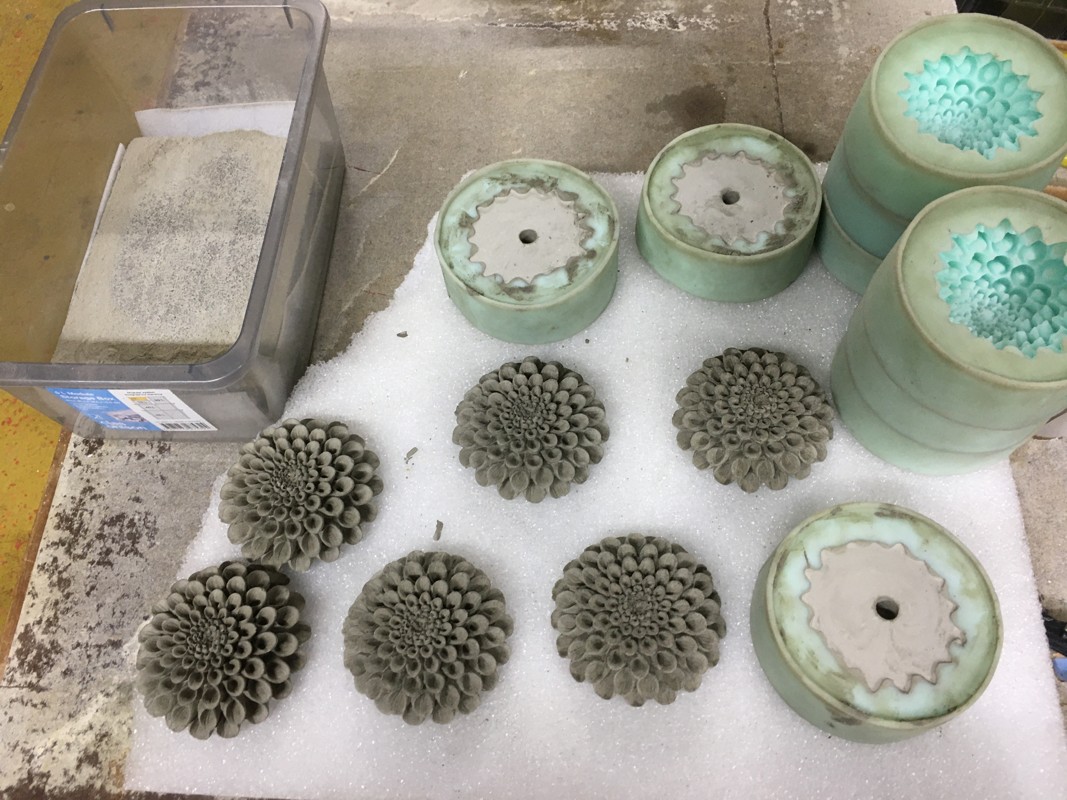
This winter I’m casting a lot of dahlia flowers to put on iron bars in the garden. I’m casting them using self-levelling compound, not concrete because concrete is too rough for this. The disadvantage of this, however, is that the flowers become more fragile and must be handled more carefully.
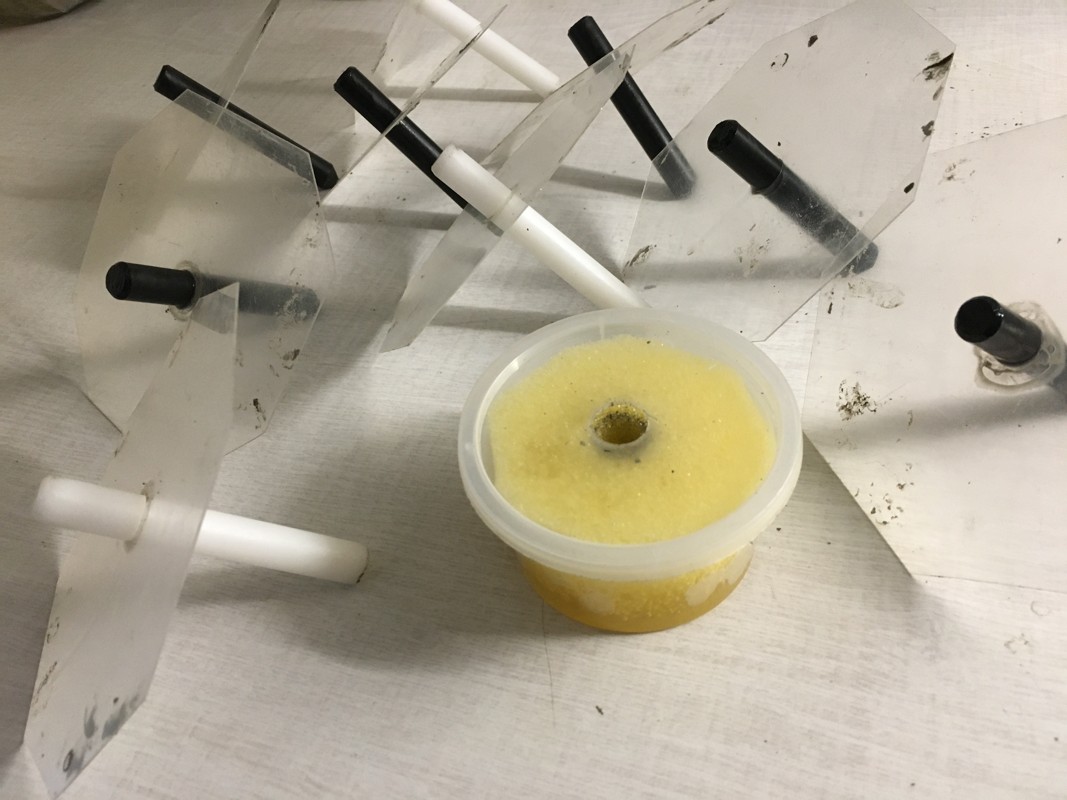
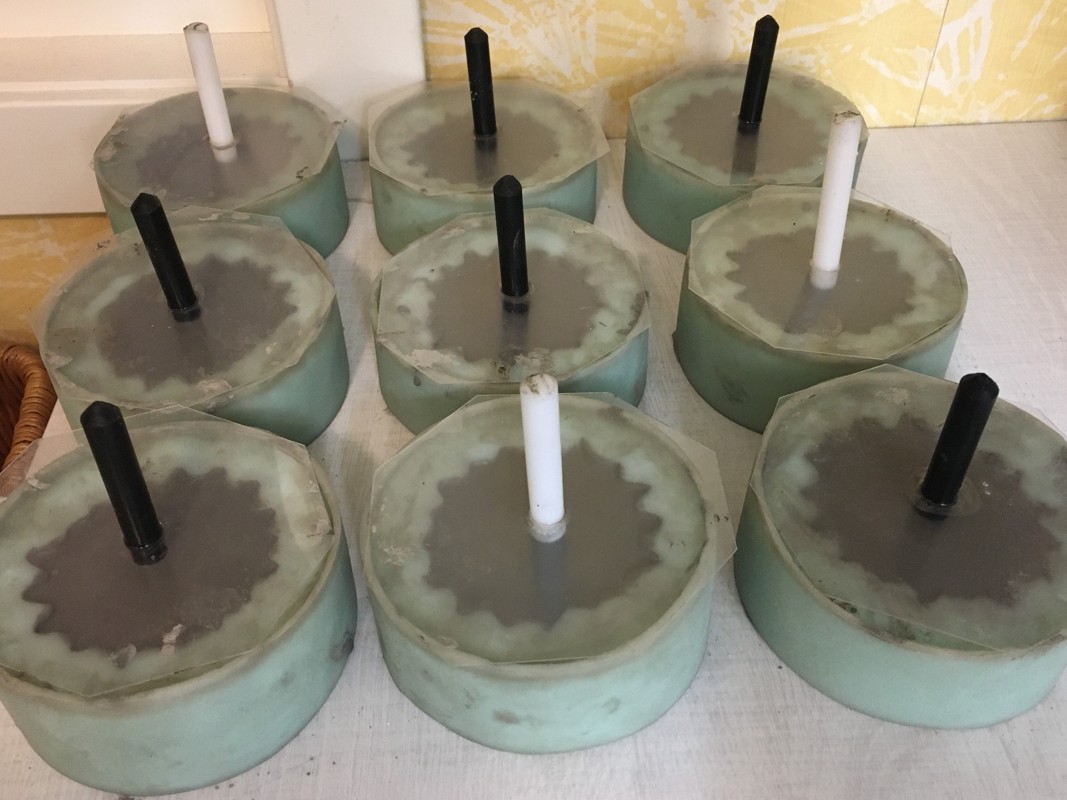
I’m using silicone moulds and I have bought several of these to make the process more time efficient. When I have filled and vibrated out the air bubbles, I’m putting in a oiled nylon stick in the wet compound to make the hole for the iron bar.
Easy oiling invention. In the plastic jar there is a sponge with a hole in it and some oil. Just dip the nylon stick in it!
When the dahlias have hardened I remove the stick and the mould and then I grind the bottom of the flower by just rubbing it on a concrete stone. Fast and easy!
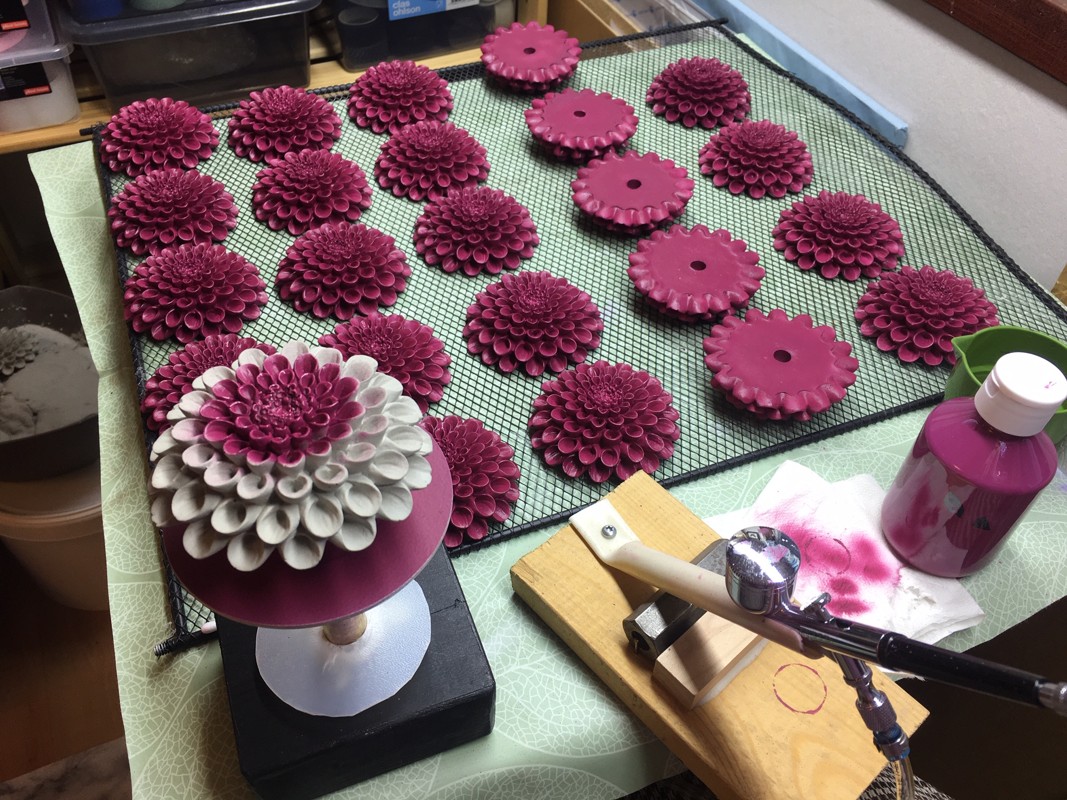
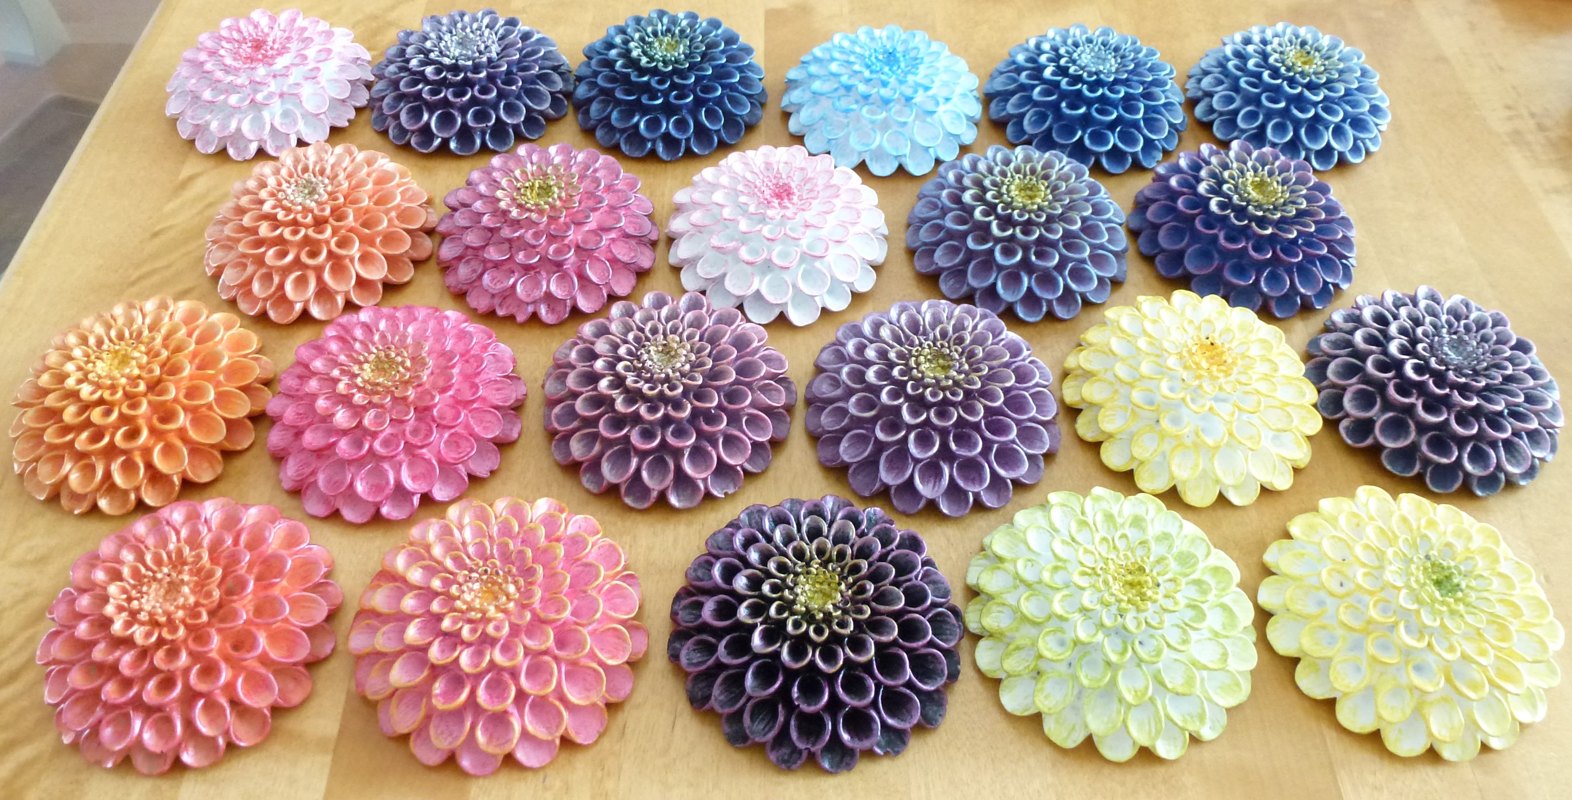
When the dahlia flowers have cured for a week or two it’s time to put on the first colour coat. This has always been a tedious job doing by hand. Now I wanted to try something else. I bought an airbrush and started painting. I also made a small turntable to make it easier to paint, and I also needed a stand for the airbrush. What a upgrade, this is working great! I also made a lifting tool to lift the flower off the turntable when painted.
Some of the primed flowers.
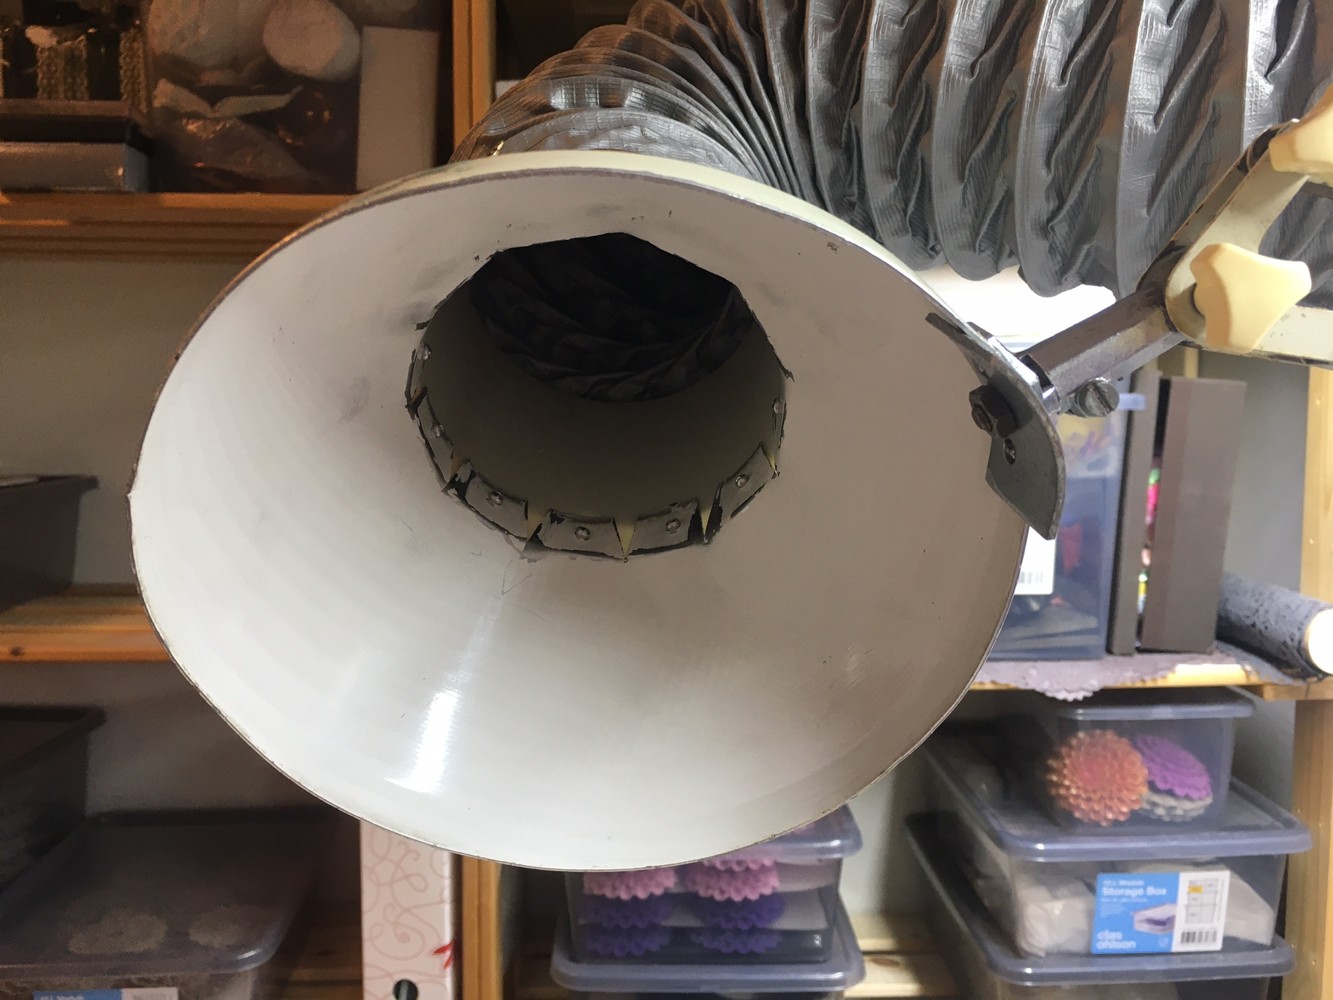
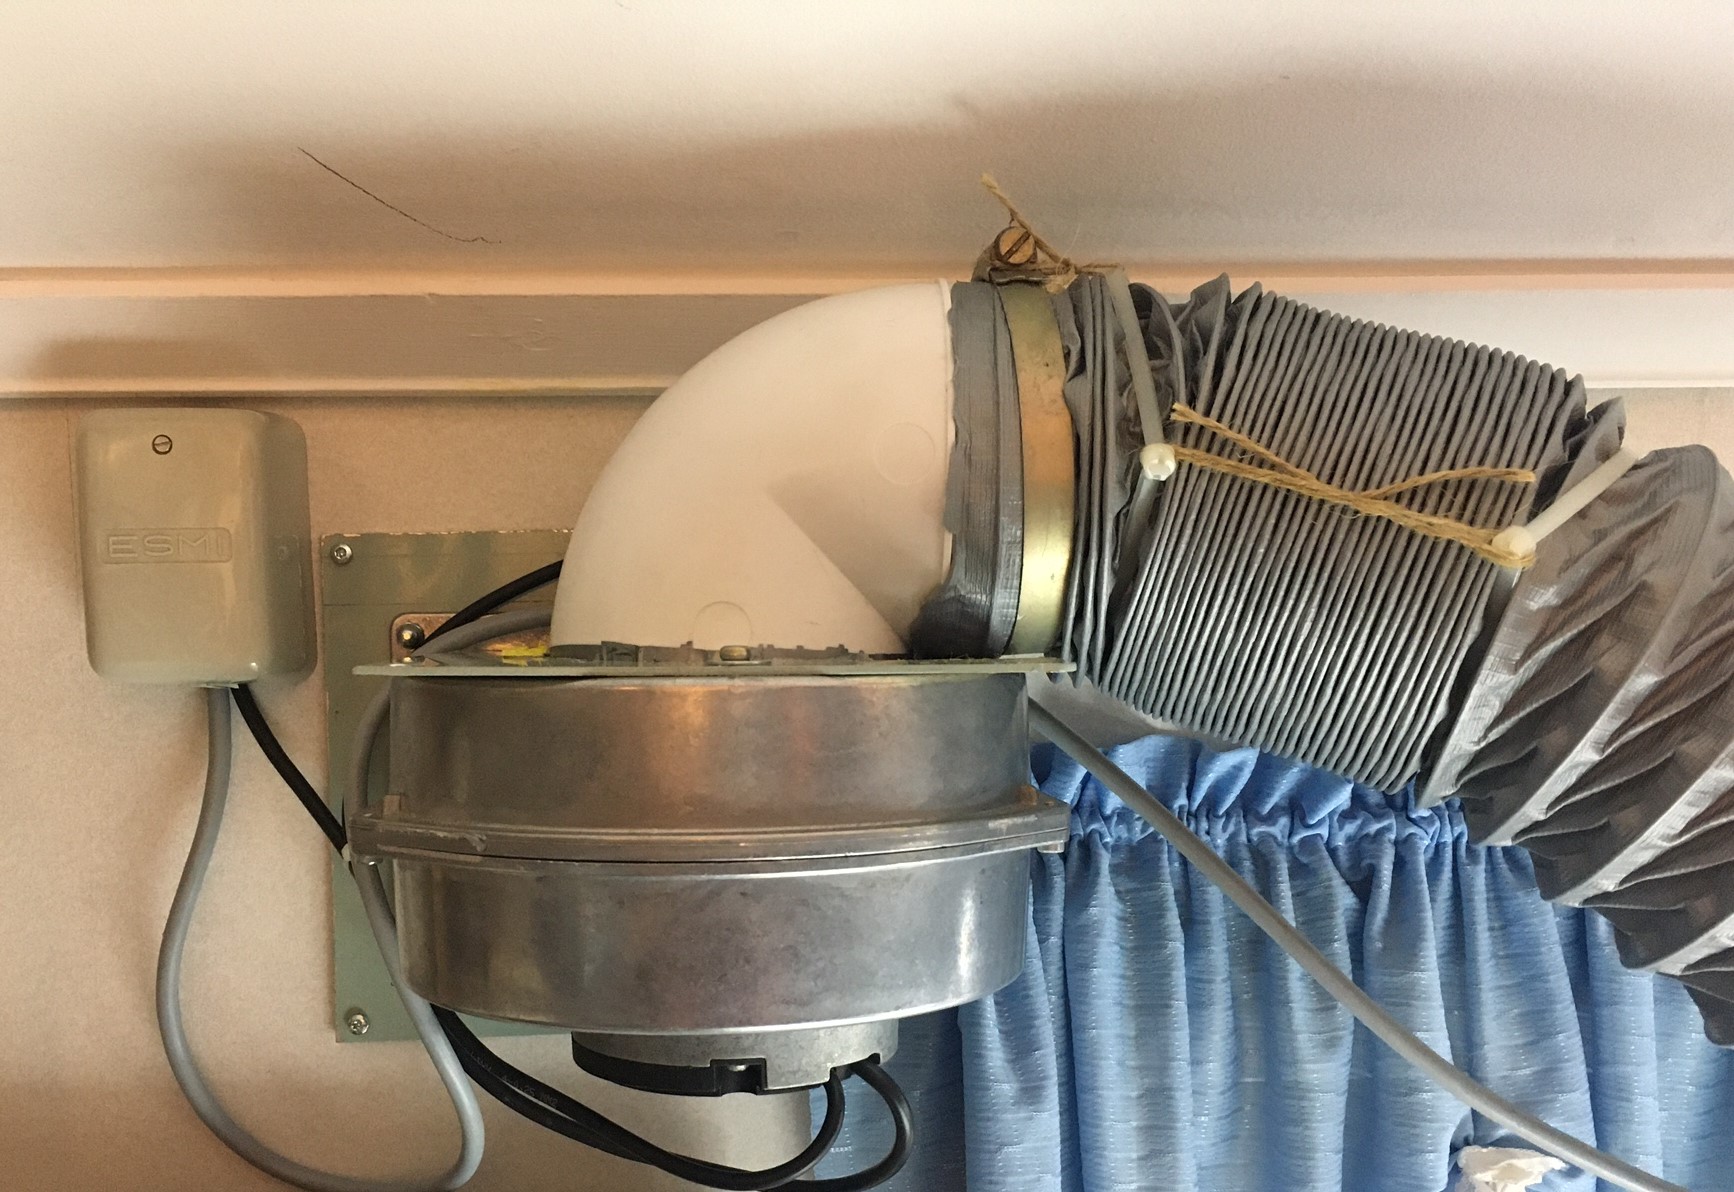
Because I’m inside when painting I really needed an exhaust for this, airbrushing spreads a lot of paint particles everywhere! I already had a suitable fan for this but needed an adjustable arm and a funnel. After some thinking I got a brilliant idea. I went up to the attic and fetched an old desk lamp we had left over. I cut off the upper part of the lamp-shade and removed the lamp and then rebuilt it to fit the exhaust hose. We made a hole in the wall and mounted the fan. Now I have an exhaust that works great and I can adjust the funnel as I want. I’m so satisfied with this invention!
The fan mounted on the wall.
The next step is to paint metallic colours on them in several layers and shades to get them looking something like this.
When all the paint has dried I will put on some layers of clear varnish before they are finished. This will be made outside during spring because I use a solvent-based spray varnish for this, and it stinks!
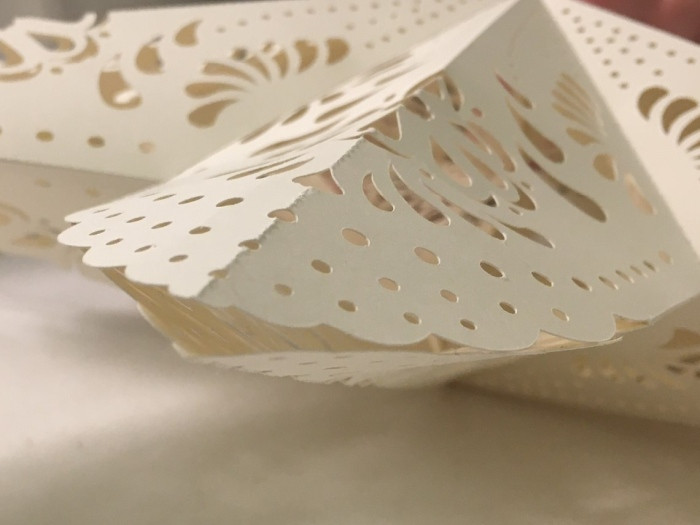
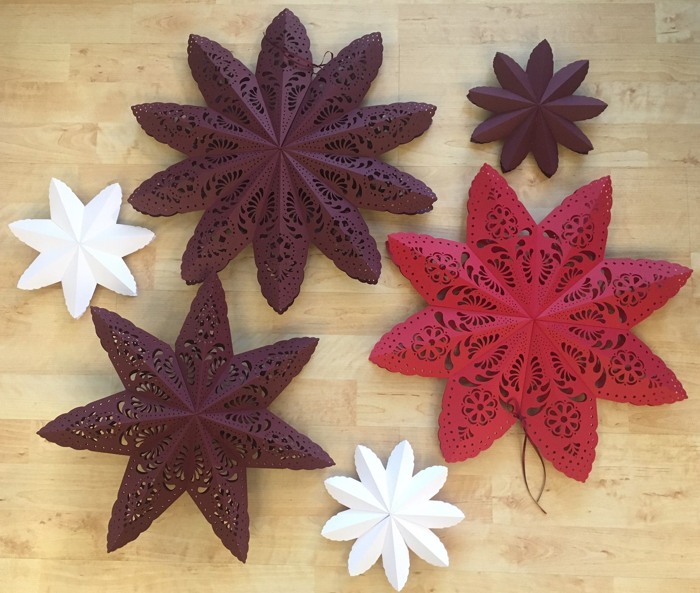
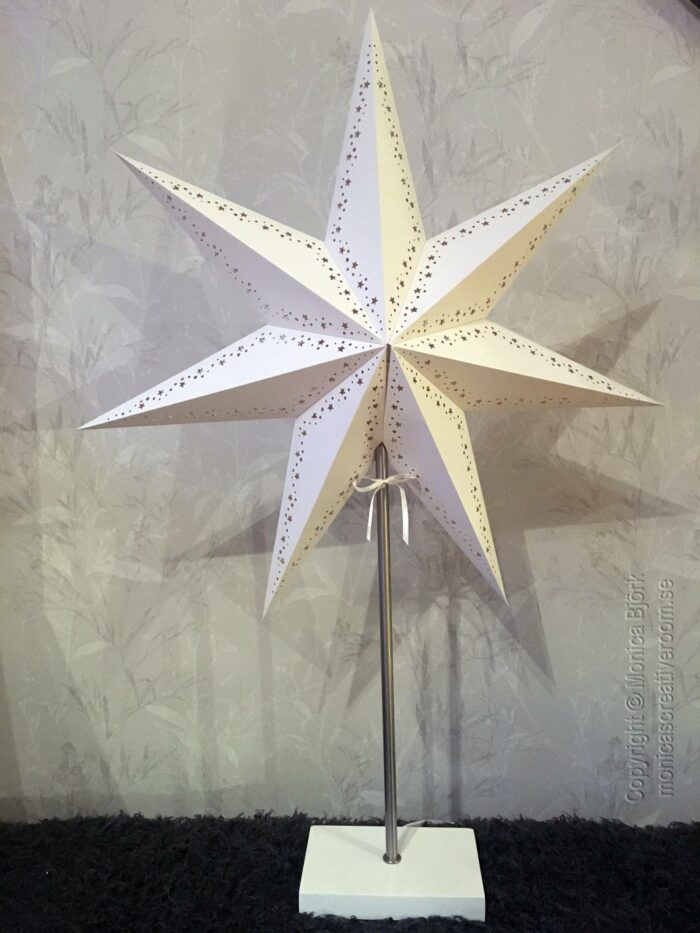
After a lot of struggle, the second paper star is now ready. It took way longer time than I anticipated. This design is slightly different because the points are cut open. I wanted this star to have seven points so I could mount it on a stand, you know, one point has to be straight up.
The hard thing was to make the design so the points would close when ready. I had to make several attempts and changes before I got what I wanted. It took ages to cut and glue all the different stars. Not all the attempts are in the second picture!
The assembly is quite similar as the previous one, but I have made a new PDF instruction for this. You can find the new file and PDF instruction in the 3D Models section.
I think I’ll take a break from the stars and make something else instead for a while!
It has been a long time since I drew any new designs for cutting. Now when Christmas is here, I realized that I had to make a new paper star because the old one was broken and was not as nice as I wanted it to be.
The old star had five points and I wanted seven. It was also very bulky and I wanted a neater design. I had to make some prototypes before I was satisfied, then I added the hole pattern on it.
This is the first star I will share with you. I will make more different ones later.
You can find the new file in the 3D Models section. I have also added a PDF instruction in the download file.
I wish you a Merry Christmas and a Happy New Year.
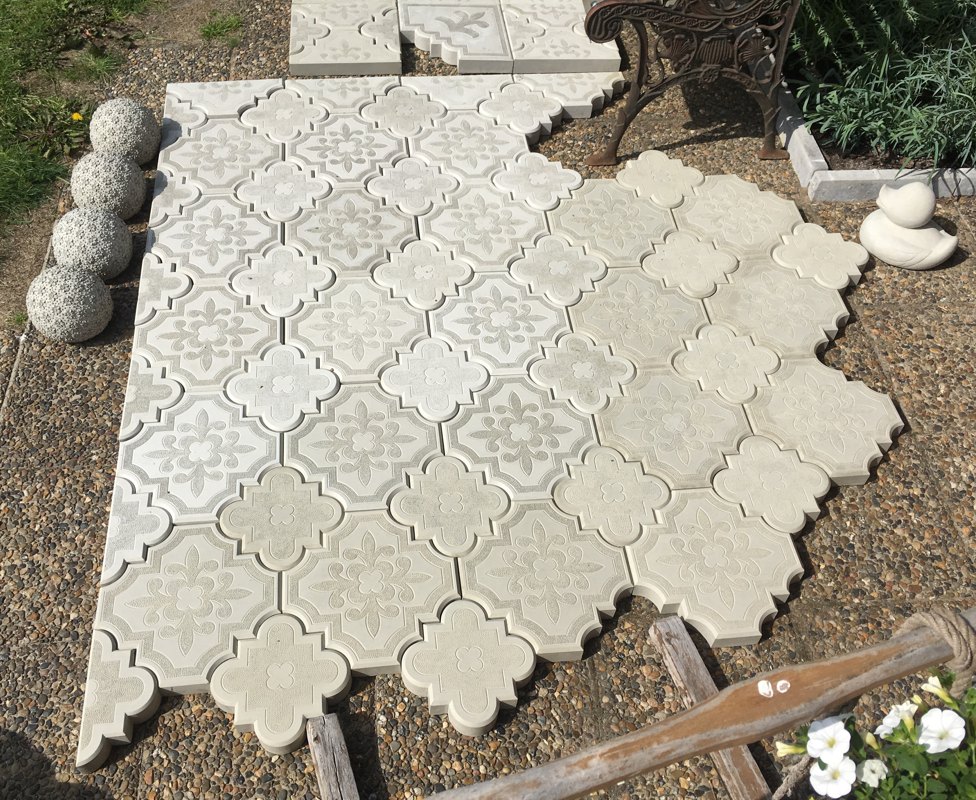
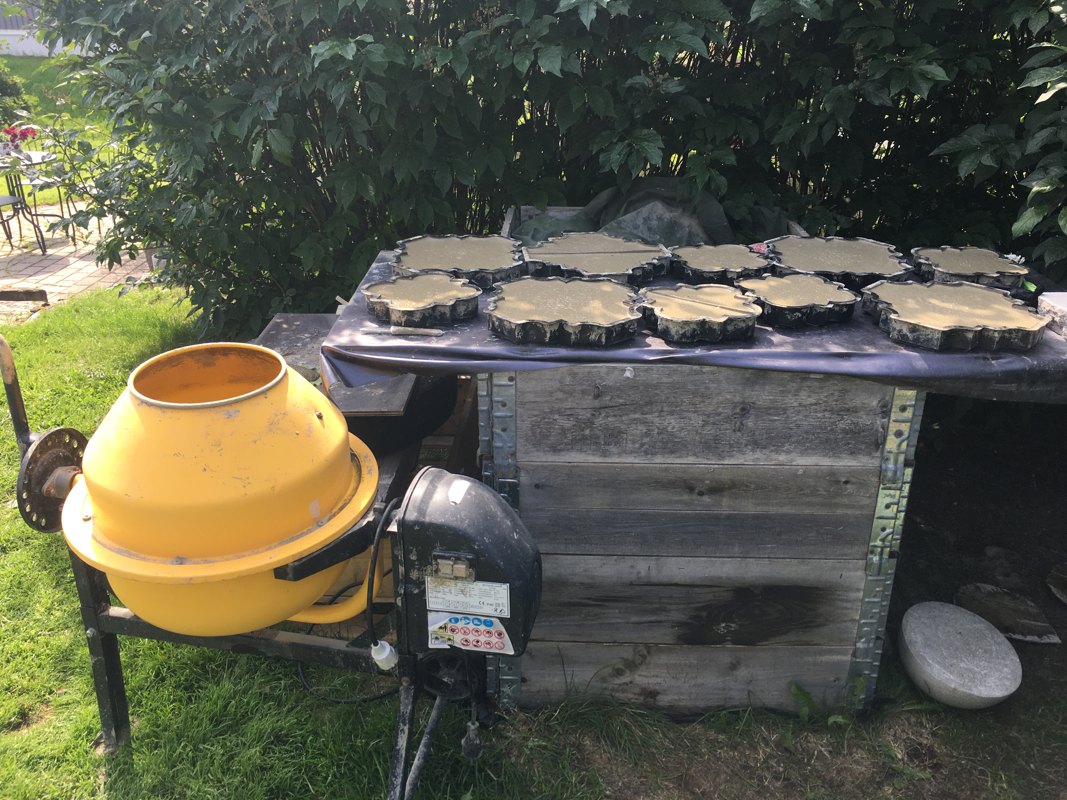
During summer I have been casting a lot of oriental paver stones. I’m planning to build a casting corner in my garden where I will have a working bench with a built-in sink and space for my concrete mixer and the vibrating table. Of course I need a fancy pavement for this.
This is what the tiles look like.
I bought a starter set of the very pretty concrete moulds and started casting. I quickly realized that I will need quite many of the finished stones, more than you think, so I ordered some more moulds to speed up the casting.
Casting in progress.
Every other day during summer was spent on casting these stones. Now I have almost enough for the planned area to be paved. To build the casting corner will be a fun project for next summer!
Lots of stones but not enough!
Update on the snow
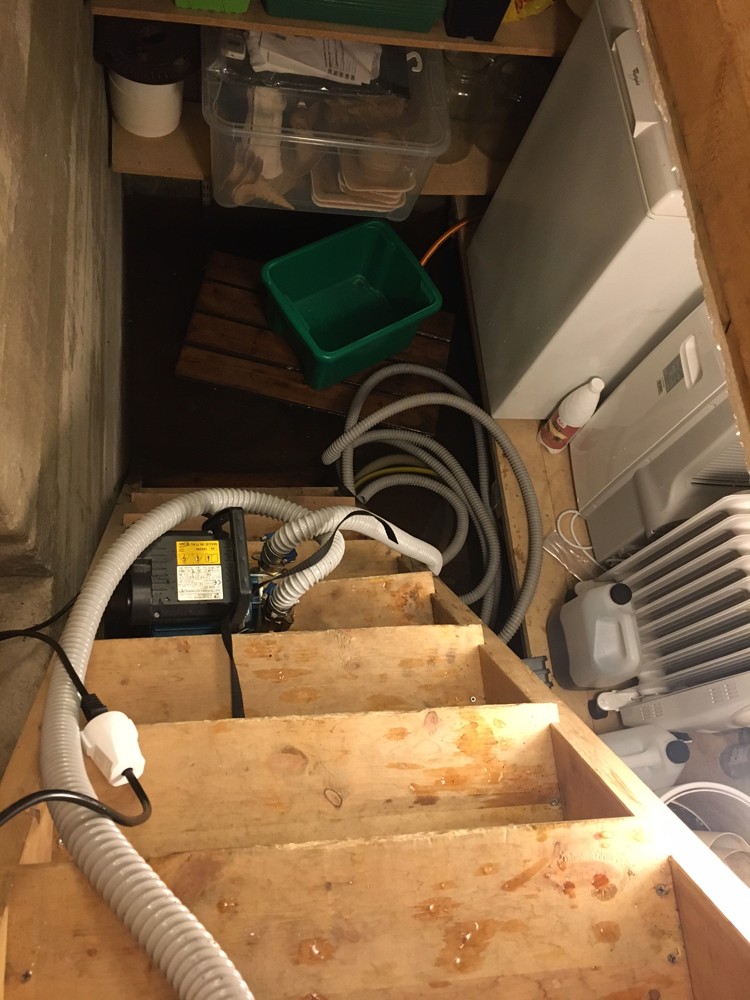
All the snow we got a month ago melted after a week and then we got lots of rain. This caused our very small cellar to overflow. This happens usually during spring but rarely during fall. We got about 30 cm of water on the floor. We have a small freezer down there but it’s placed on a shelf about 50 cm up from the floor to protect it from overflowing. We had to pump out the water for some days and now its dry again.
The cellar is very tiny indeed!
Yesterday we got some more snow but not as much as last time. I hope it will stay this time!