Last summer I was casting oriental paver stones like crazy. This summer I have finished the paving and built a nice working bench.
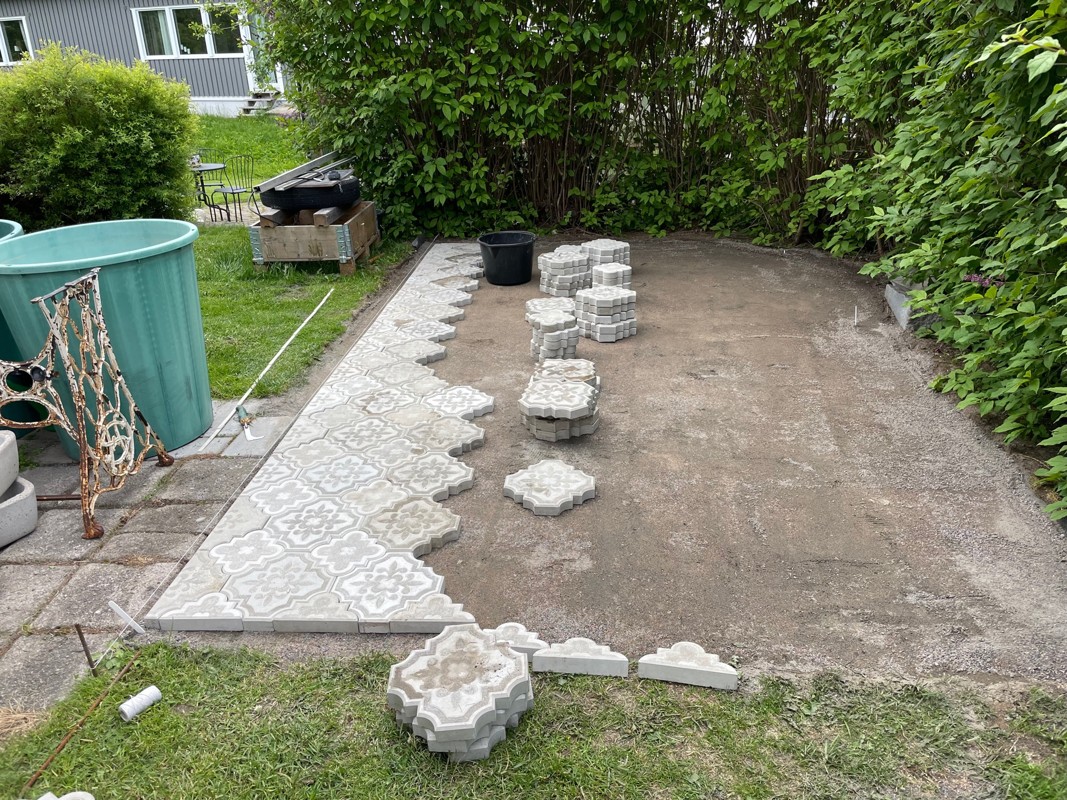
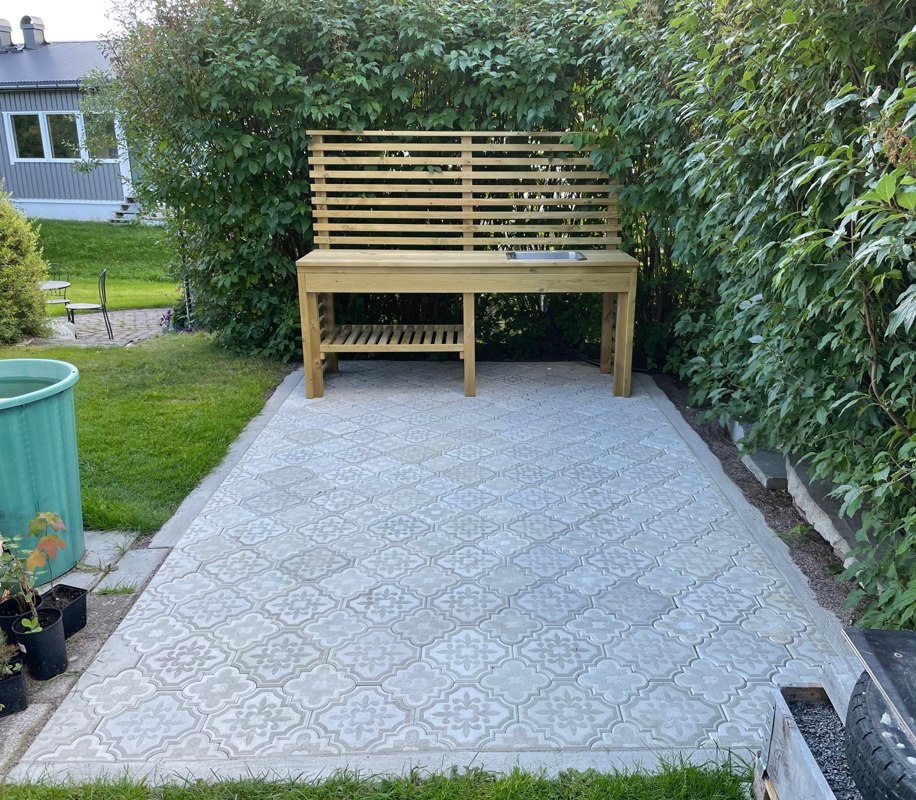
First I removed the grass from the area and filled it in with fine-grained gravel to get a flat smooth base to put my stones on.
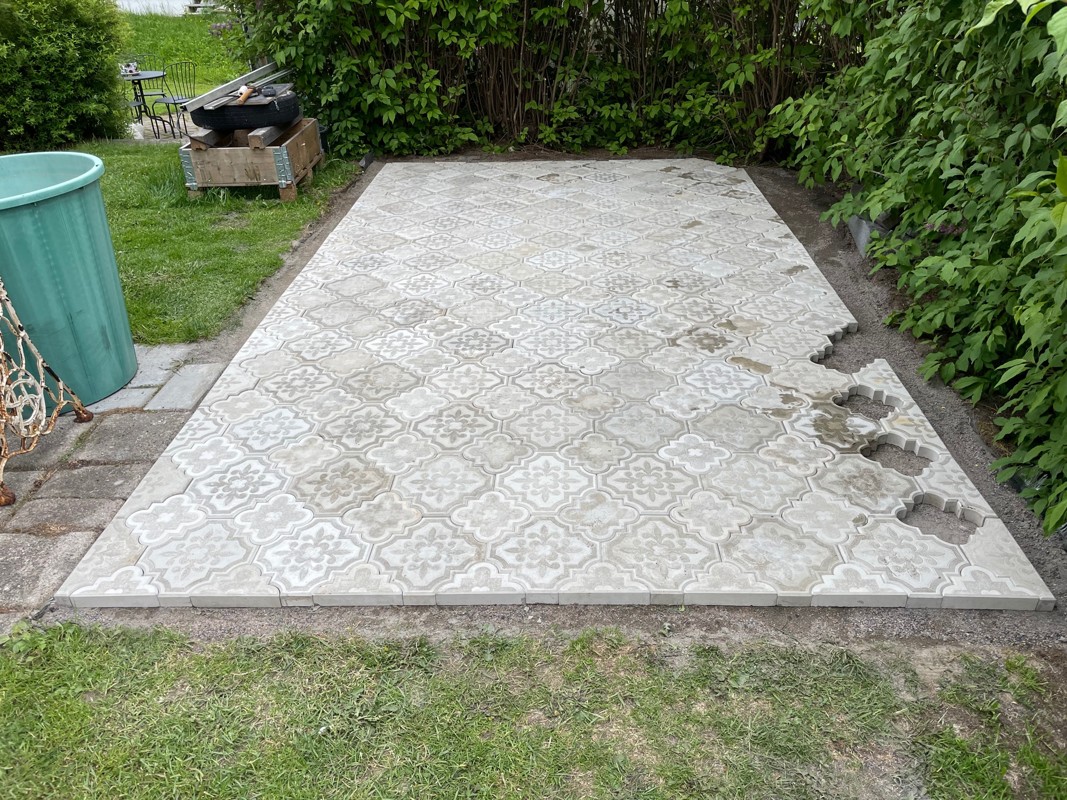
Then I started to fill up the area with my beautiful stones. This went fast but I lacked five stones in the end and had to cast them to be able to finish it.
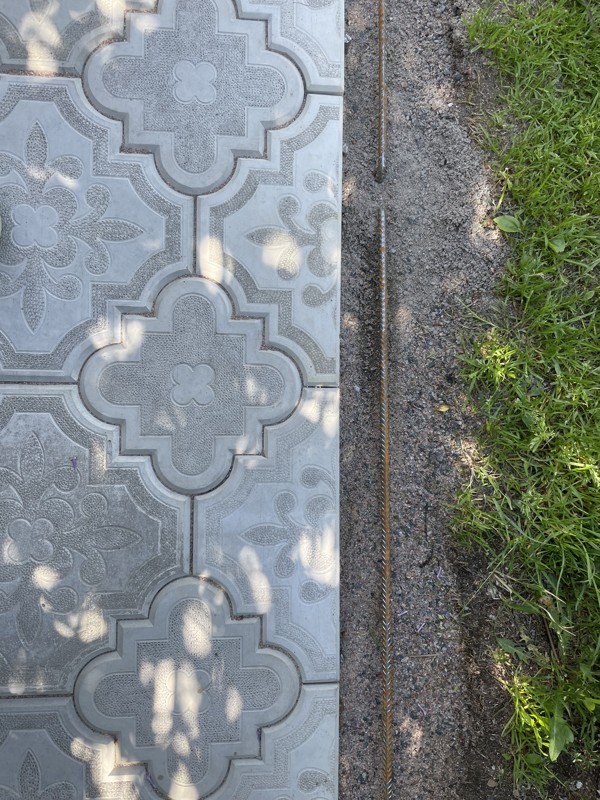
To keep the stones at the edges from sliding, I hammered down some rebars all around. I also put extra rebars outside the paving to reinforce the string of concrete I put around the edges to even out the level between the grass and the paving.
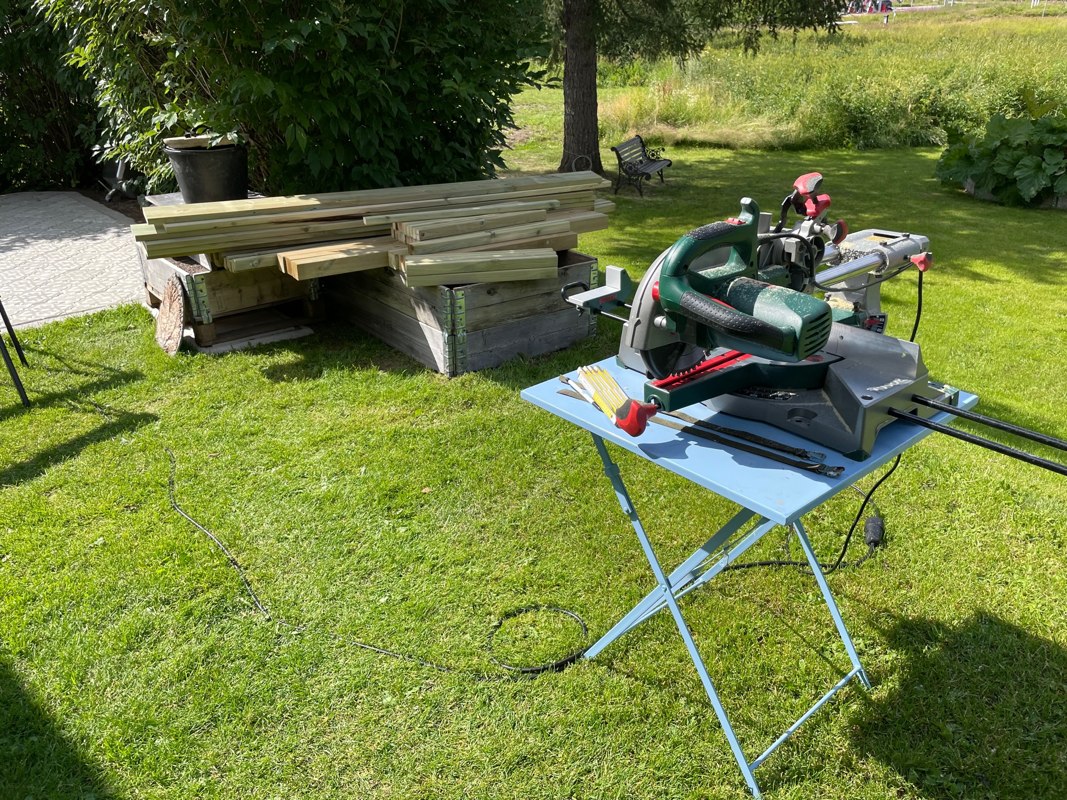
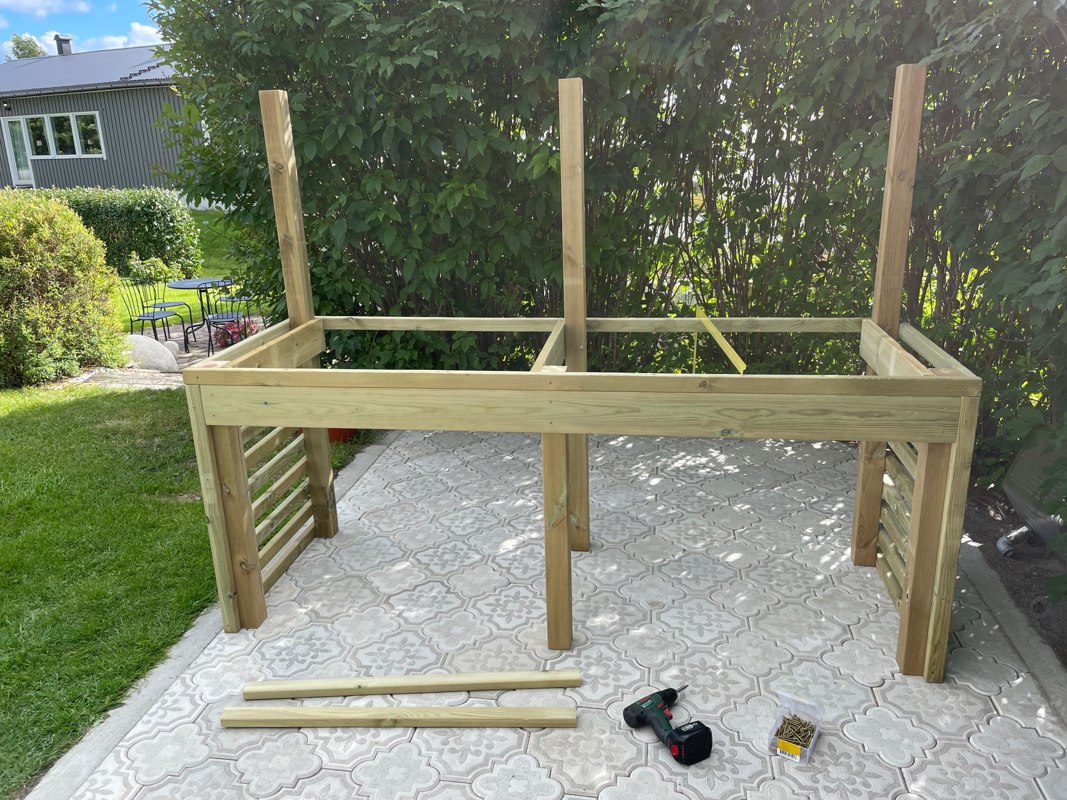
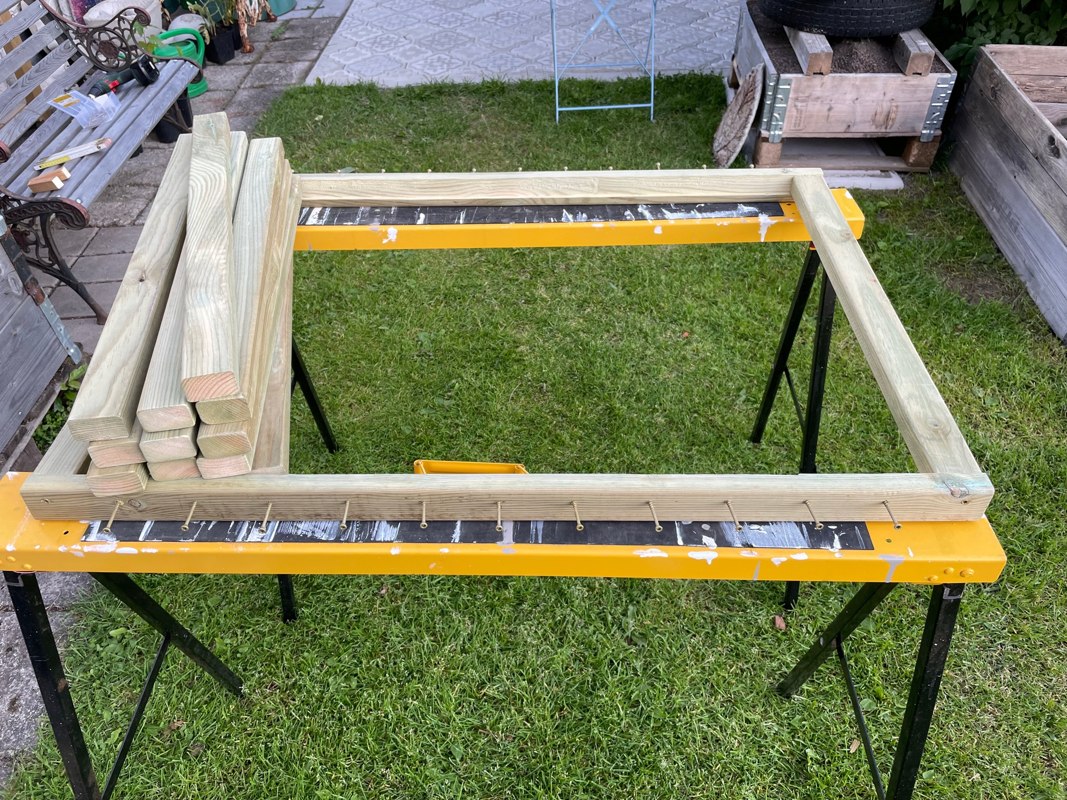
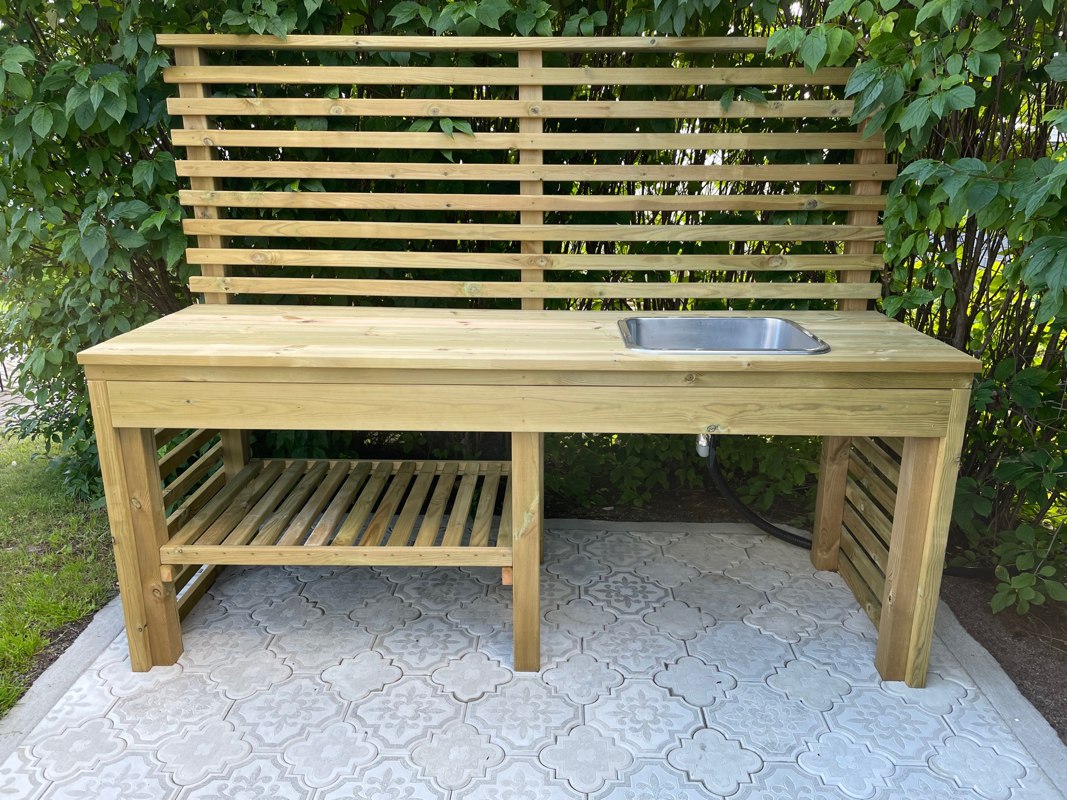
Now I wanted to build a working bench. I edited a drawing that I found on the net and started sawing up the wood I needed for this. After removing all the saw dust from all over me, I finally could start building. This was fun and I’m amazed that everything fitted without modification, except for the hole for the sink!
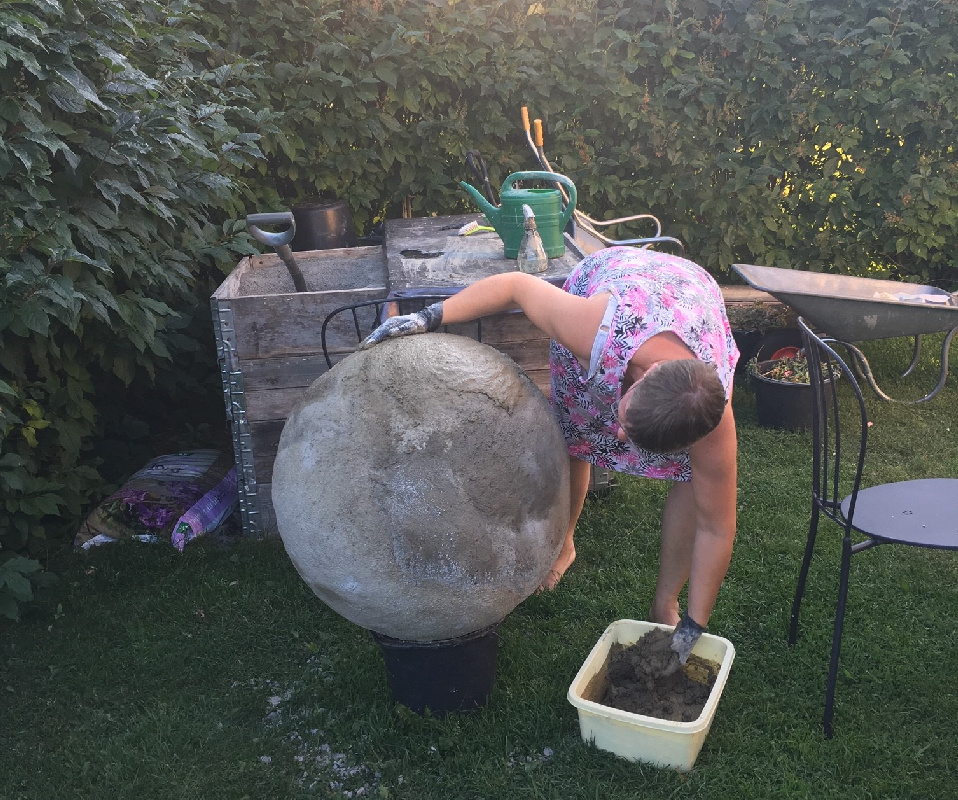
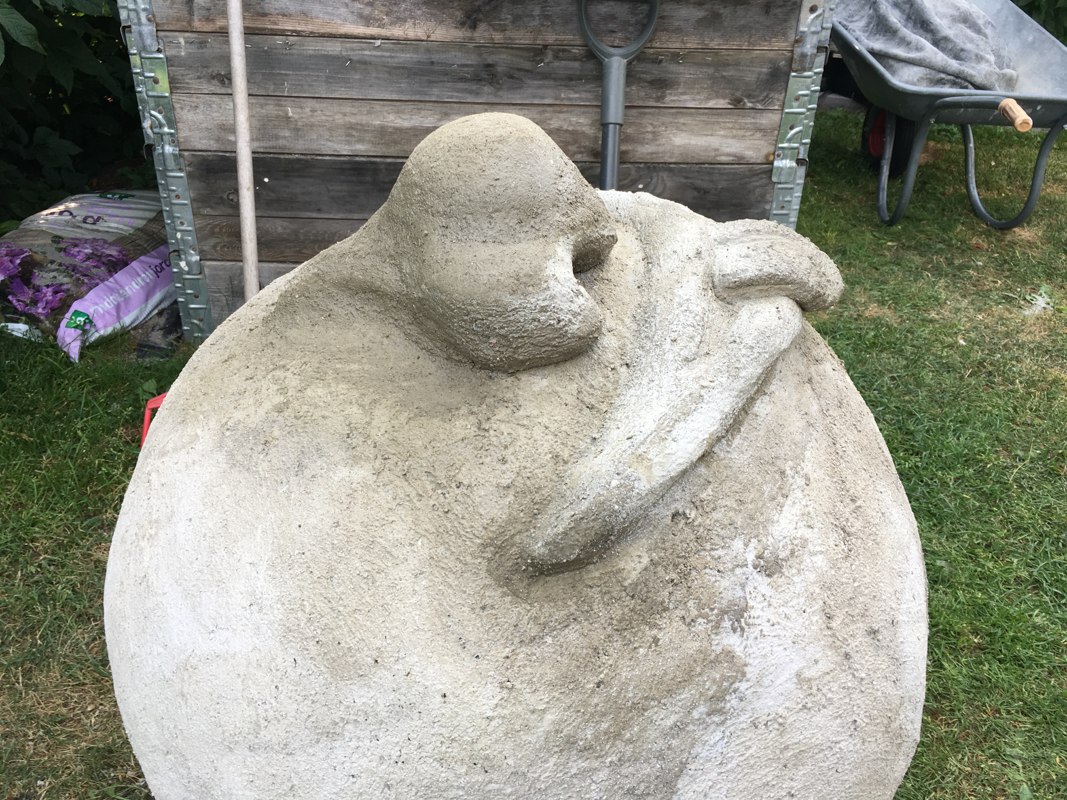
Two years ago I wanted to try making a huge concrete ball by using a Pilates ball that I covered with concrete-soaked pieces of terry towels. After covering it with several layers of towels I put on just concrete and tried to get the surface as smooth as possible. I left an area in the bottom uncovered so I could remove the Pilates ball.
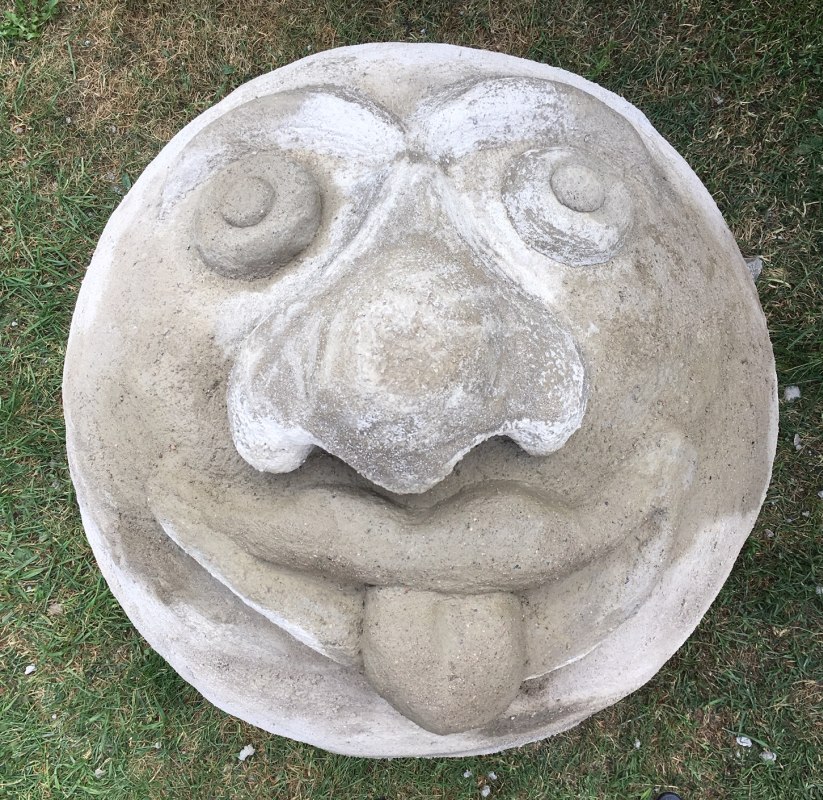
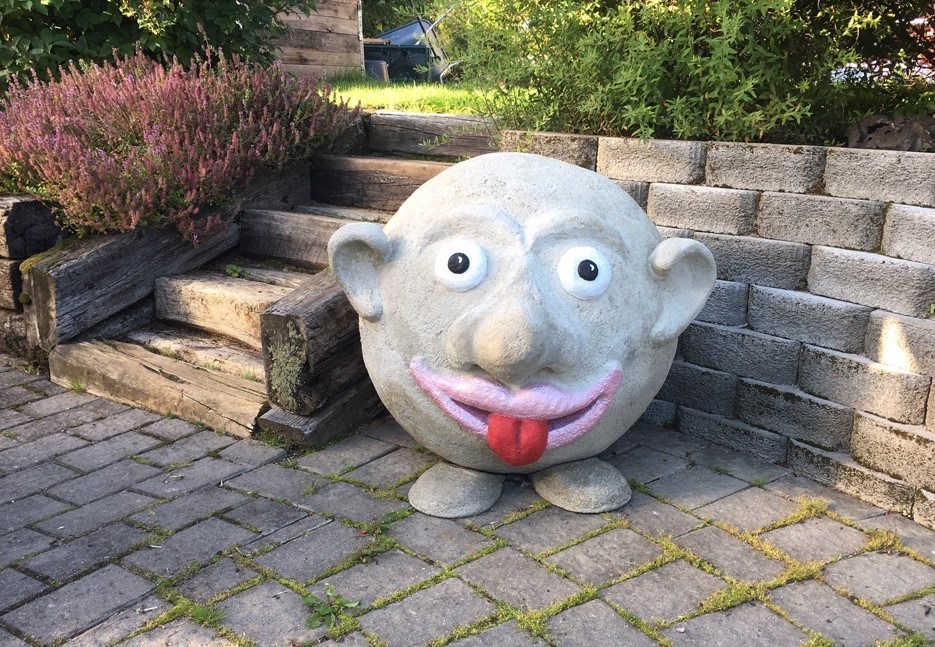
At first I didn’t know what to make of the big ball, but after some thoughts, an idea began to emerge. I wanted to make a big face on it!
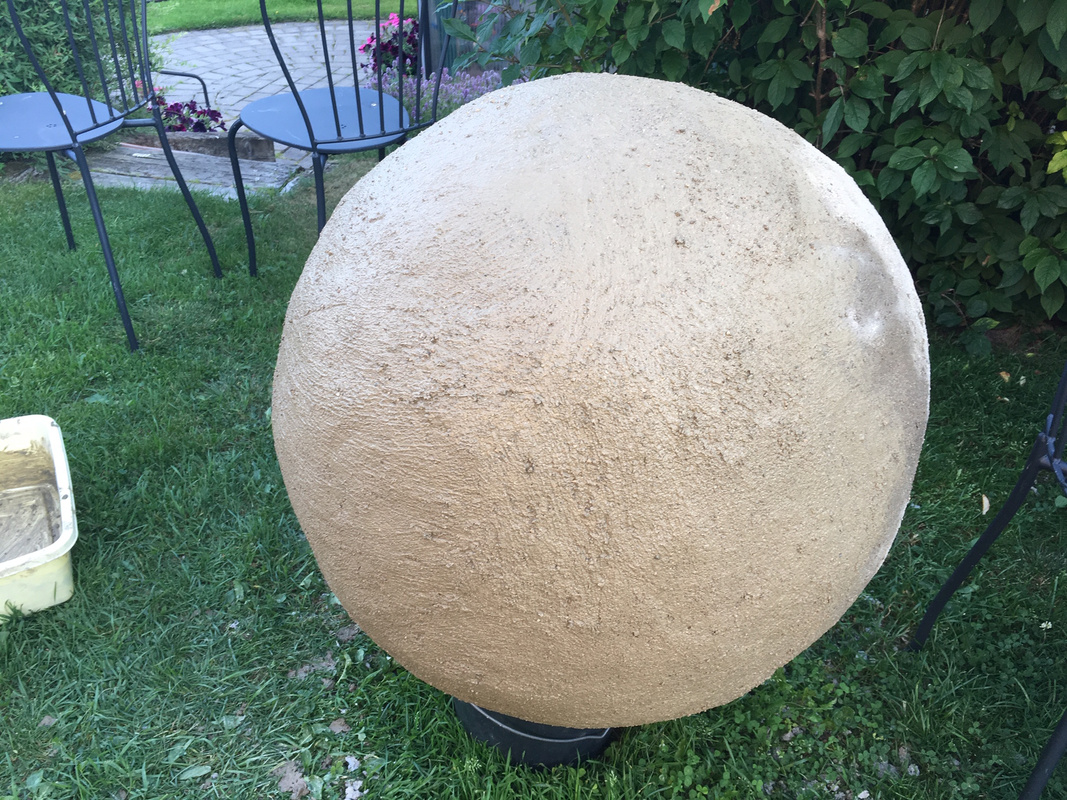
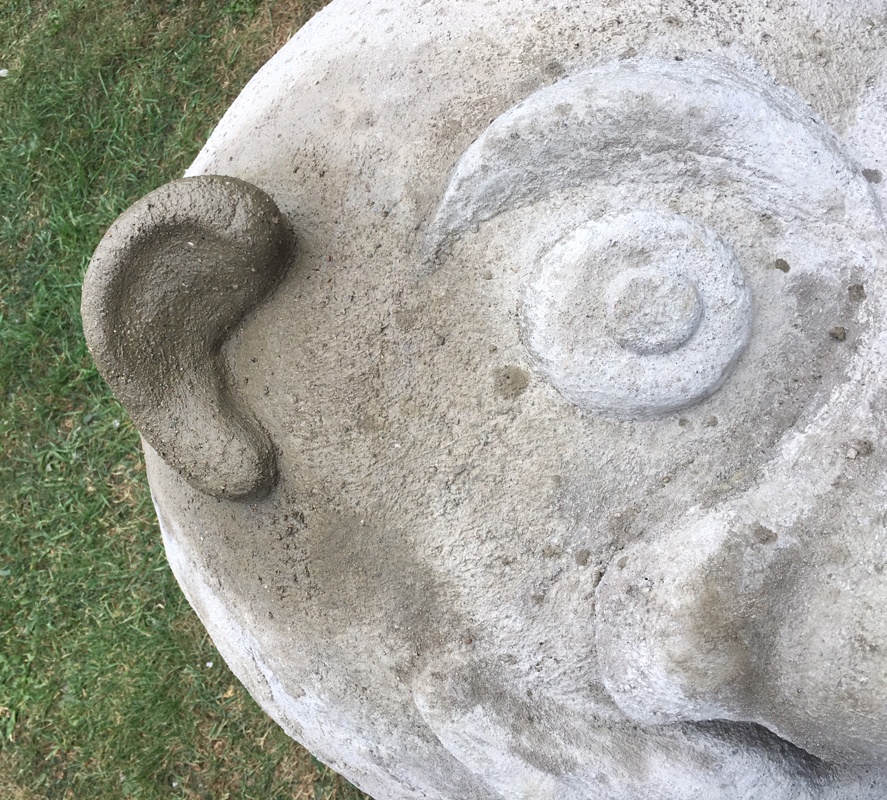
It is not easy to shape concrete freely, but it is possible! You can just do a little area at a time and let it settle before you put on more and also make sure to turn the ball so that the concrete does not start to slide. It takes layer after layer to build up the shape. The ears where hardest to make.
It’s fun to make free form concrete but it takes much longer time to make a finished item than using moulds. I will also make feet for it. It will be a big head with feet! Ha ha!
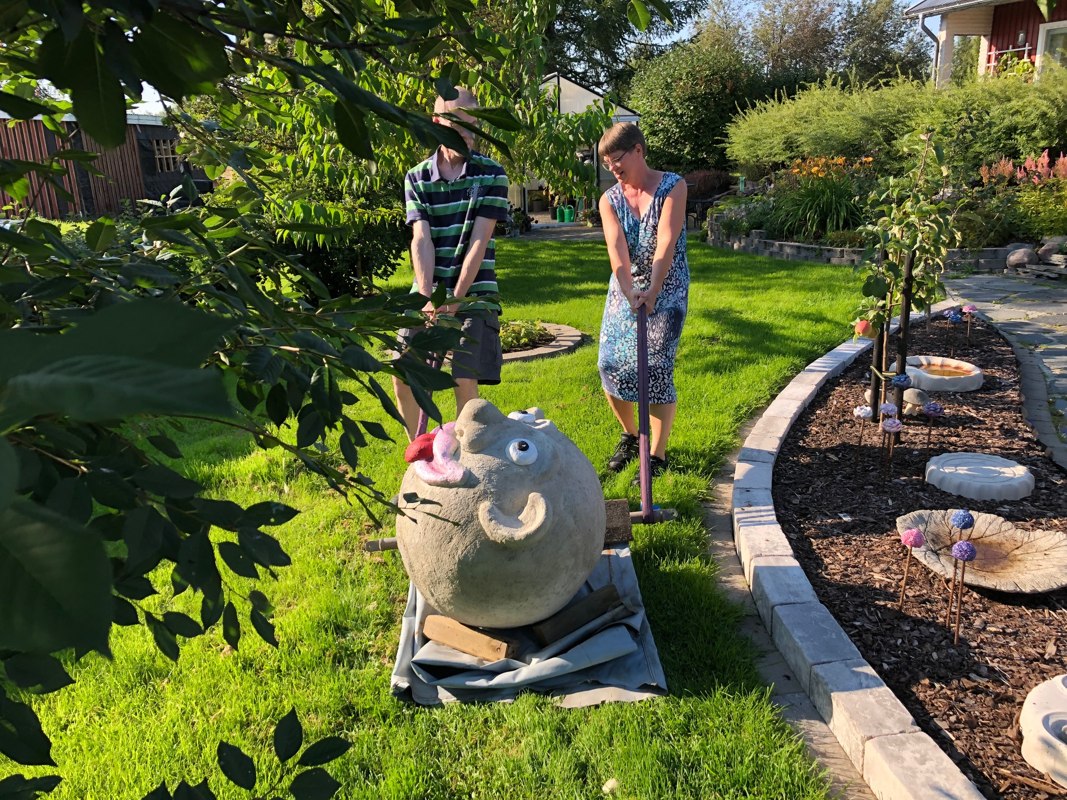
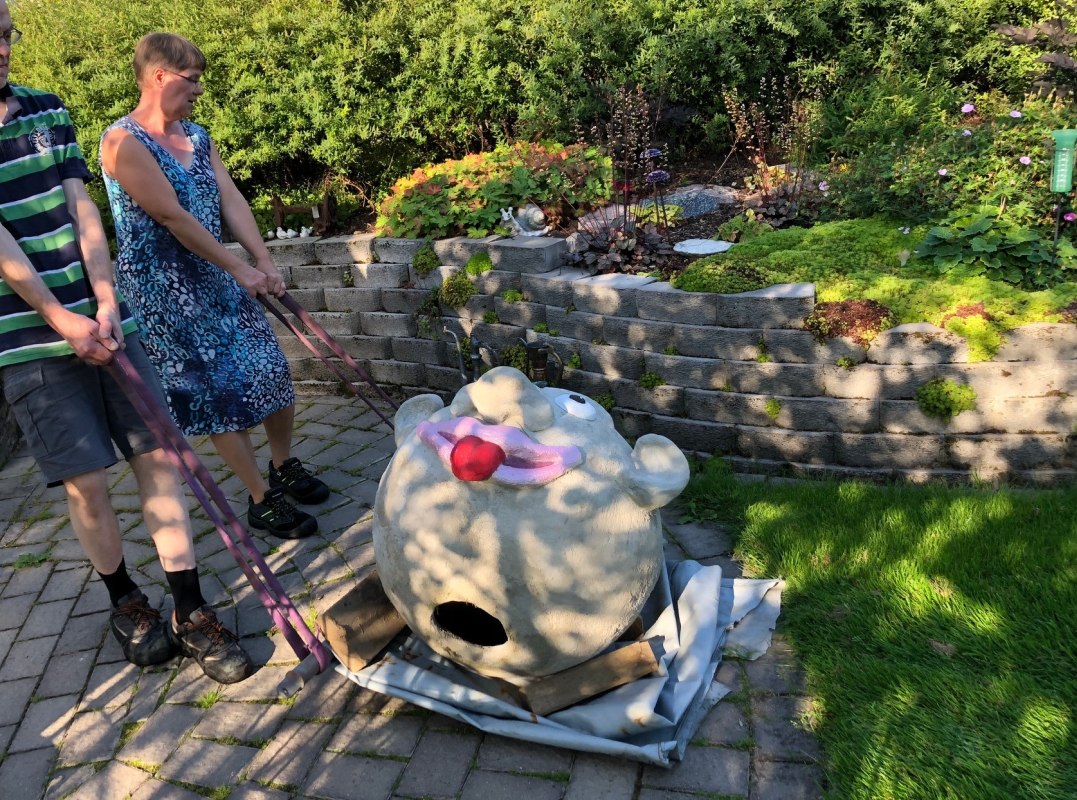
Now I had to decide where to put it. The best place was not far from where I made it, only four meters away but then there is a staircase in between. The head is huge and it’s heavy, 65 cm in diameter and it weighs just over 70 kilos. We had to drag it around the whole garden instead!
Now it has been in the garden for two years and the colours has faded a little since I made it, but that is easy to restore. During winters I just put on a small tarpaulin as protection.
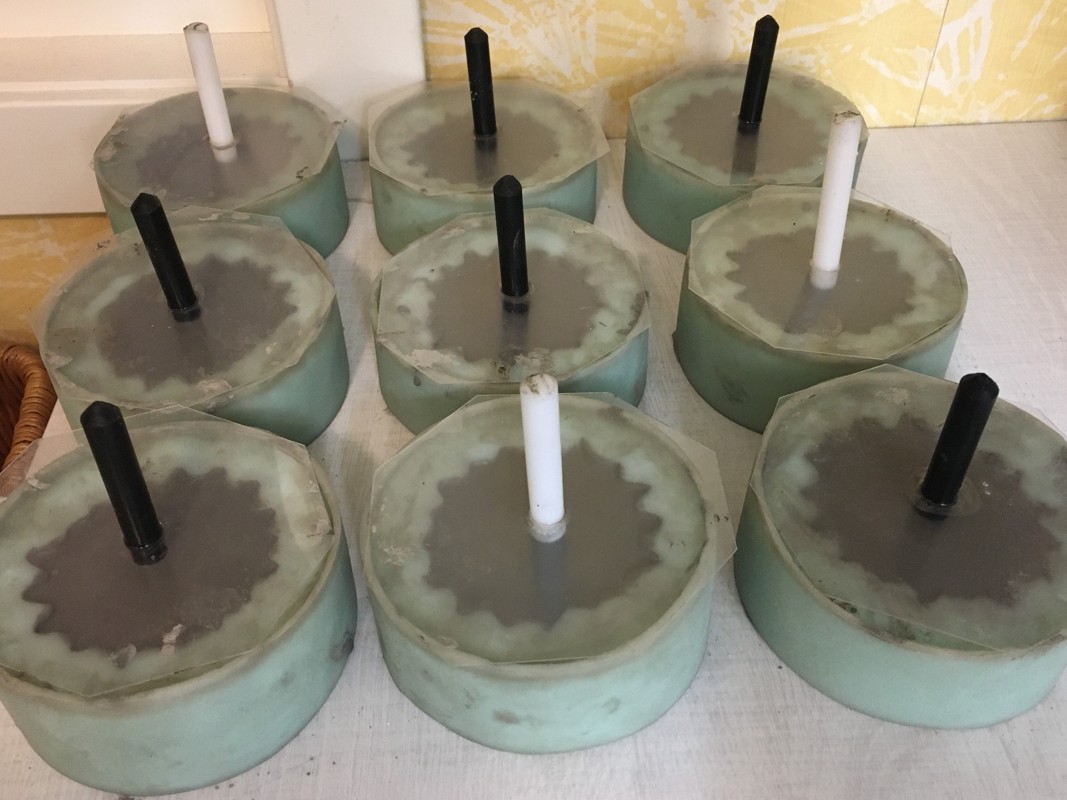
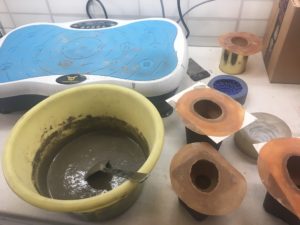
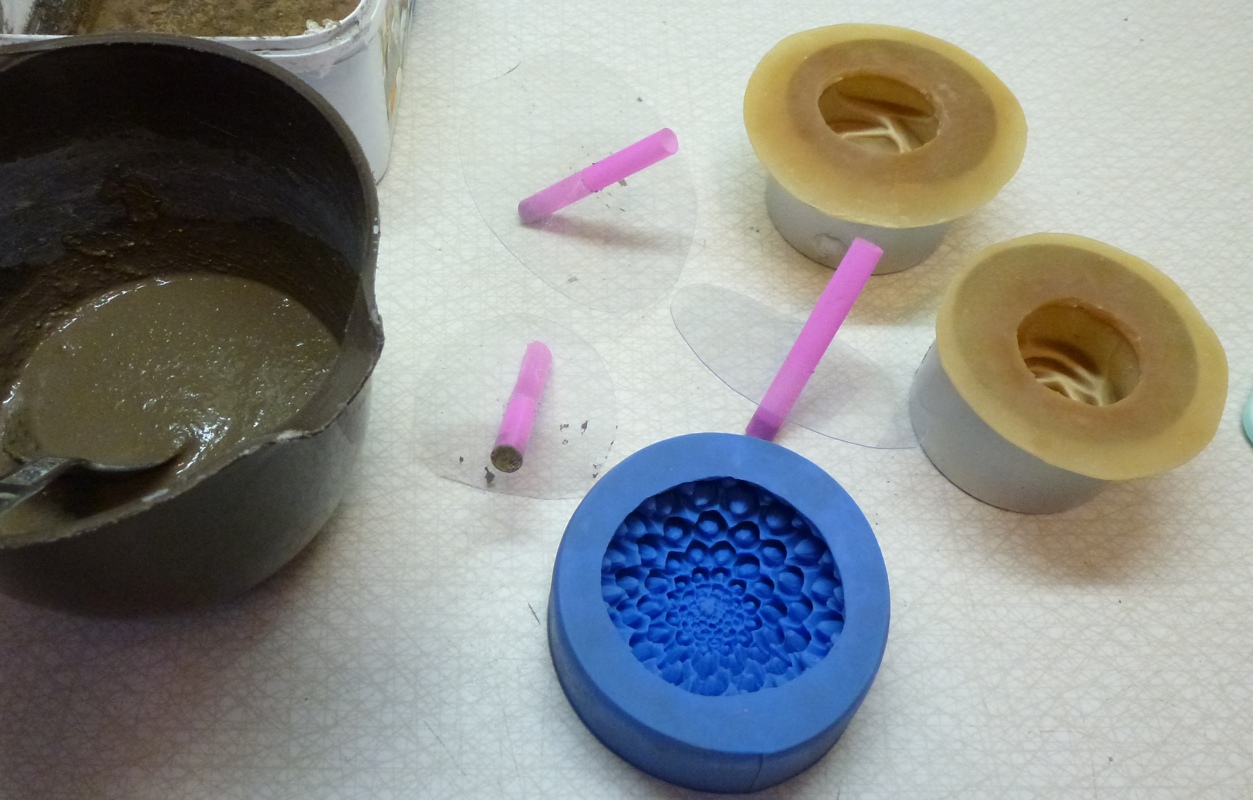
This winter I’m casting a lot of dahlia flowers to put on iron bars in the garden. I’m casting them using self-levelling compound, not concrete because concrete is too rough for this. The disadvantage of this, however, is that the flowers become more fragile and must be handled more carefully.
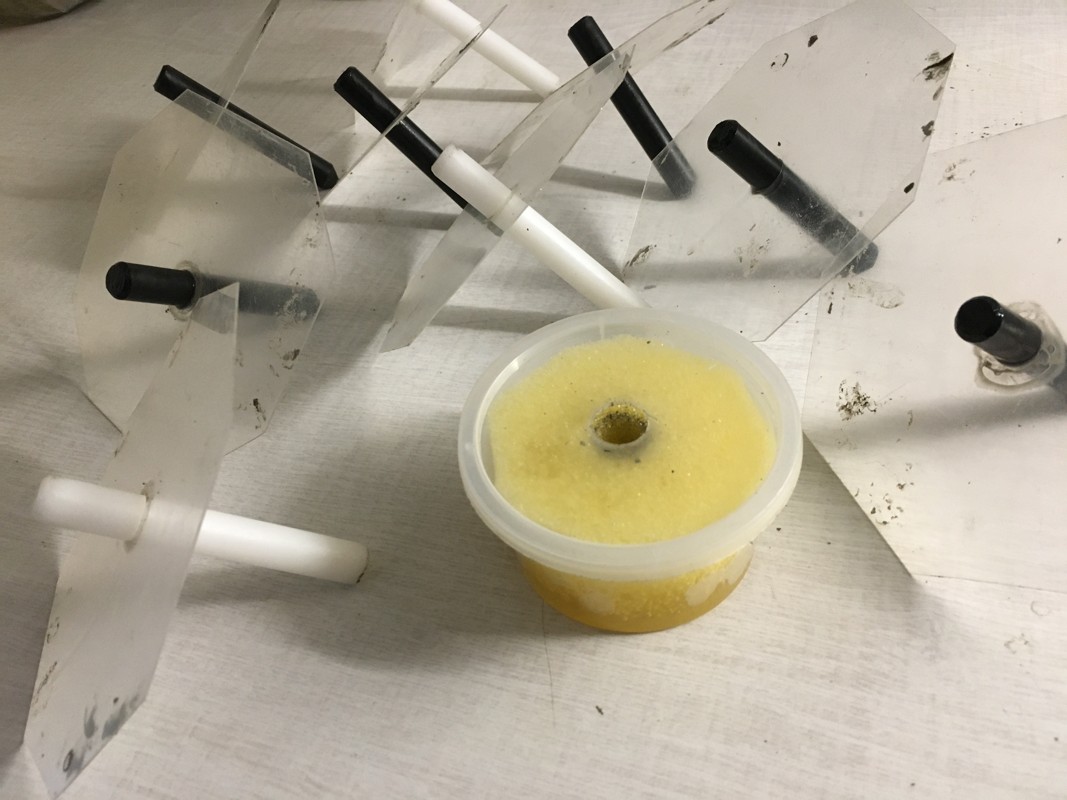
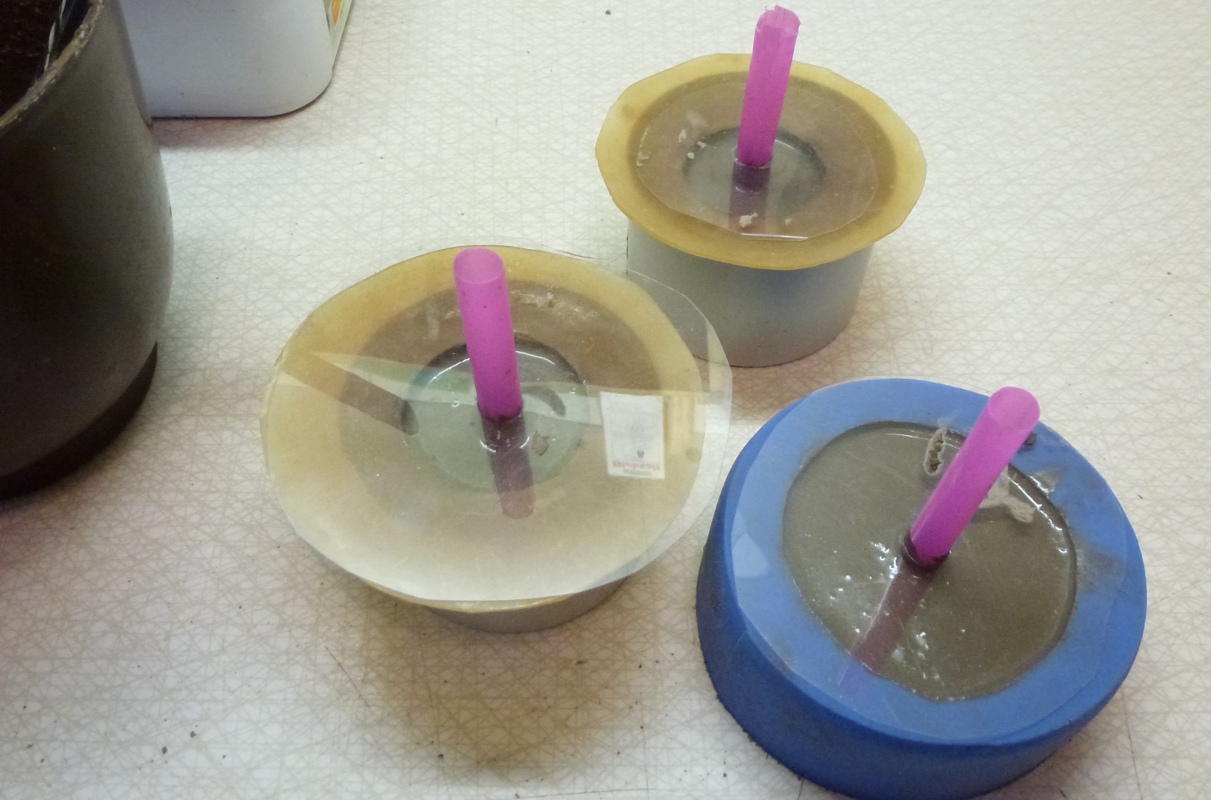
I’m using silicone moulds and I have bought several of these to make the process more time efficient. When I have filled and vibrated out the air bubbles, I’m putting in a oiled nylon stick in the wet compound to make the hole for the iron bar.
Easy oiling invention. In the plastic jar there is a sponge with a hole in it and some oil. Just dip the nylon stick in it!
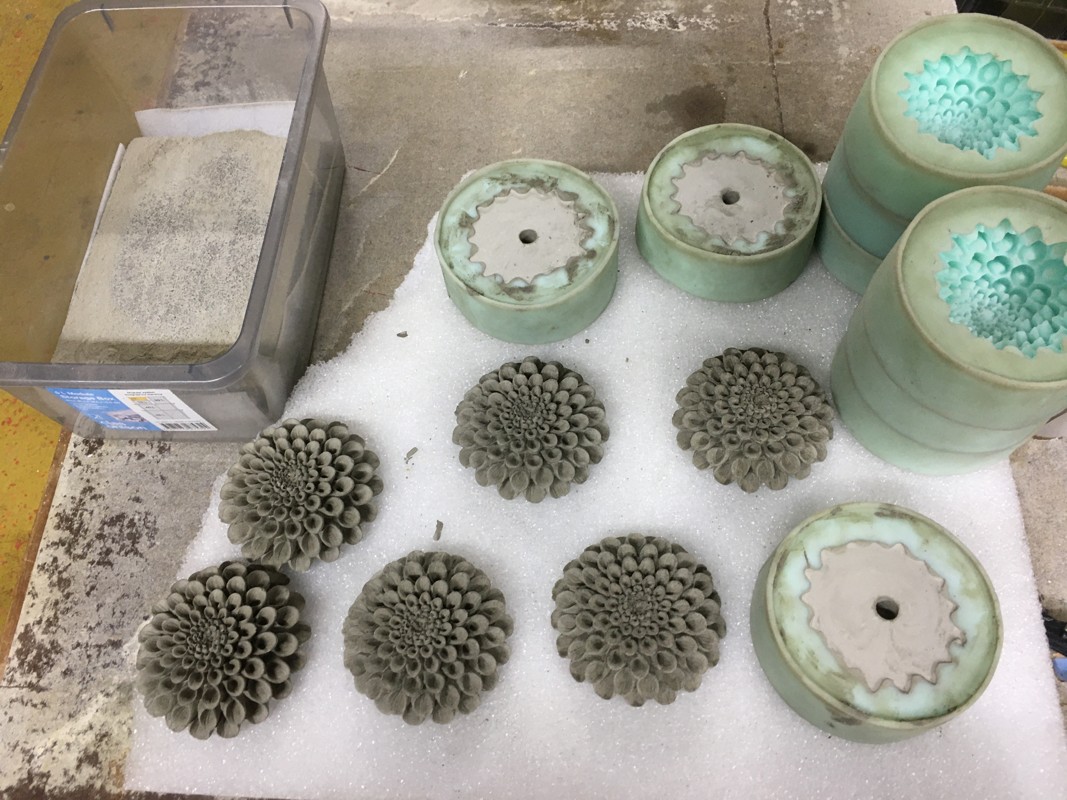
When the dahlias have hardened I remove the stick and the mould and then I grind the bottom of the flower by just rubbing it on a concrete stone. Fast and easy!
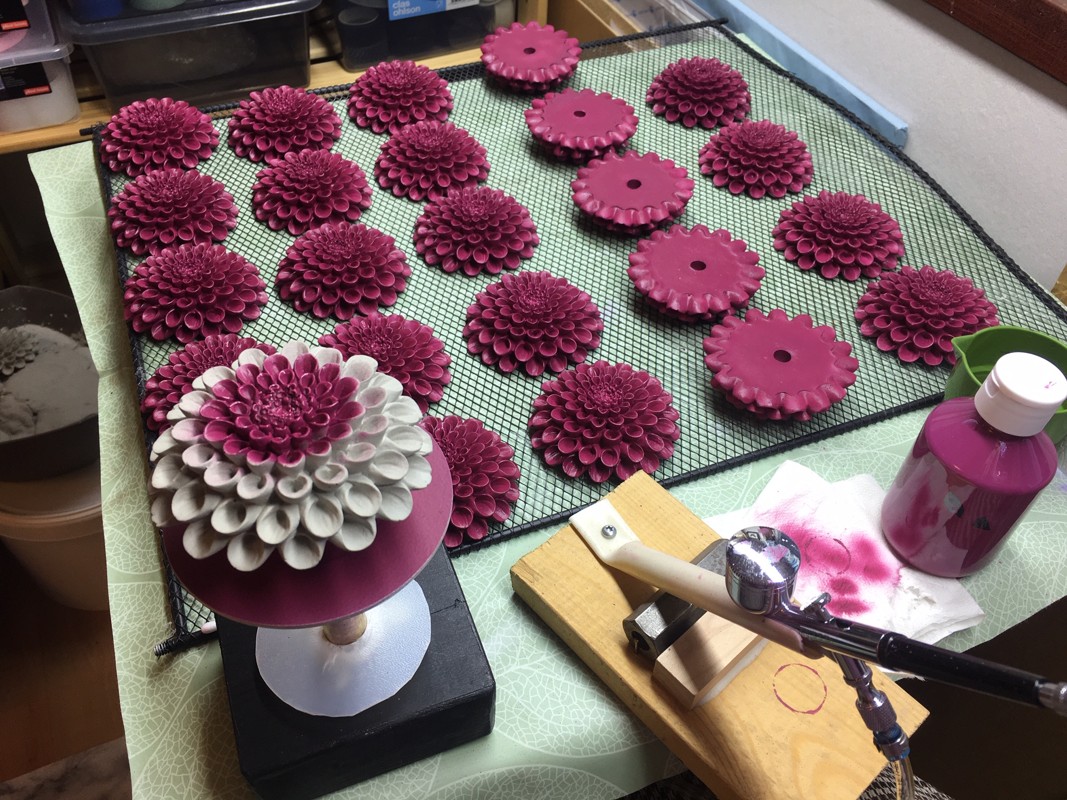
When the dahlia flowers have cured for a week or two it’s time to put on the first colour coat. This has always been a tedious job doing by hand. Now I wanted to try something else. I bought an airbrush and started painting. I also made a small turntable to make it easier to paint, and I also needed a stand for the airbrush. What a upgrade, this is working great! I also made a lifting tool to lift the flower off the turntable when painted.
Some of the primed flowers.
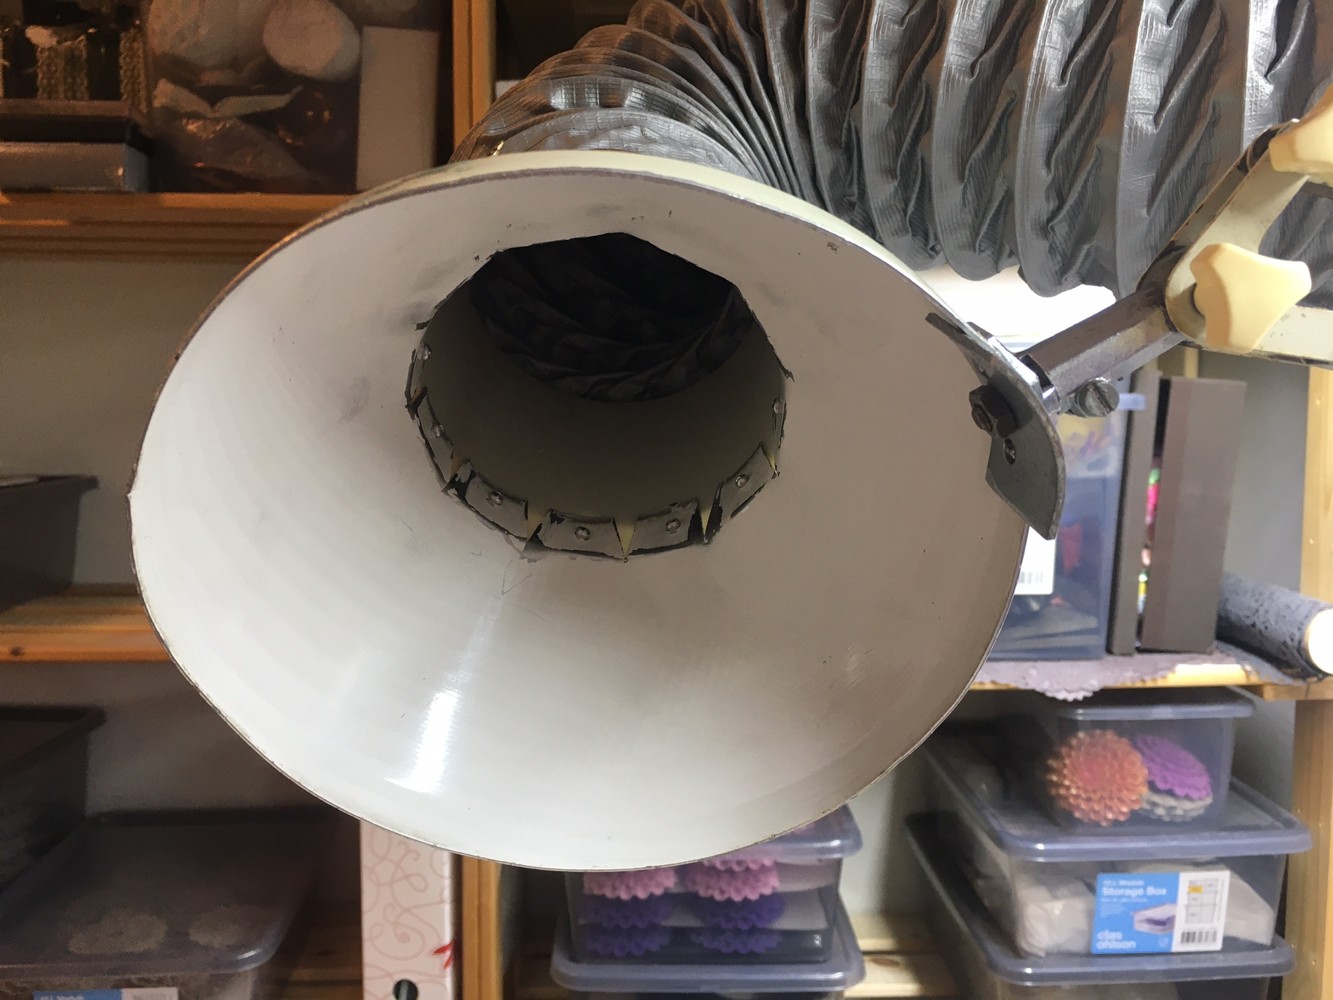
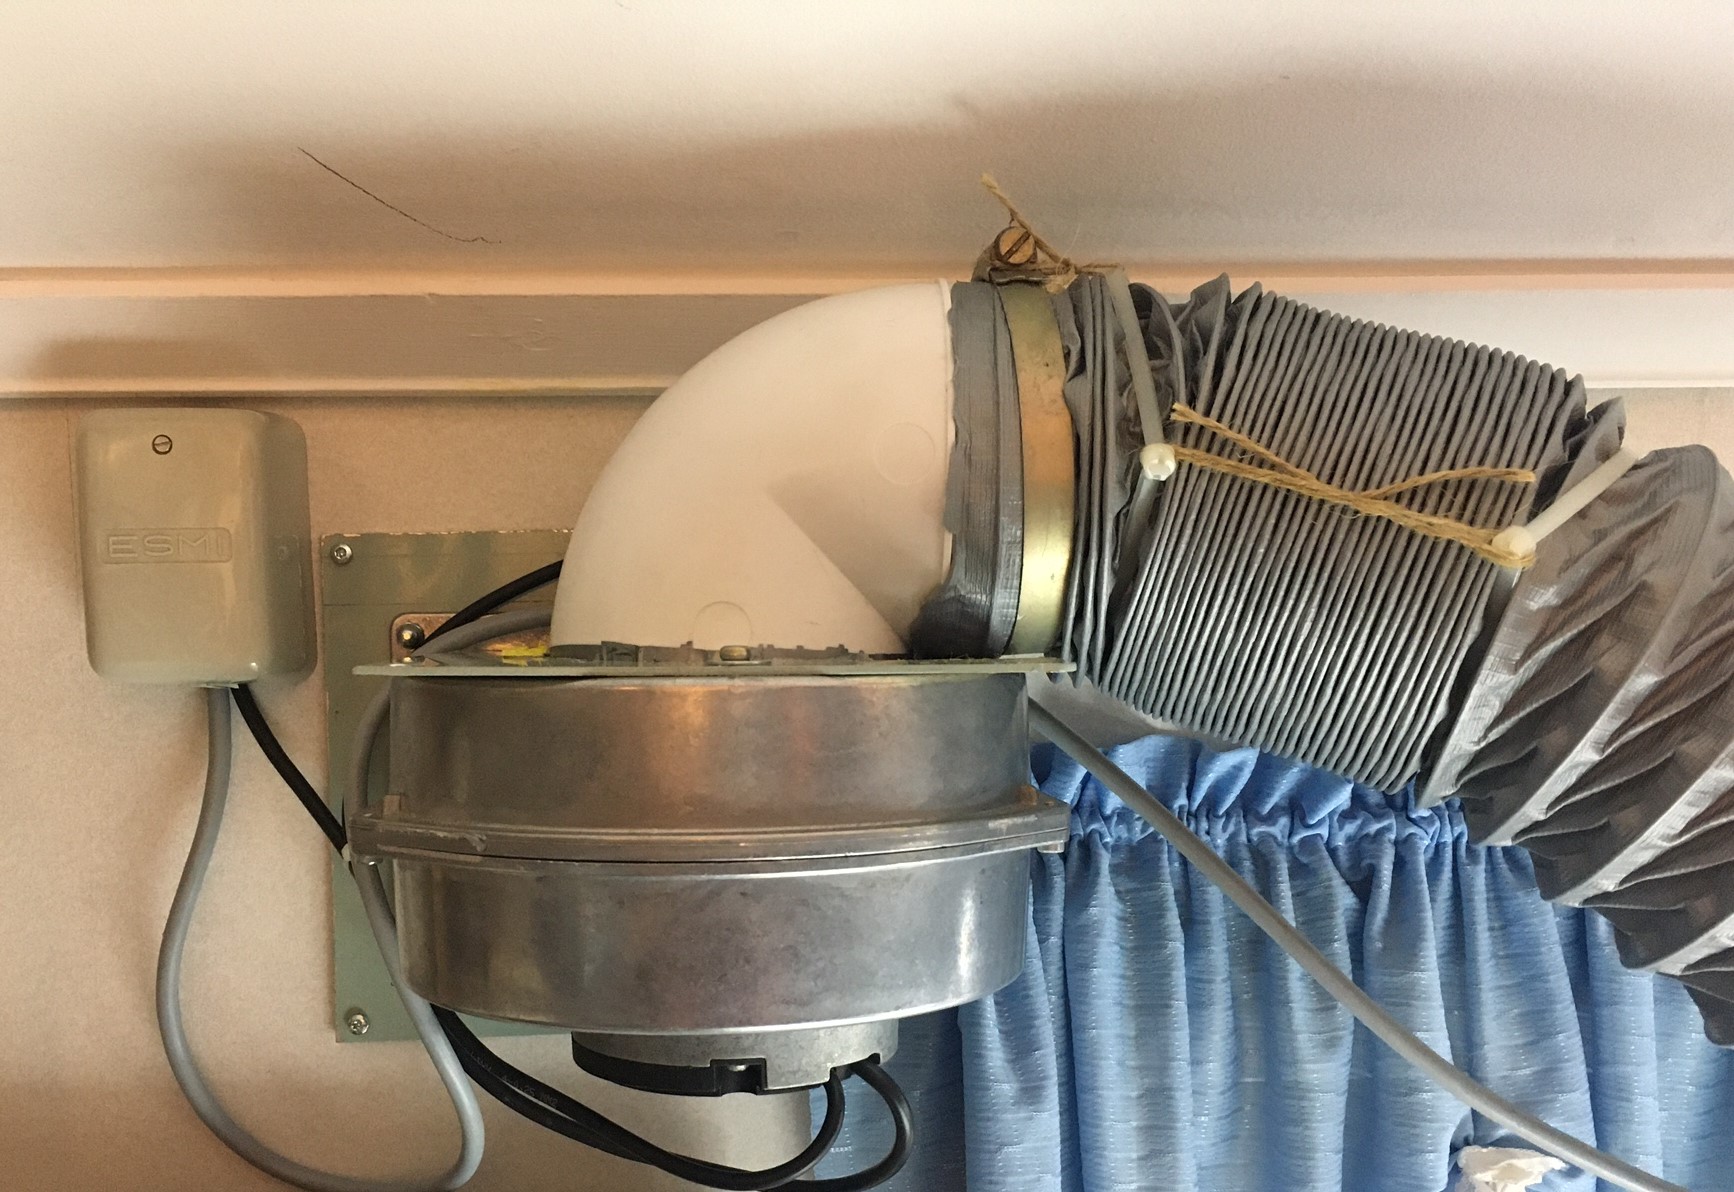
Because I’m inside when painting I really needed an exhaust for this, airbrushing spreads a lot of paint particles everywhere! I already had a suitable fan for this but needed an adjustable arm and a funnel. After some thinking I got a brilliant idea. I went up to the attic and fetched an old desk lamp we had left over. I cut off the upper part of the lamp-shade and removed the lamp and then rebuilt it to fit the exhaust hose. We made a hole in the wall and mounted the fan. Now I have an exhaust that works great and I can adjust the funnel as I want. I’m so satisfied with this invention!
The fan mounted on the wall.
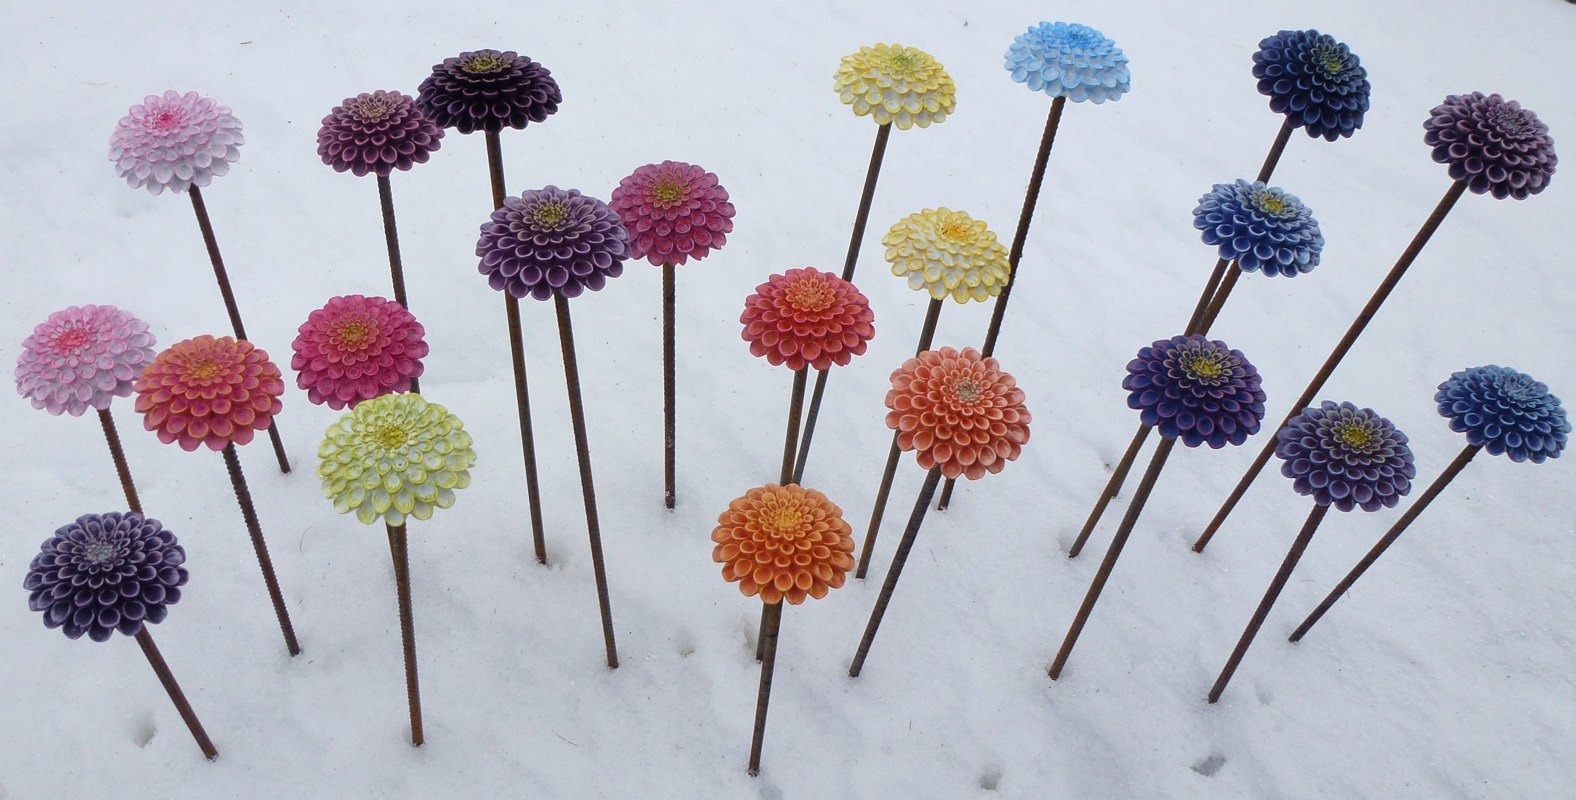
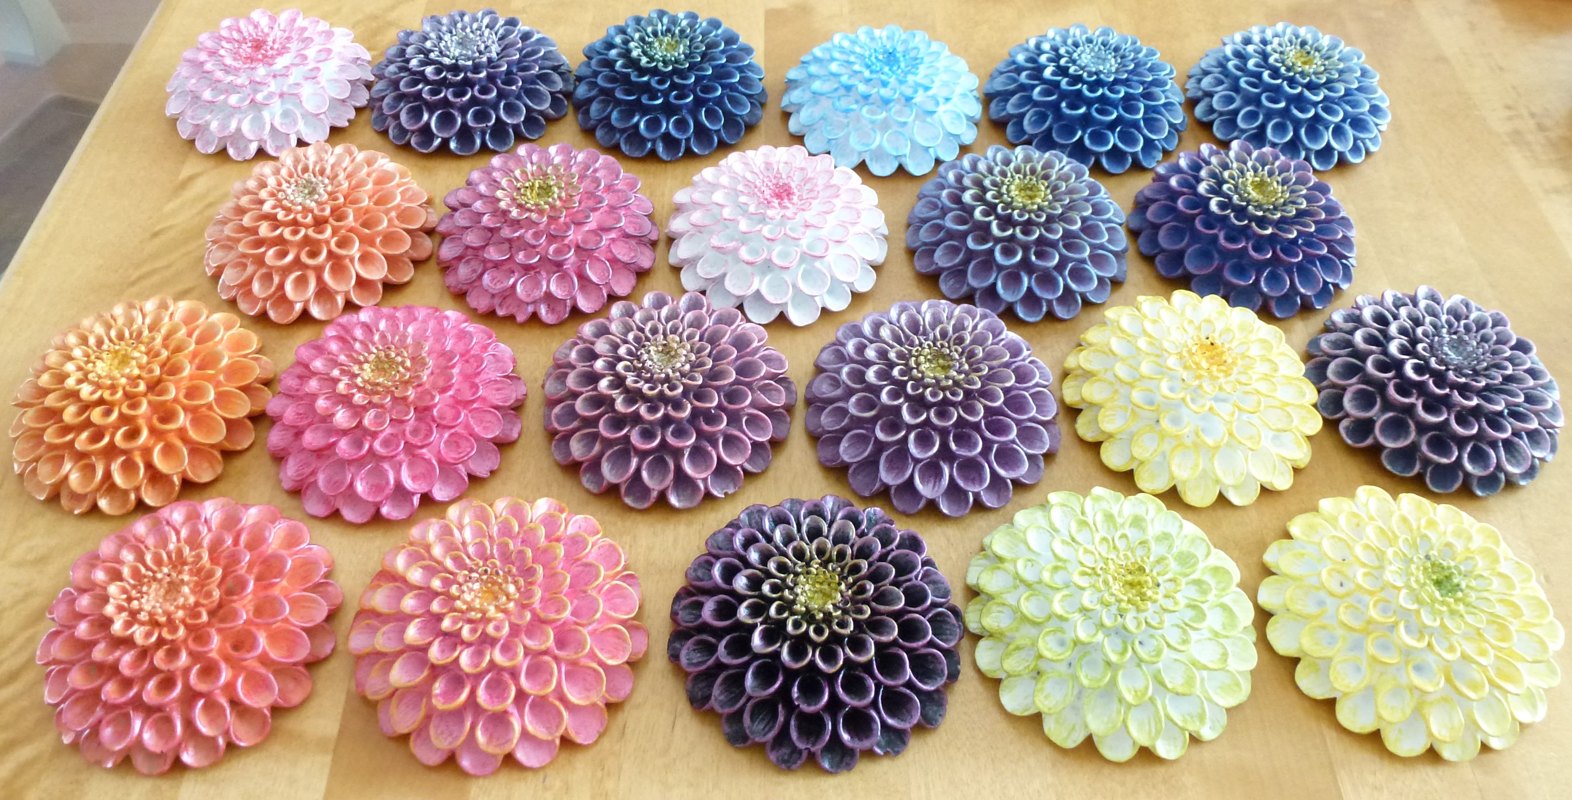
The next step is to paint metallic colours on them in several layers and shades to get them looking something like this.
When all the paint has dried I will put on some layers of clear varnish before they are finished. This will be made outside during spring because I use a solvent-based spray varnish for this, and it stinks!
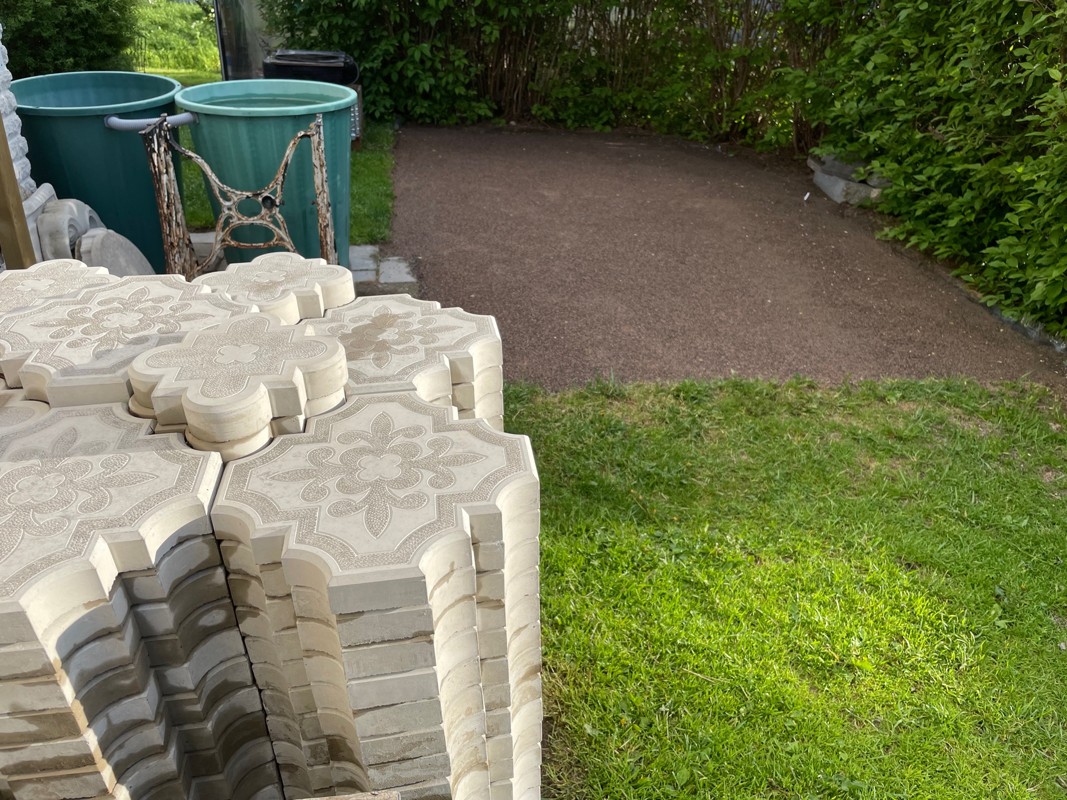
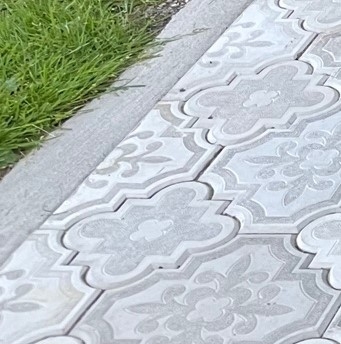
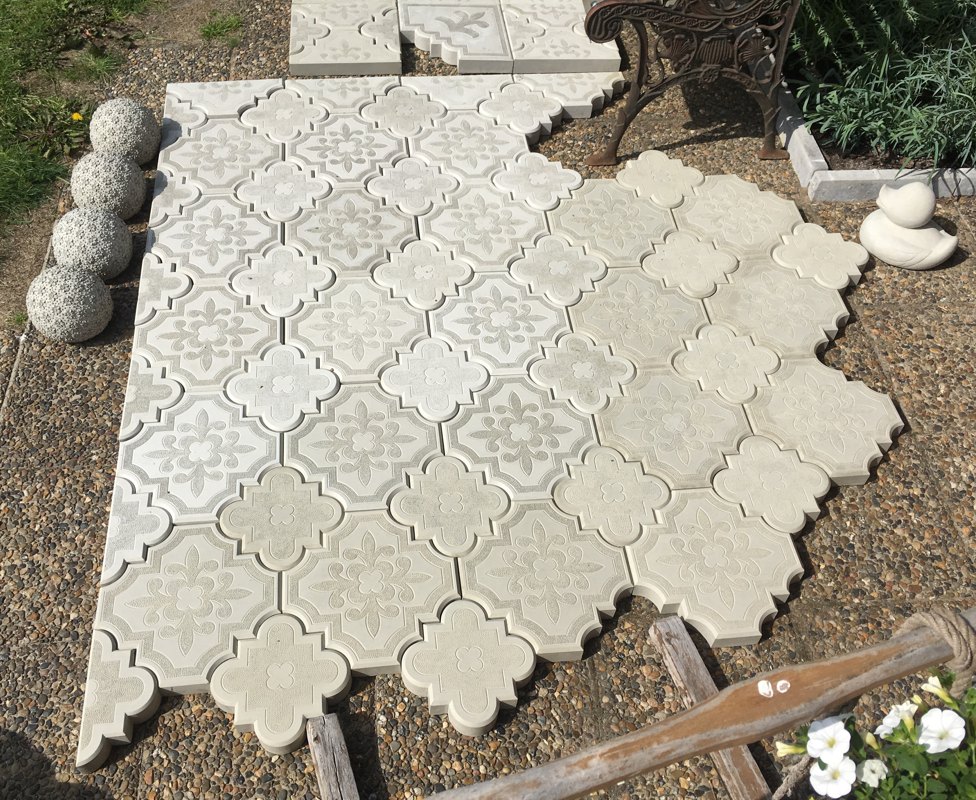
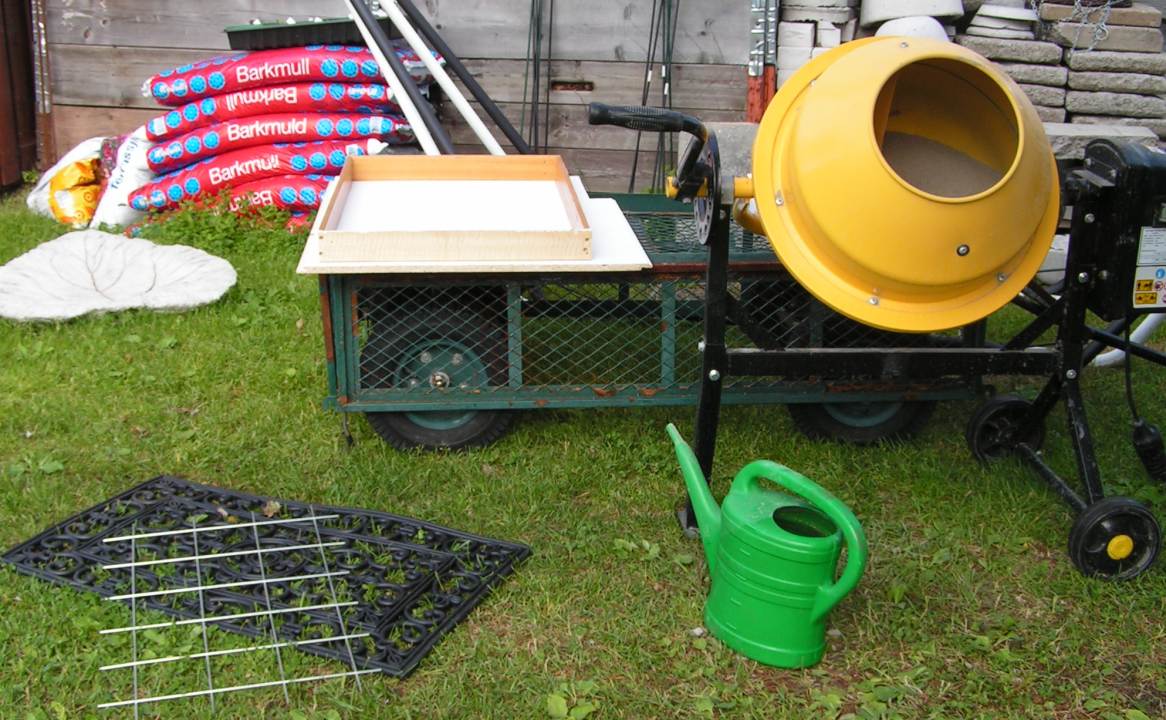
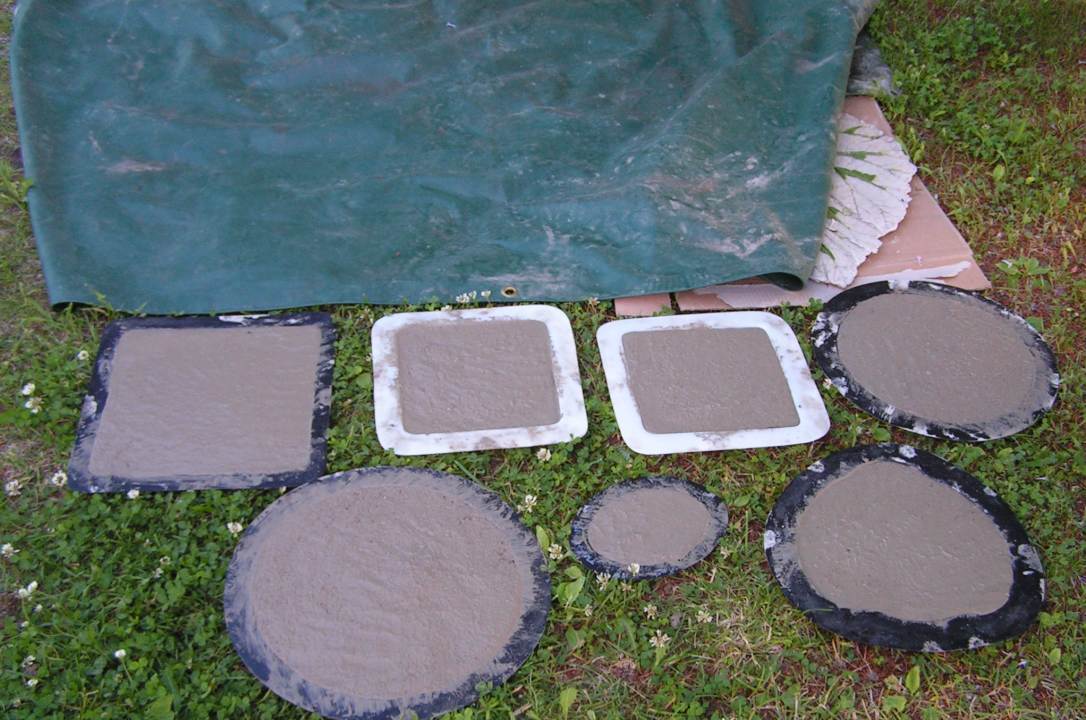
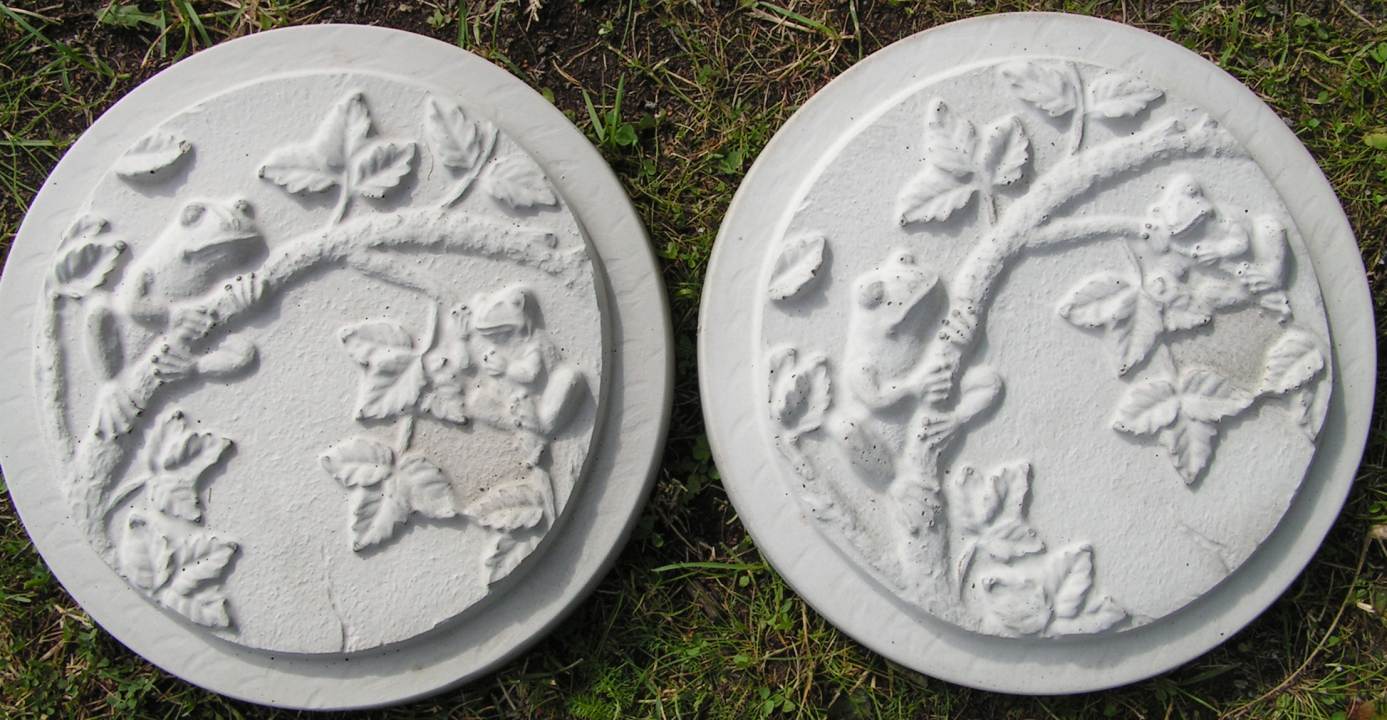
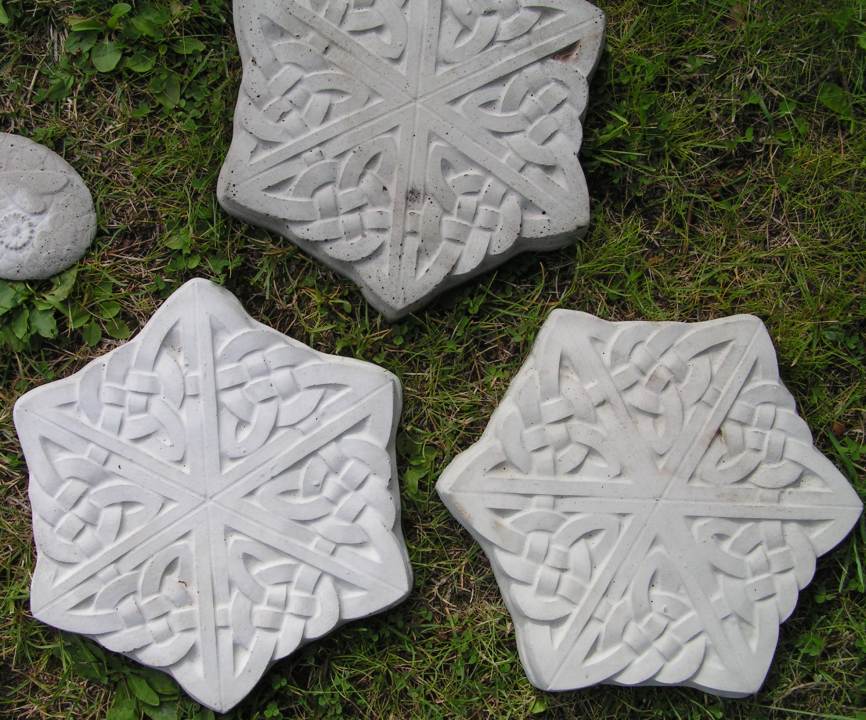
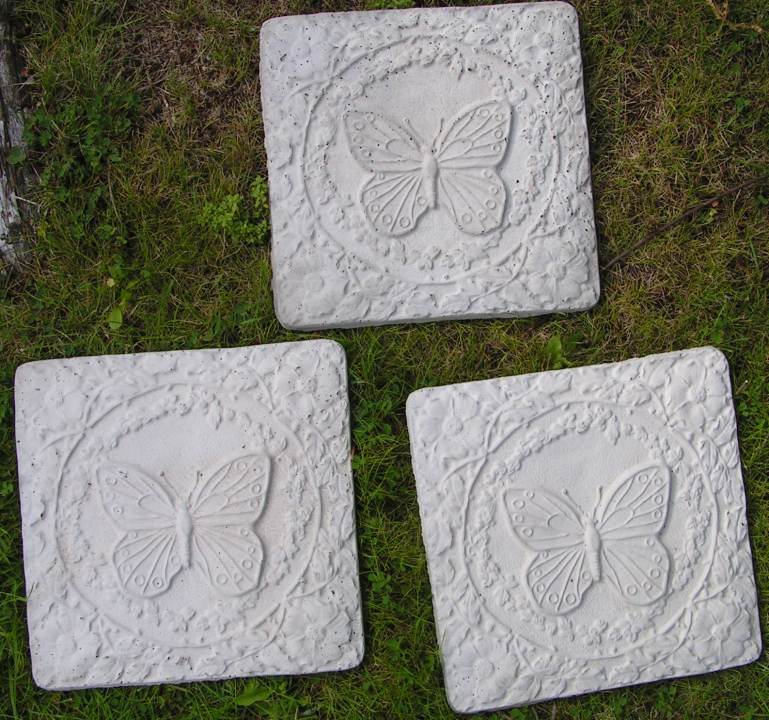
During summer I have been casting a lot of oriental paver stones. I’m planning to build a casting corner in my garden where I will have a working bench with a built-in sink and space for my concrete mixer and the vibrating table. Of course I need a fancy pavement for this.
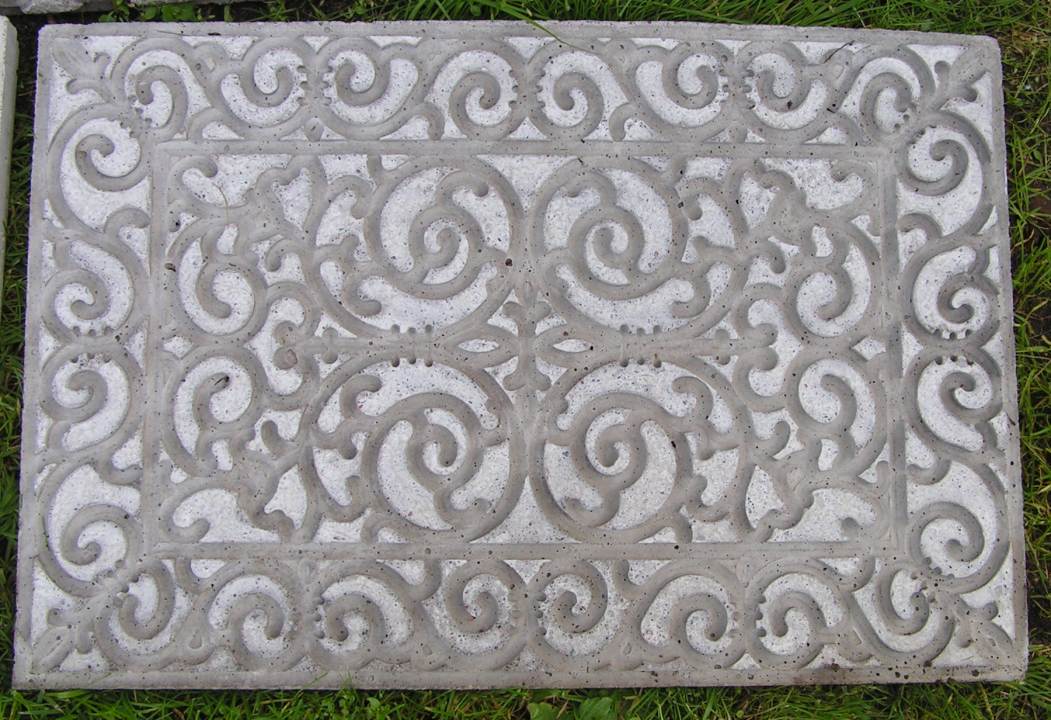
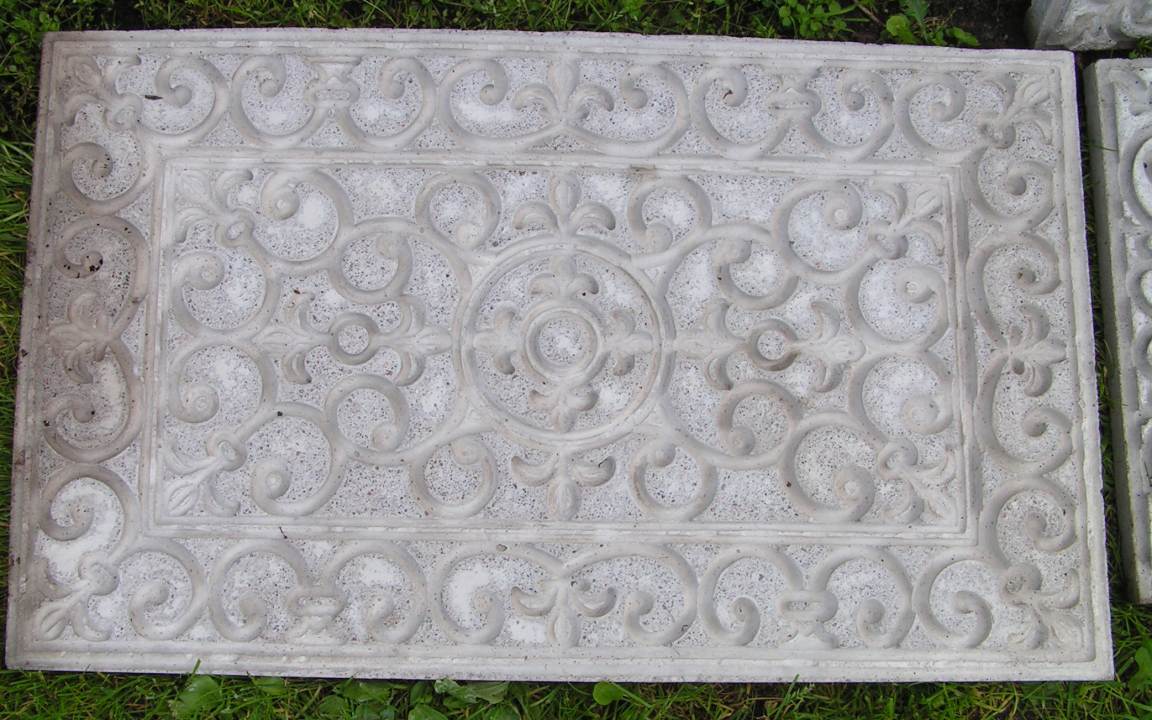
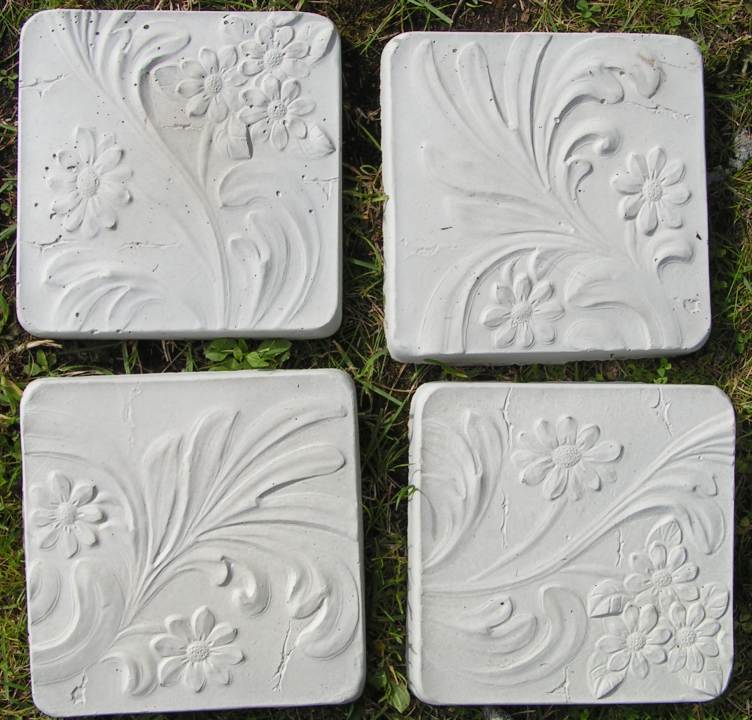
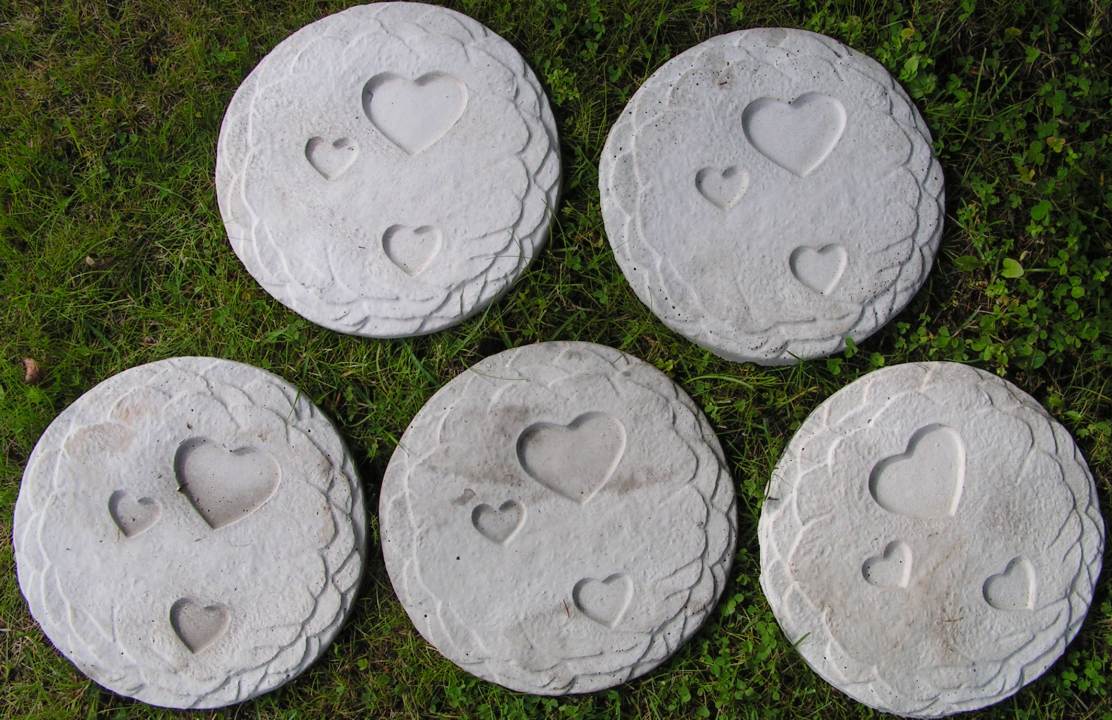
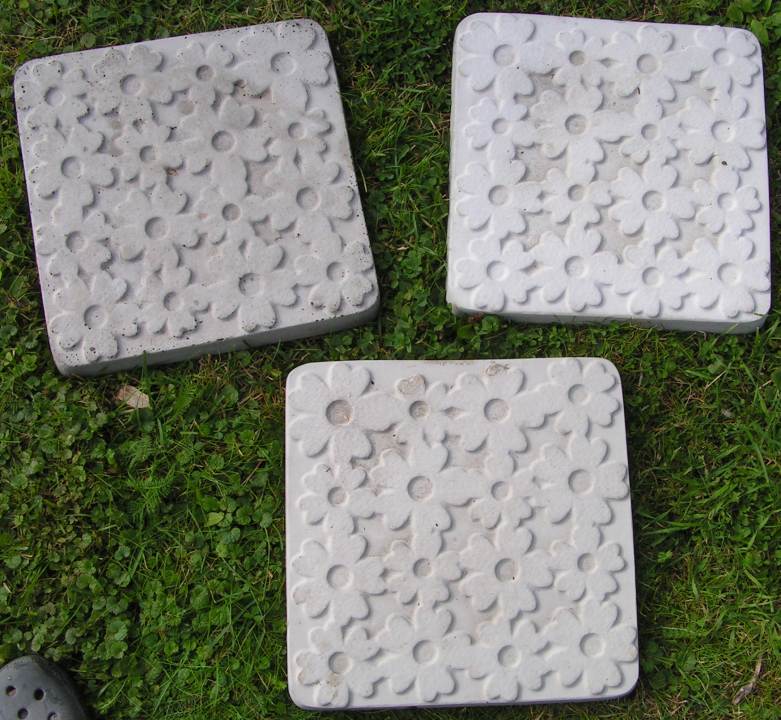
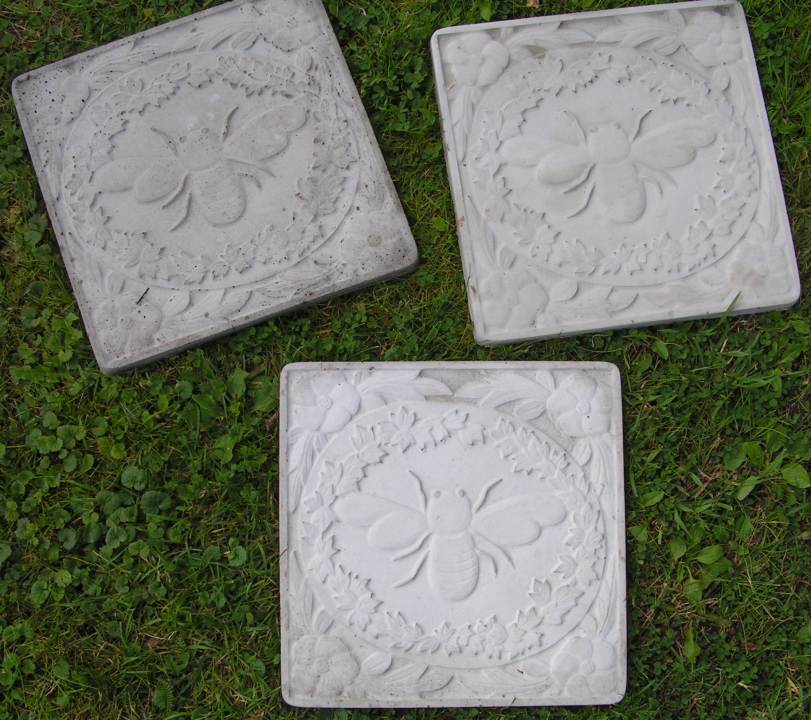
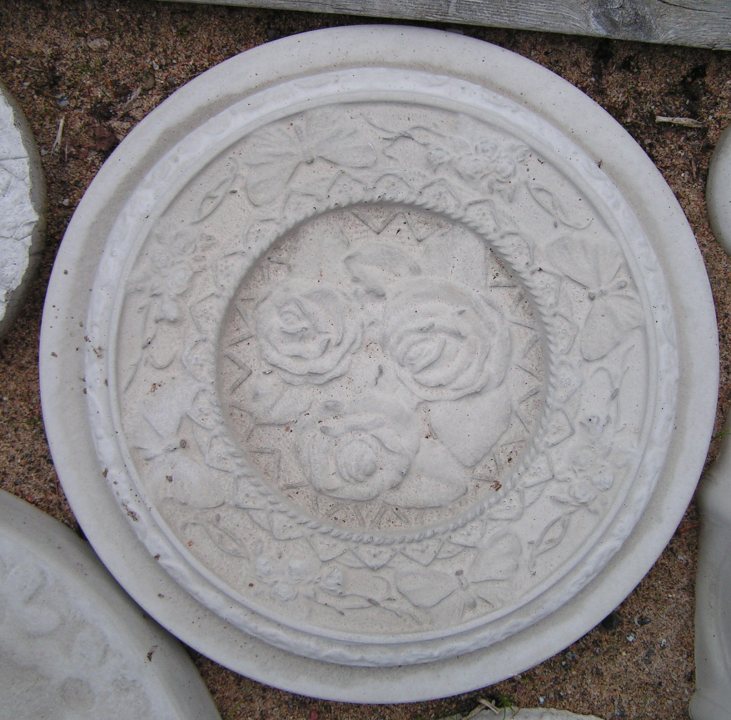
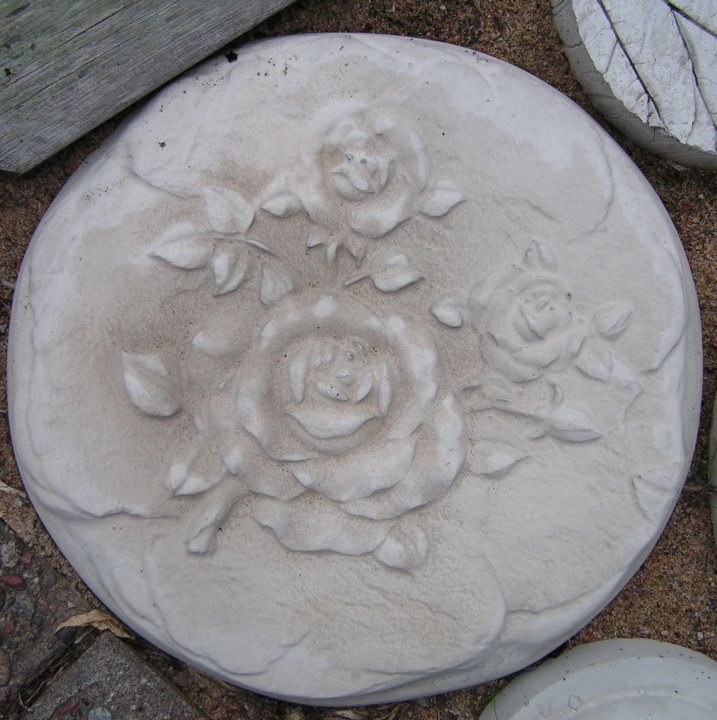
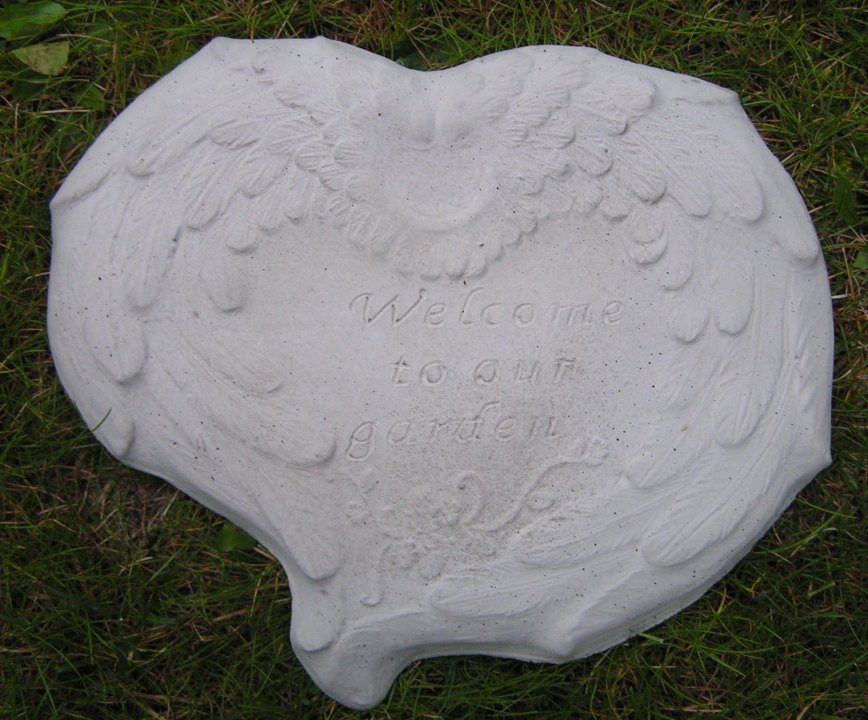
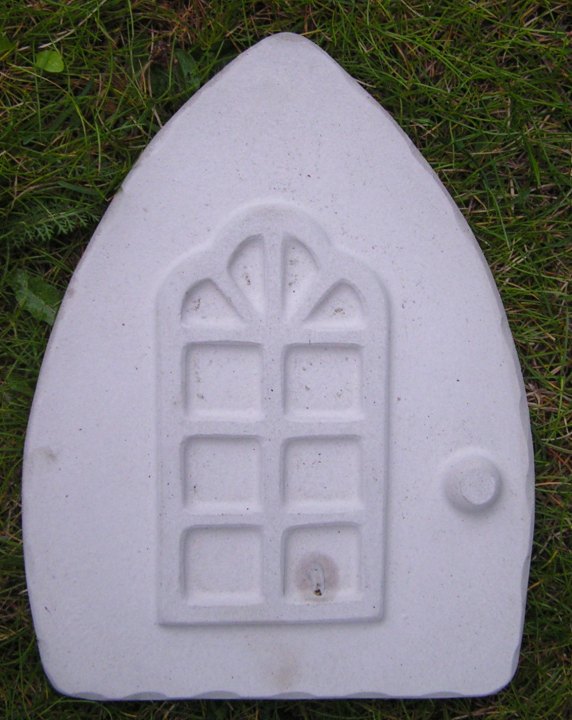
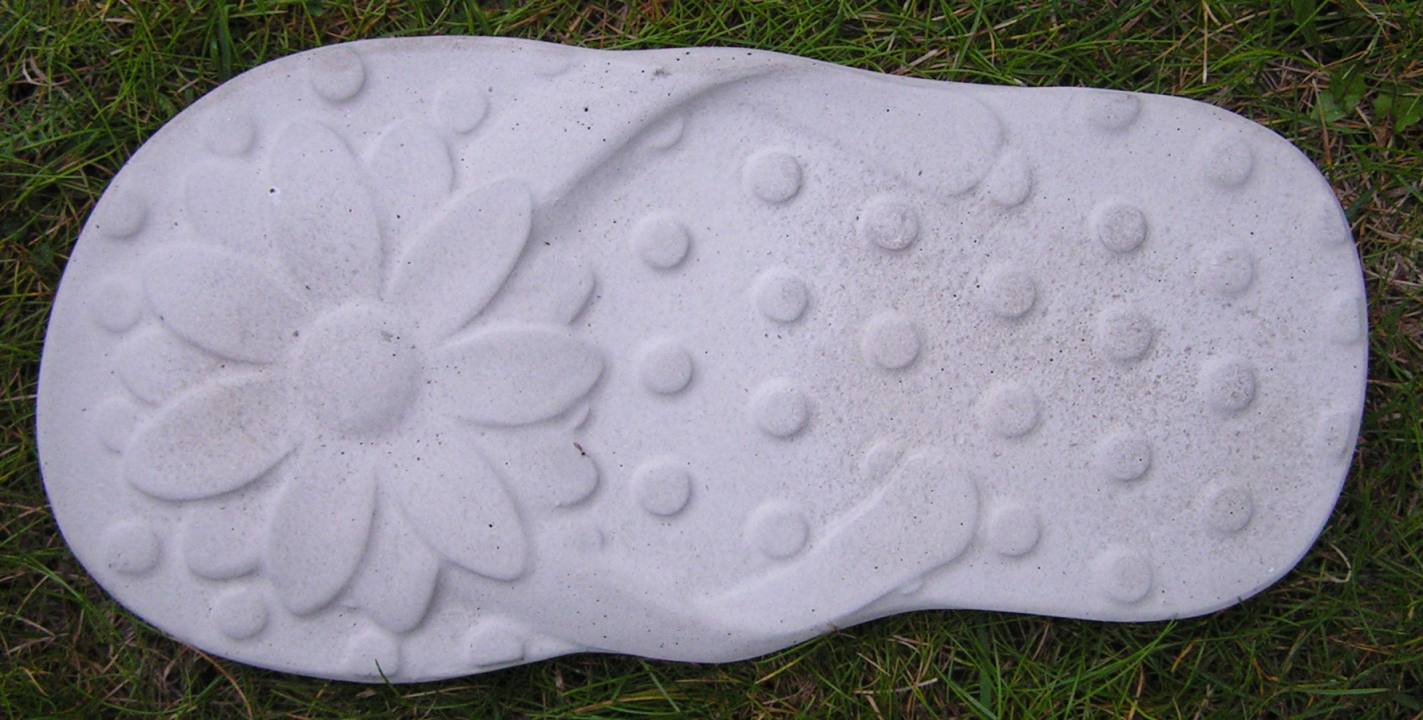
This is what the tiles look like.
I bought a starter set of the very pretty concrete moulds and started casting. I quickly realized that I will need quite many of the finished stones, more than you think, so I ordered some more moulds to speed up the casting.
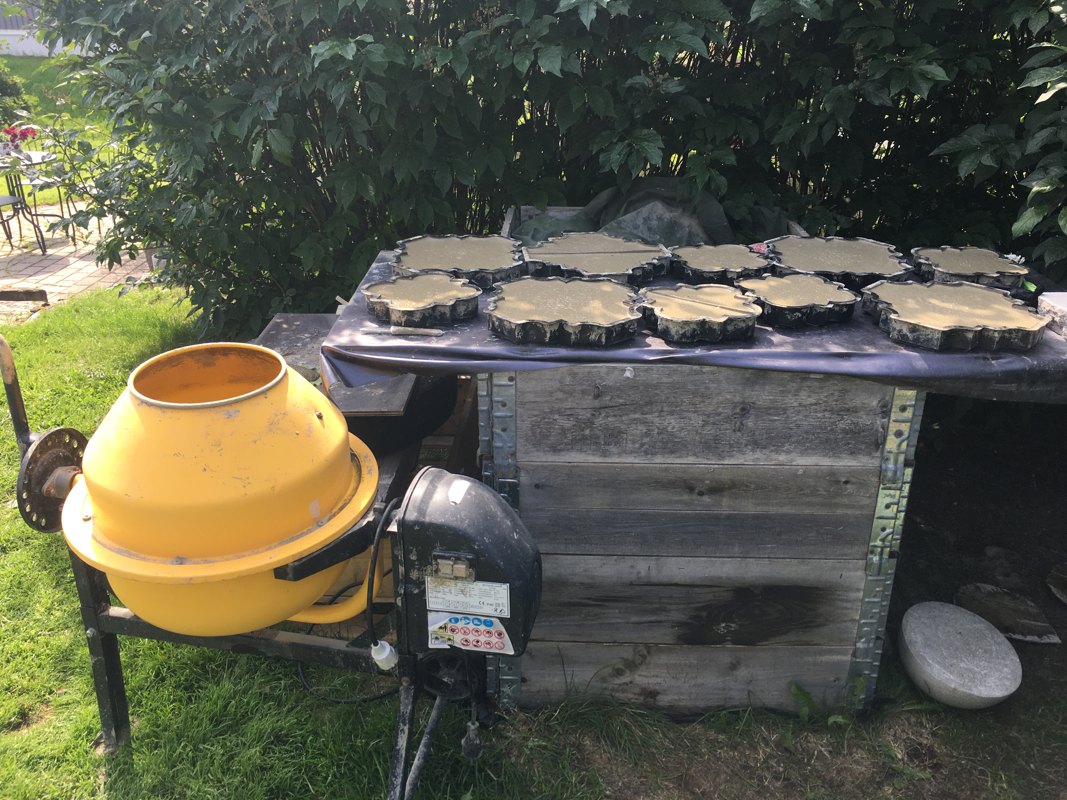
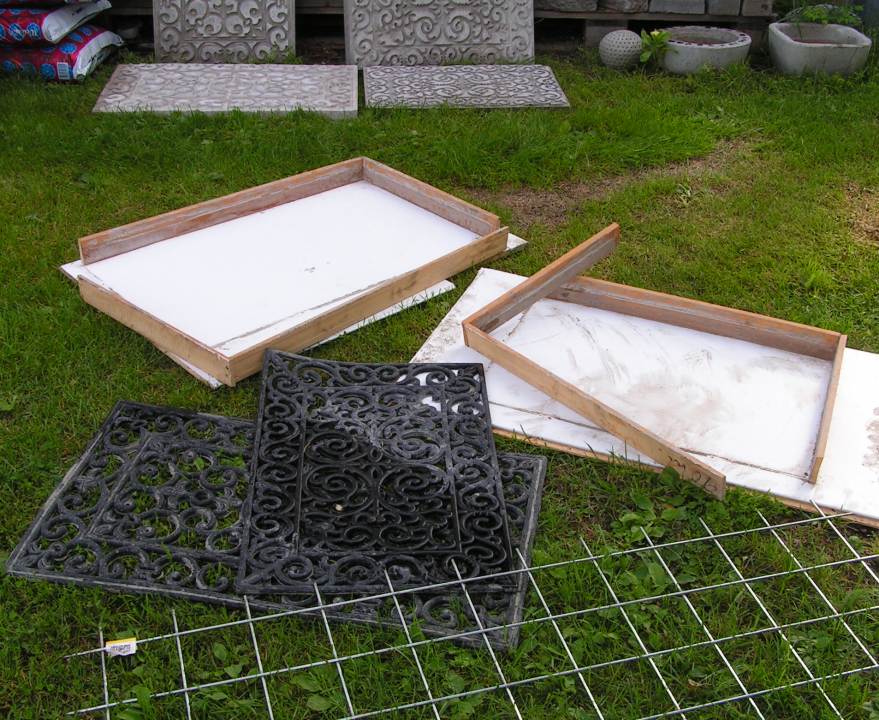
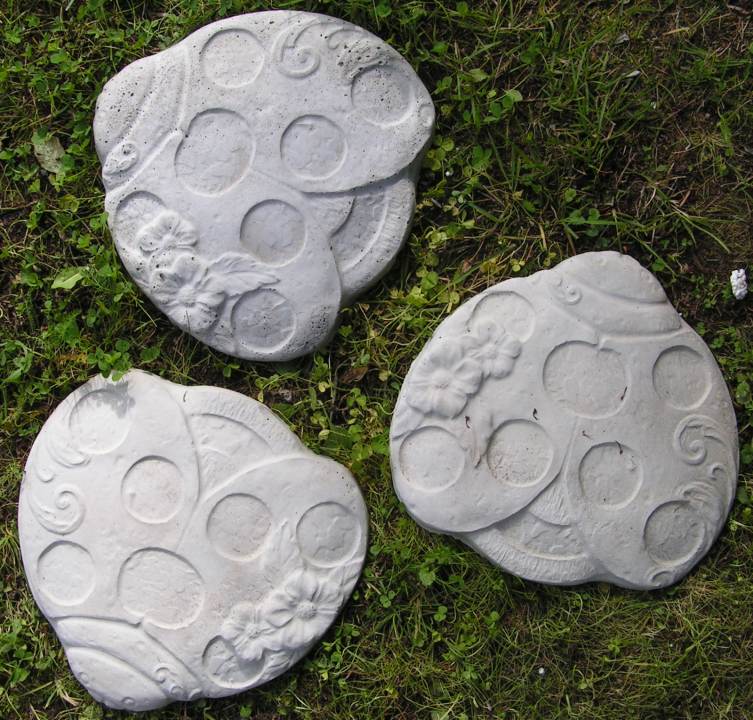
Casting in progress.
Every other day during summer was spent on casting these stones. Now I have almost enough for the planned area to be paved. To build the casting corner will be a fun project for next summer!
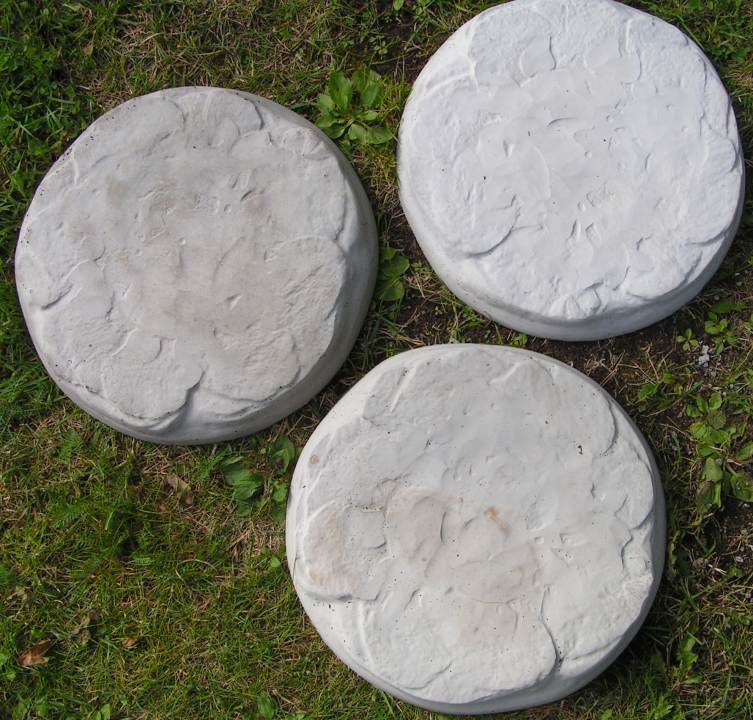
Lots of stones but not enough!
Update on the snow
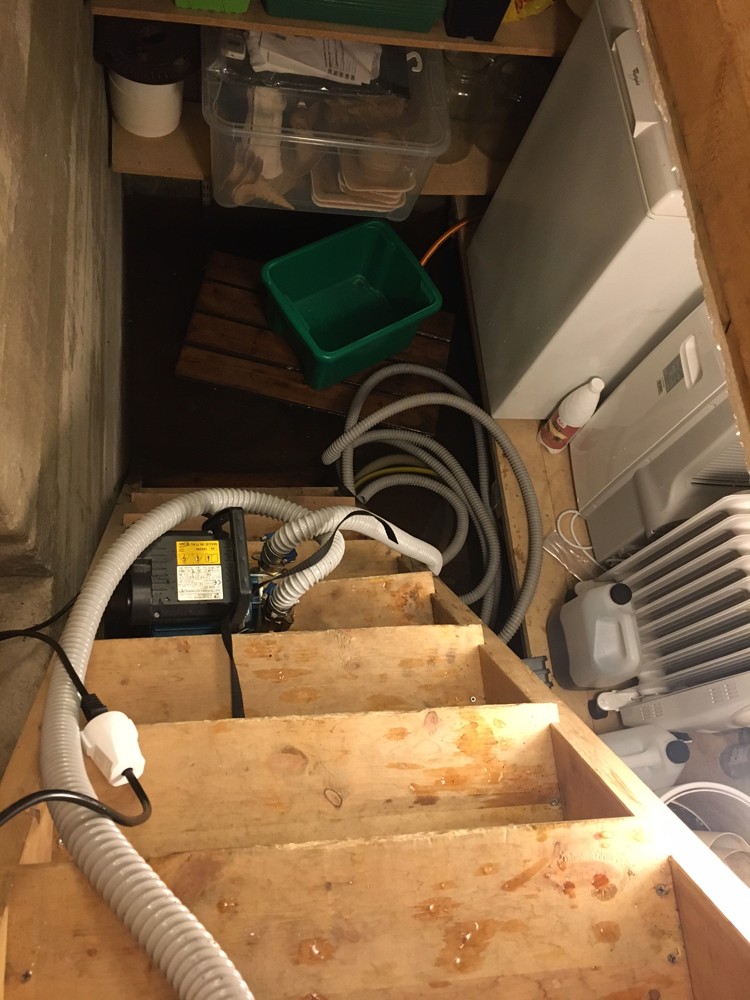
All the snow we got a month ago melted after a week and then we got lots of rain. This caused our very small cellar to overflow. This happens usually during spring but rarely during fall. We got about 30 cm of water on the floor. We have a small freezer down there but it’s placed on a shelf about 50 cm up from the floor to protect it from overflowing. We had to pump out the water for some days and now its dry again.
The cellar is very tiny indeed!
Yesterday we got some more snow but not as much as last time. I hope it will stay this time!
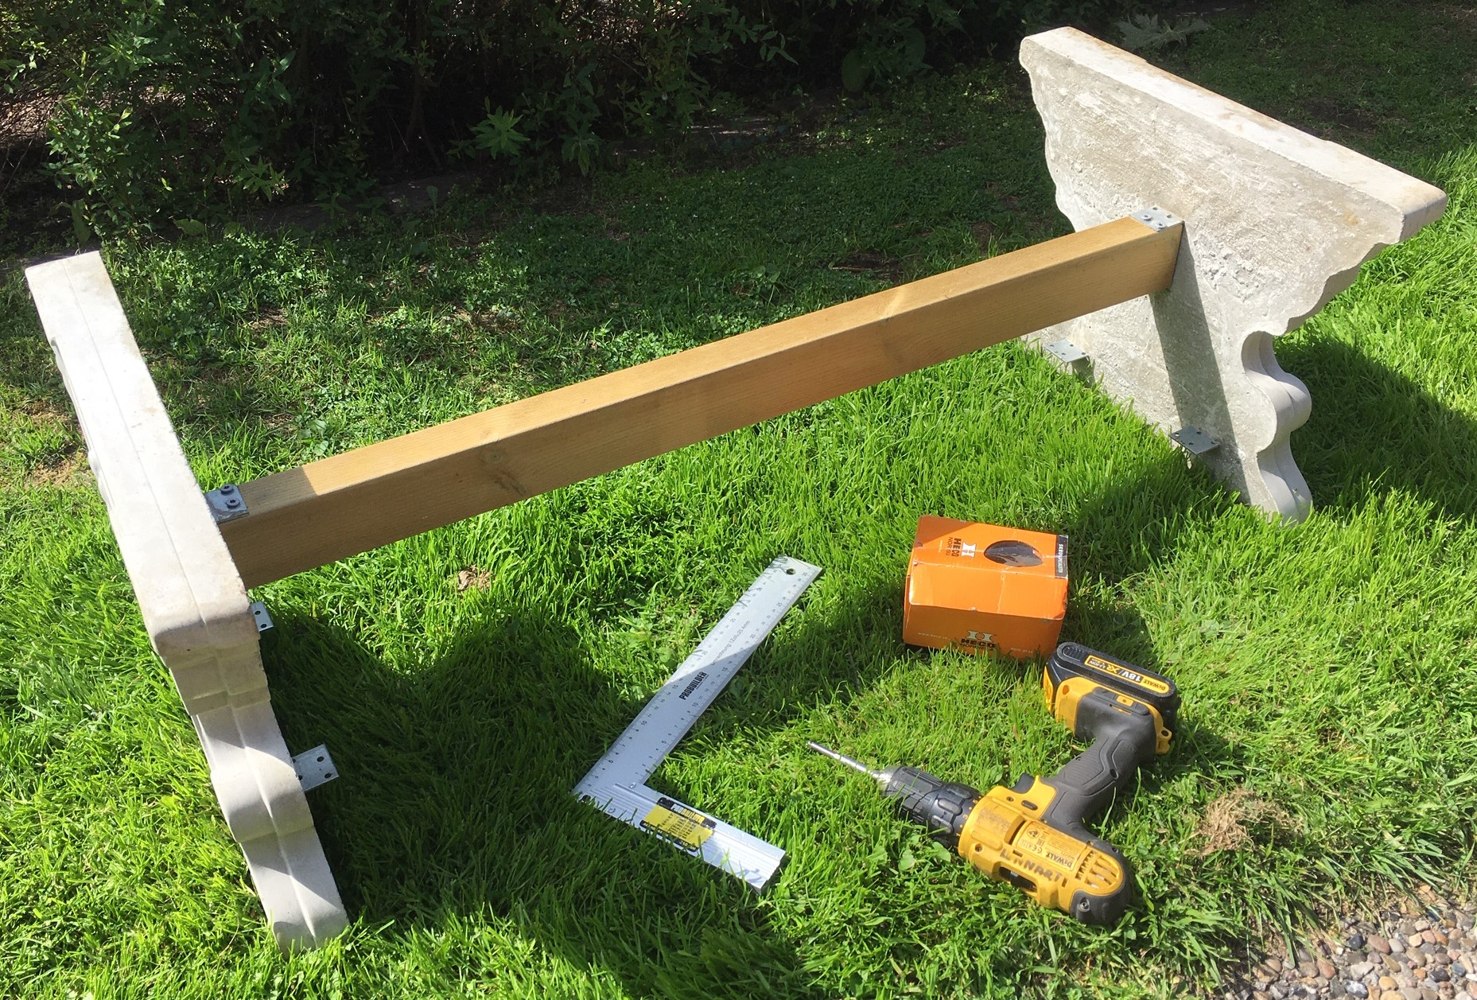
Some years ago i bought a mould for casting bench legs. Since I didn’t know how to attach the top planks, I never got around to use it.
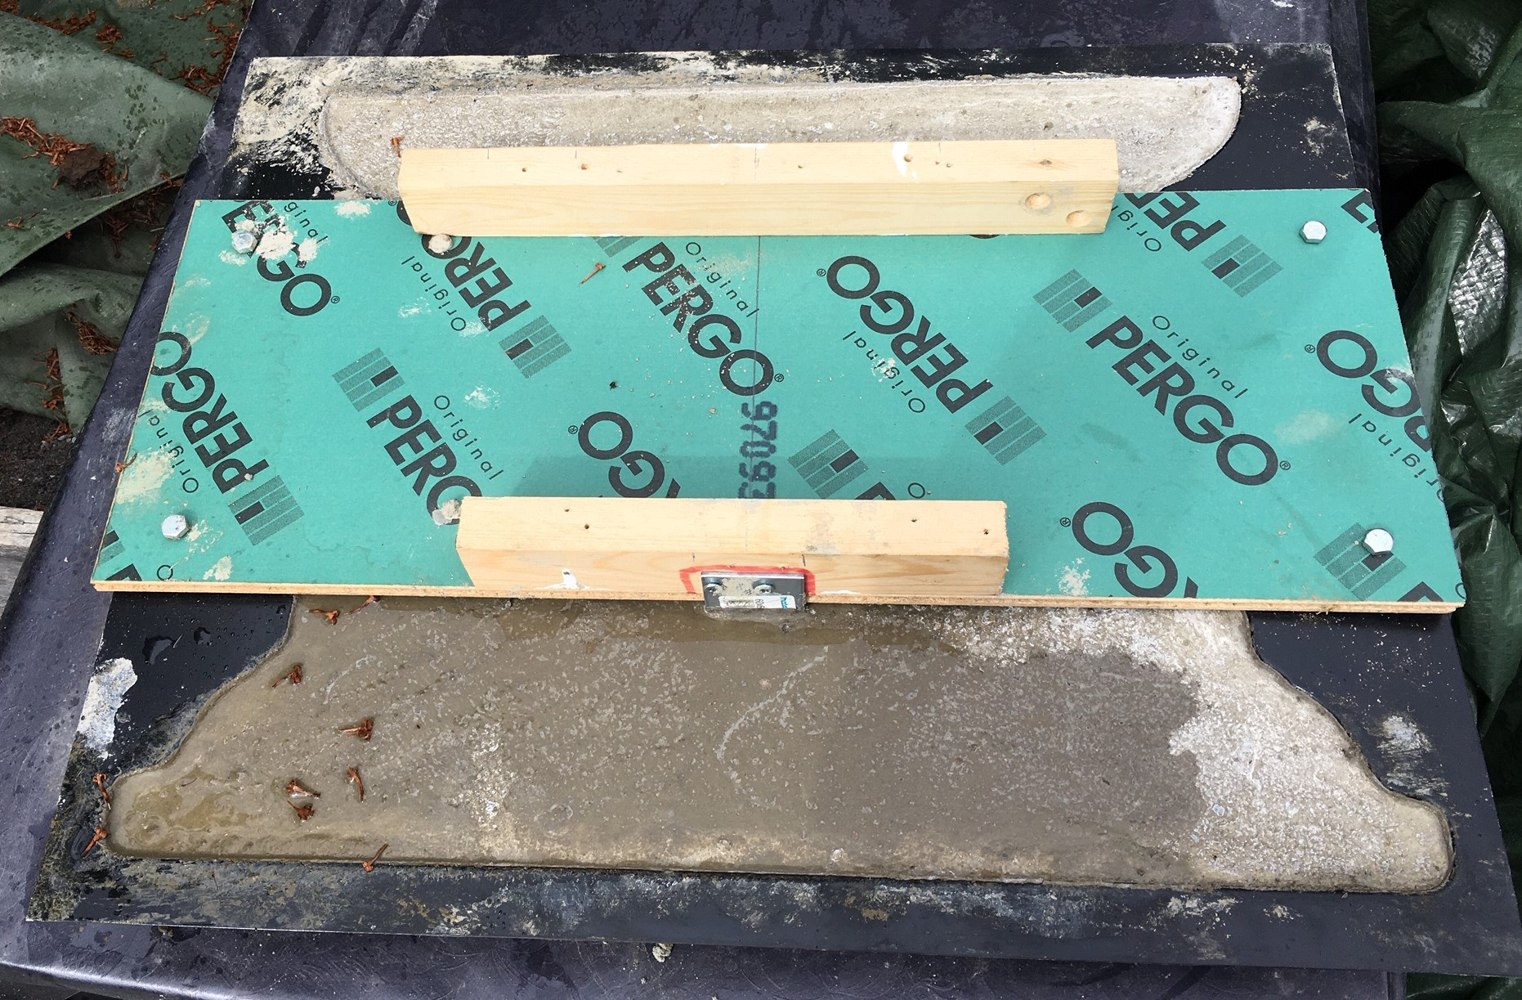
Now I wanted to do something about this. I bought some angle brackets that I was going to cast into the bench legs. I also needed to make a support for the brackets to get them in the right position when casting. I used some left over materials for this.
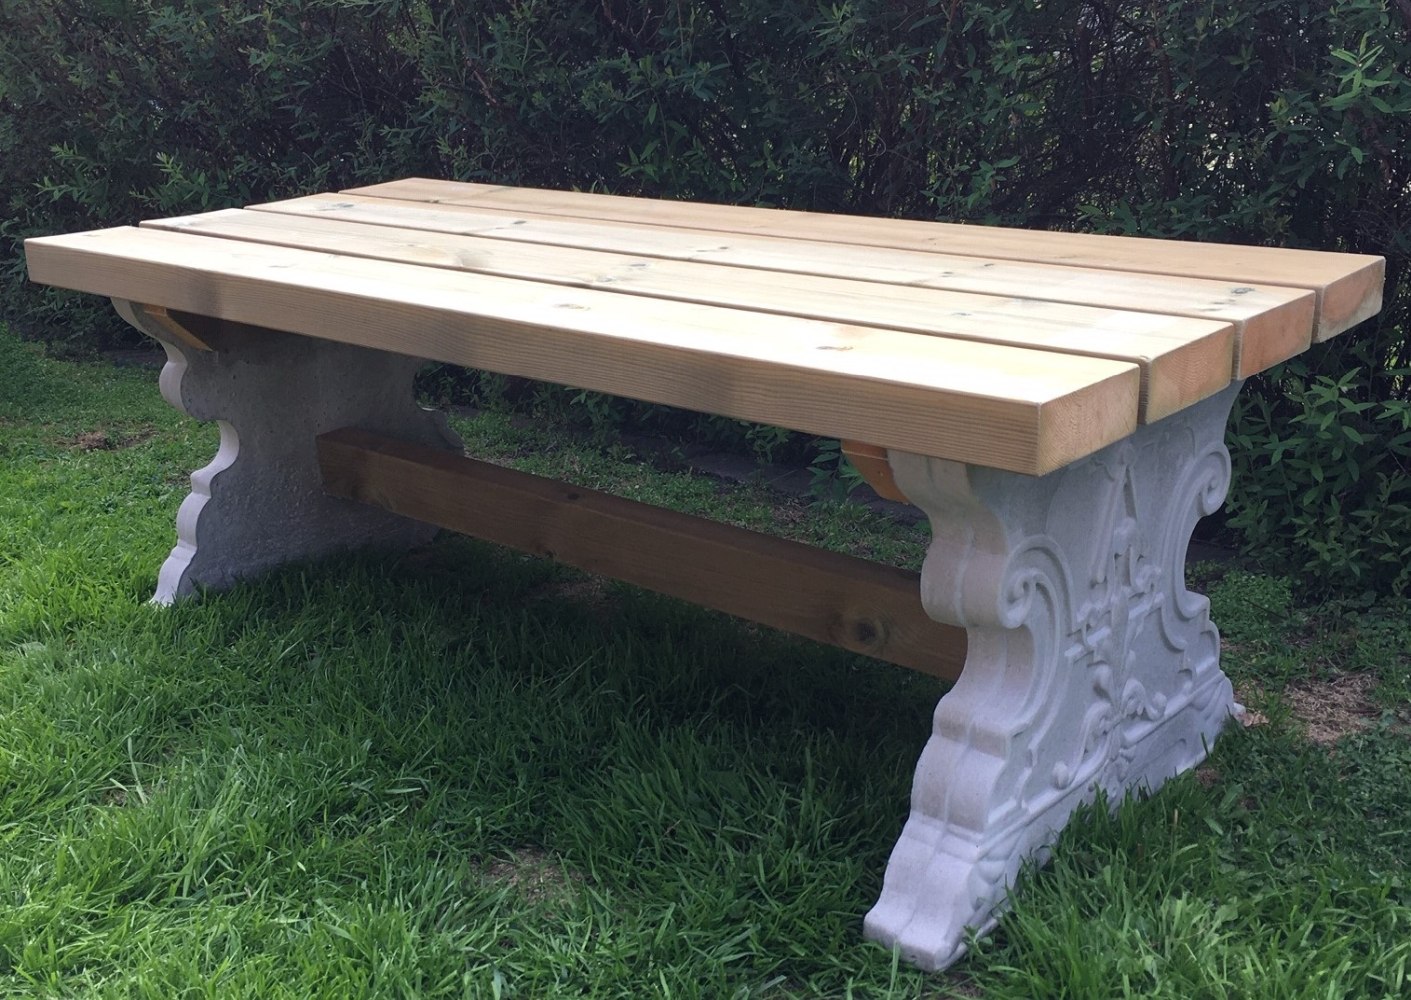
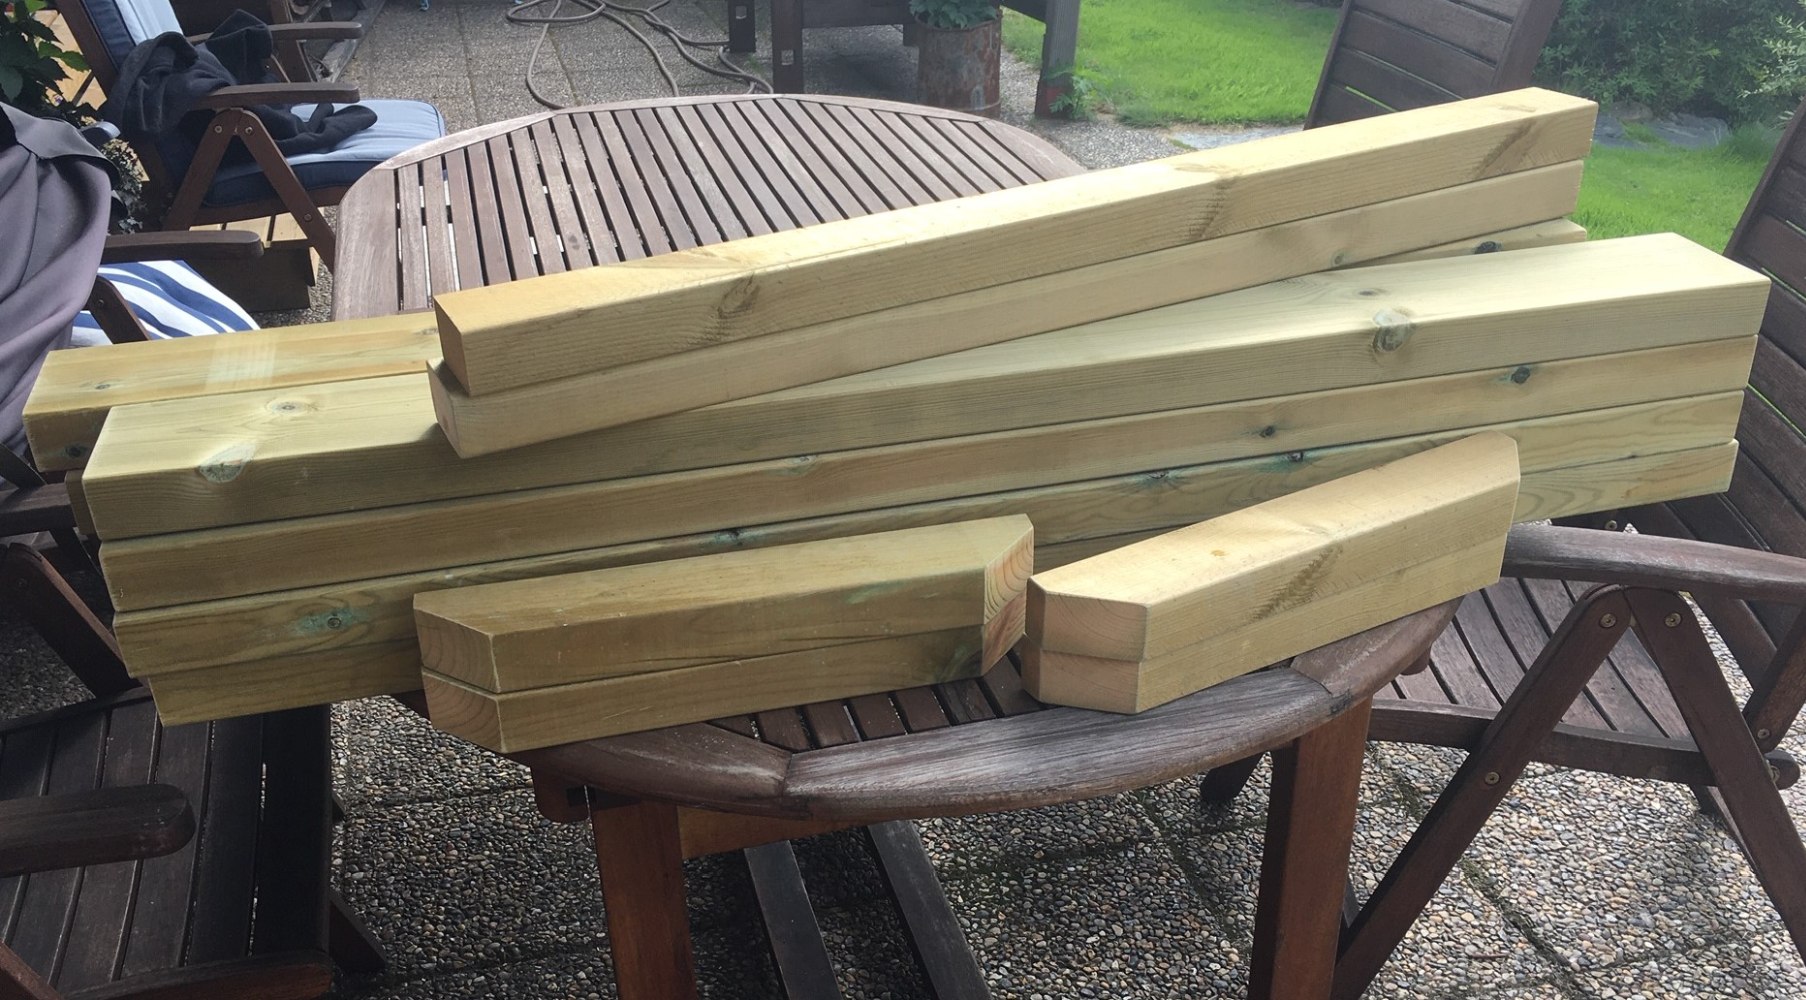
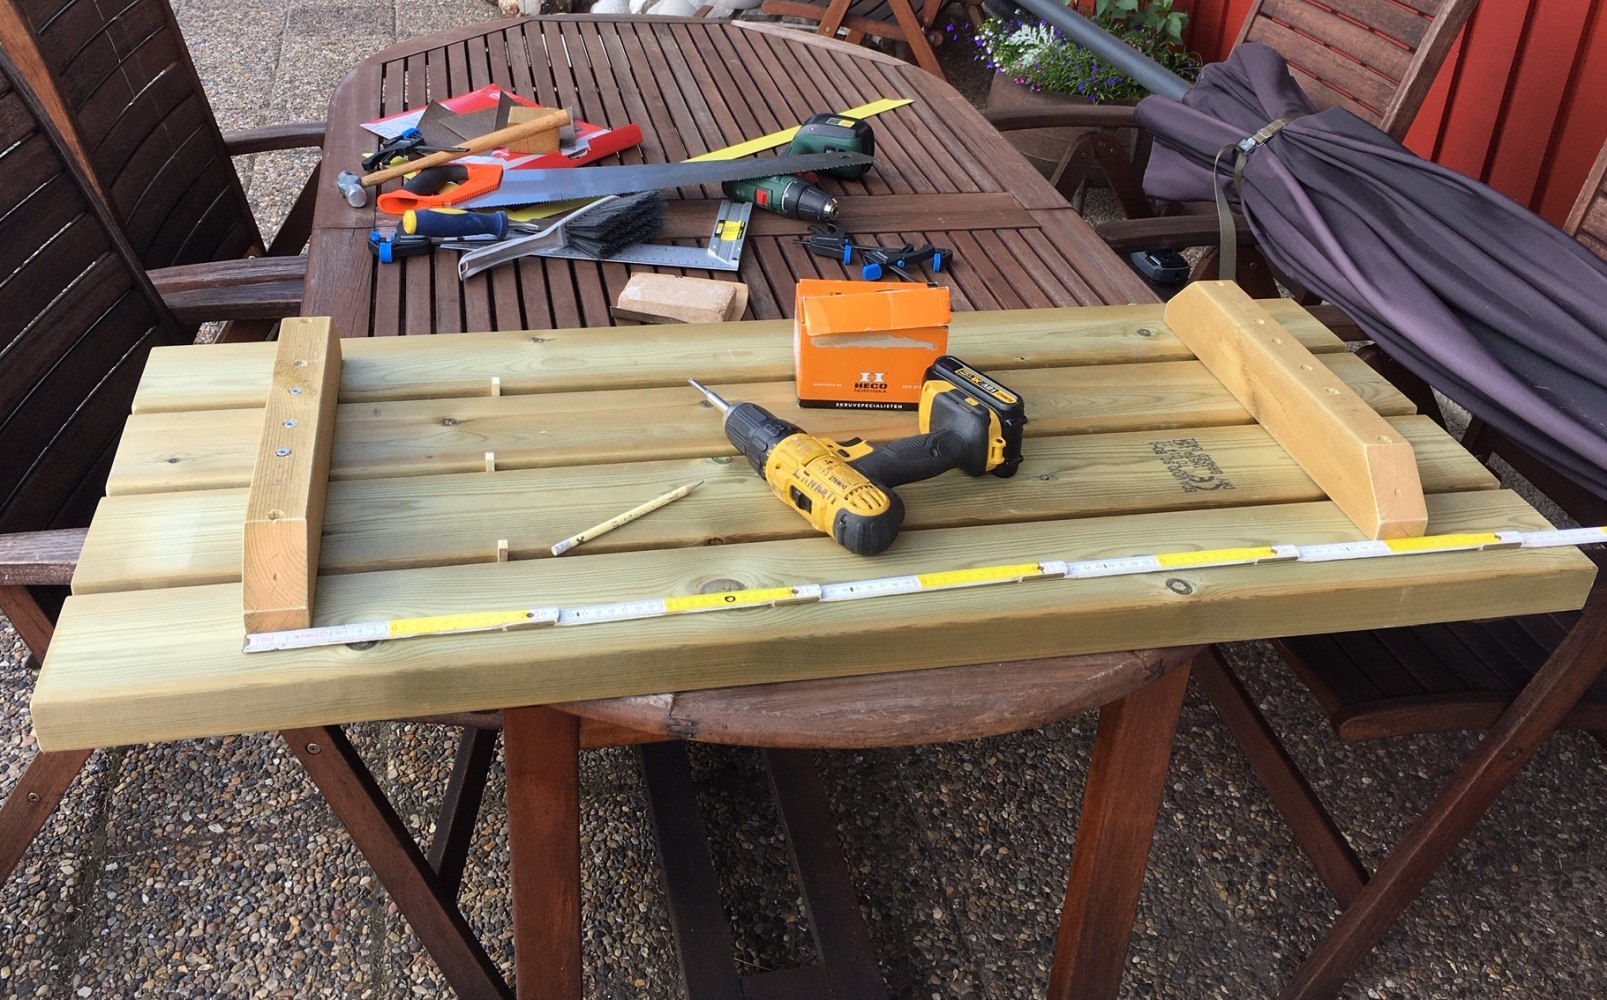
I casted four bench legs and it went just fine. Now to the fun part, the assembling of the bench! For this I had bought some pressure impregnated wood for the top and cut it into the dimensions I wanted.
Before I screwed the top part on the legs, I mounted a reinforcement between them. Here it is up side down so I could put the screws in.
And here is the two finished garden benches. Aren’t they gorgeous!
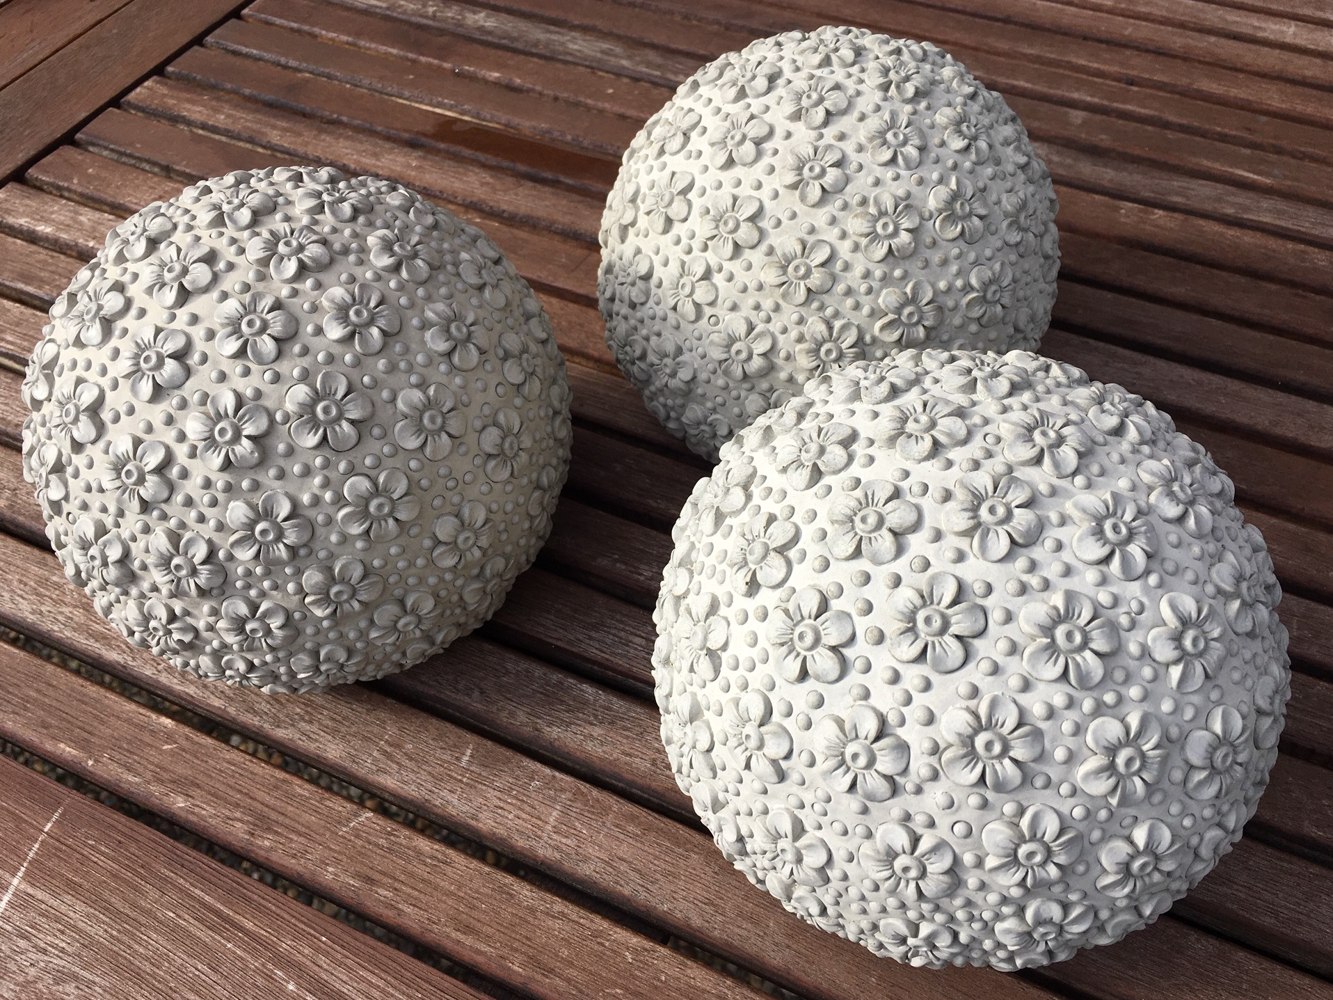
The flower ball latex mould is finally ready and I have casted some balls with really good result. To make it easier when casting, I also made a support for the mould.
I don’t know if I will paint the balls because I kinda like the colour of raw concrete. Look how nice they are!
I got a new idea to make latex moulds to cast concrete flower balls. They hopefully will look fantastic as garden decorations. I hope they will turn out great, and if so, I will make more of them!
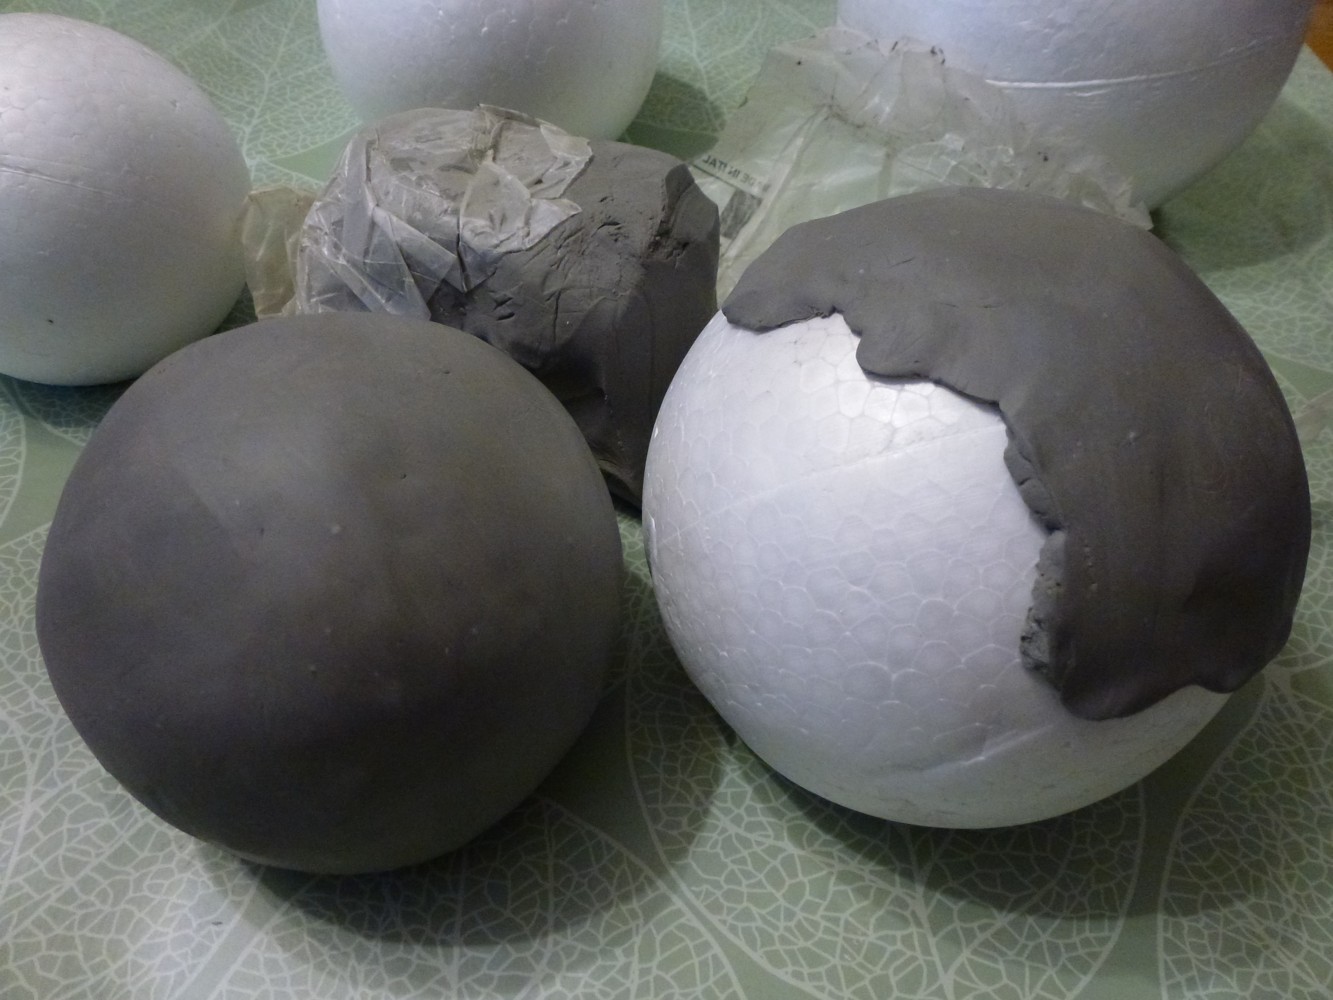
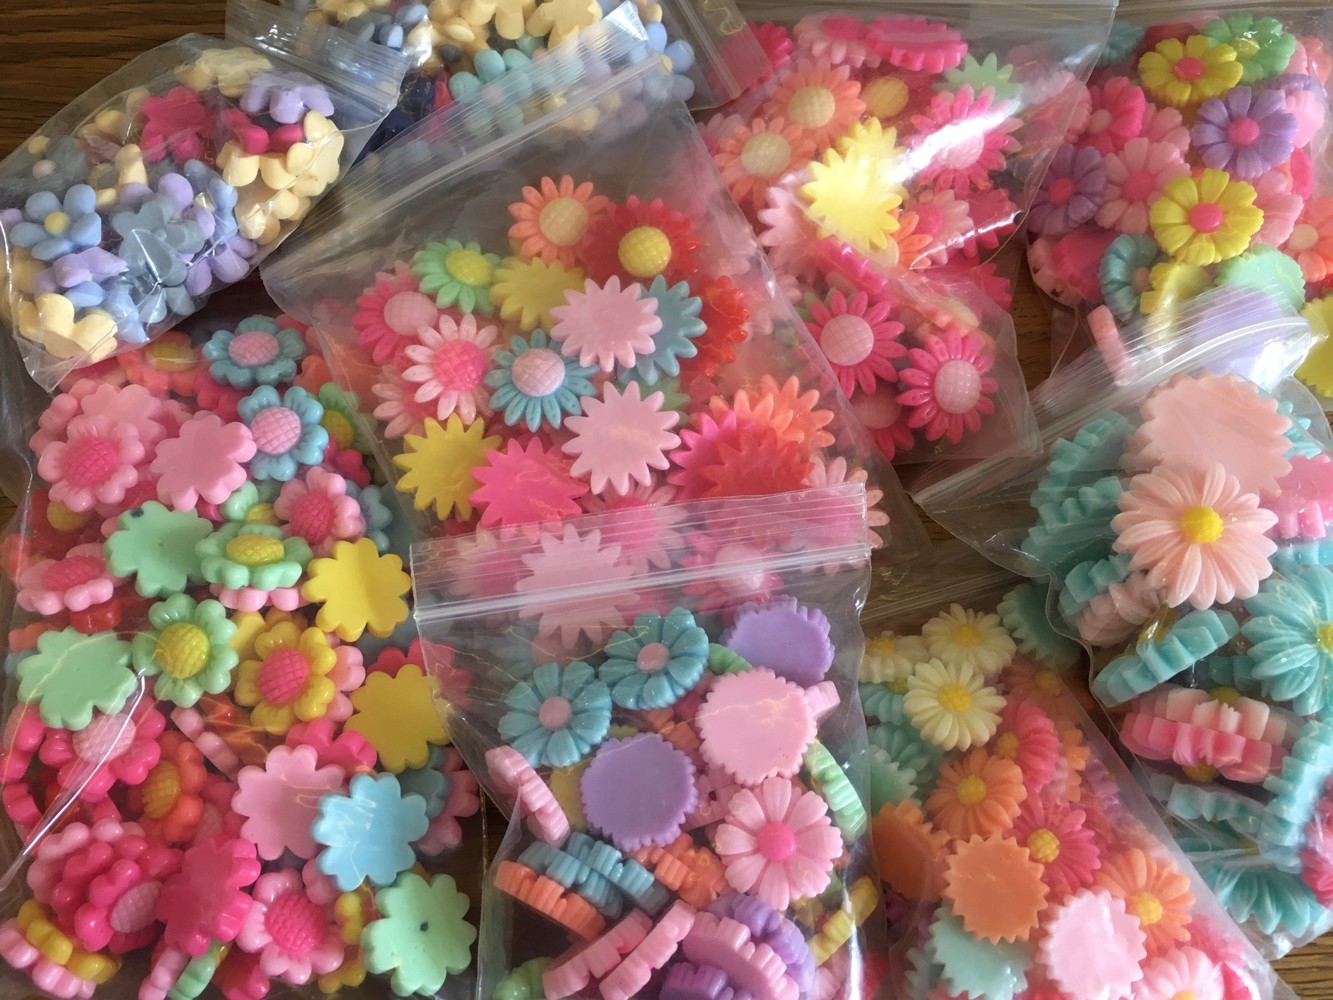
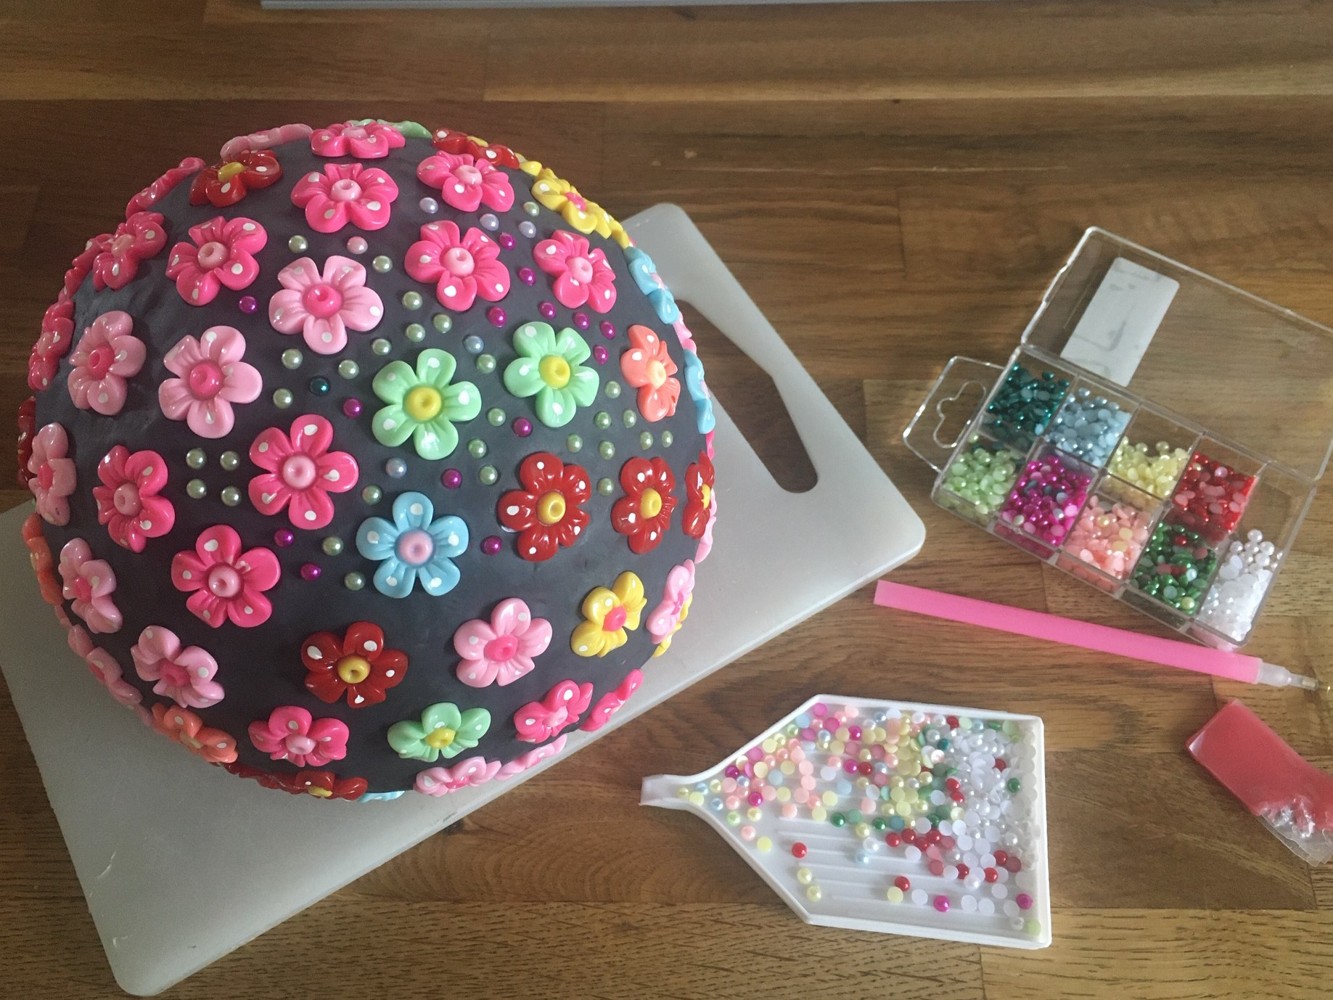
I have bought a bunch of resin flatback flowers to use for this. I also bought some big styrofoam balls in different sizes and some modelling clay (that does not dry). The biggest ball is 14 cm in diameter. I cut a bit off from the styrofoam balls to have a flat bottom for my balls to stand on. Then I put on a thin layer of clay and then gently pressed the flowers into the clay. I filled the gaps between the flowers with small half round pearl beads.
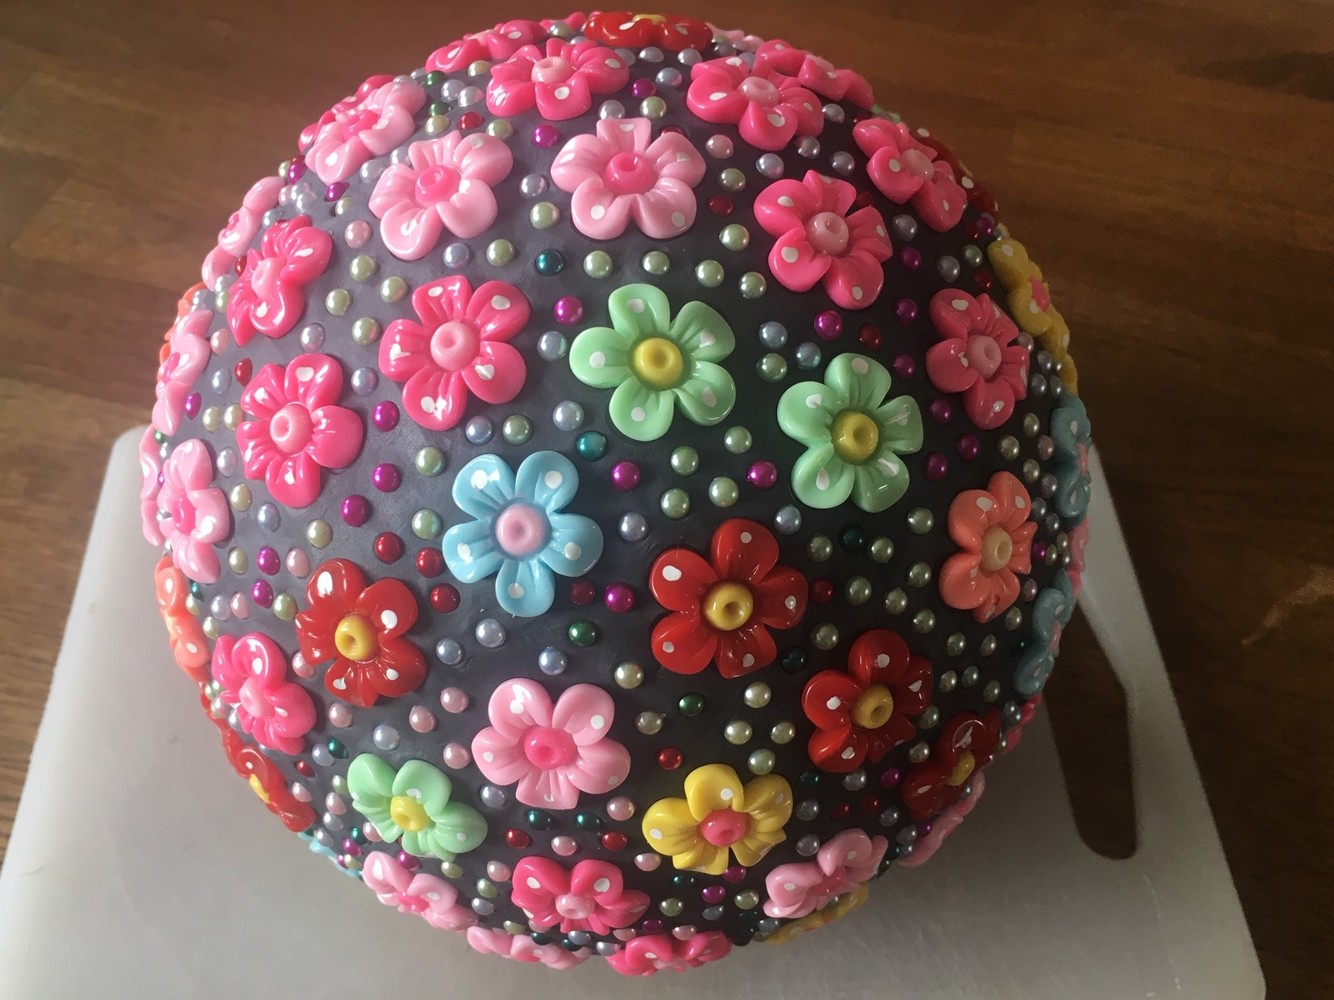
This is the first ball I’m working on. I will make more of them (different designs) if this turn out as good as I think it will do.
Now the long process starts to make the latex mould. The ball has to be covered with liquid latex in several layers. I can put on two layers a day. It will take about two weeks to finish. It is very important to remove all trapped bubbles when putting the latex on. I use a straw to blow the bubbles away. Here I have just put on the third layer of latex.
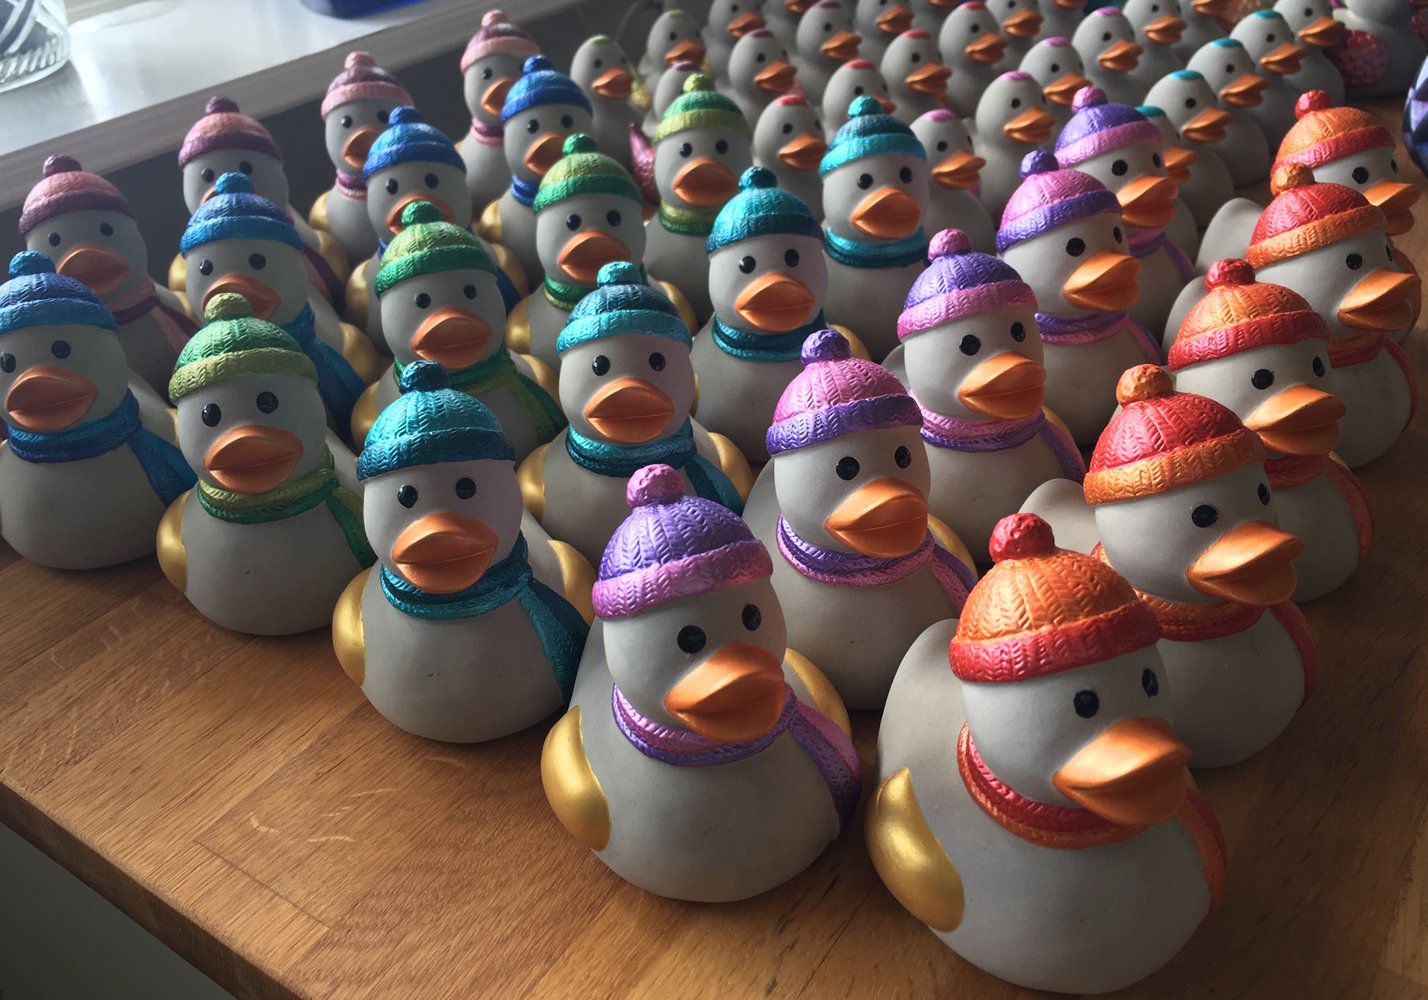
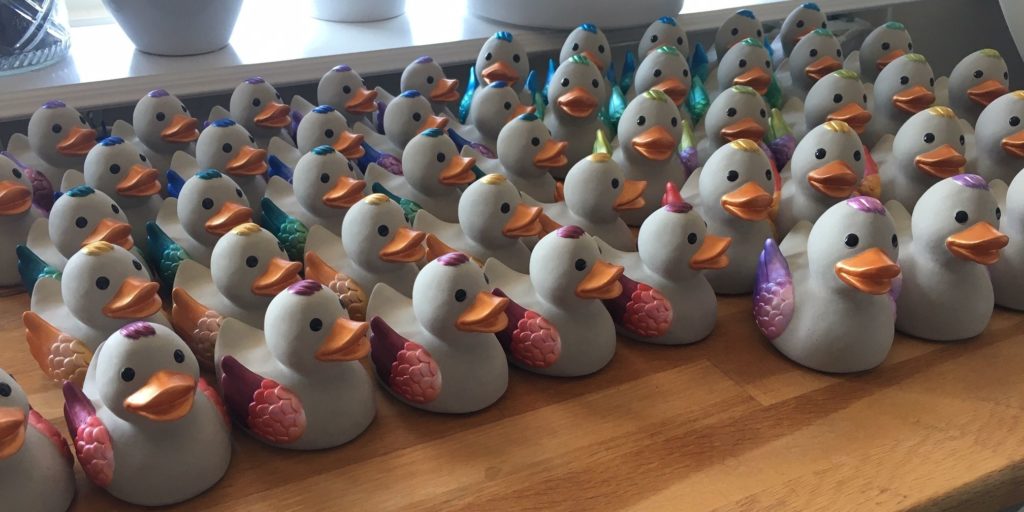
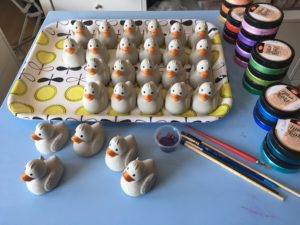
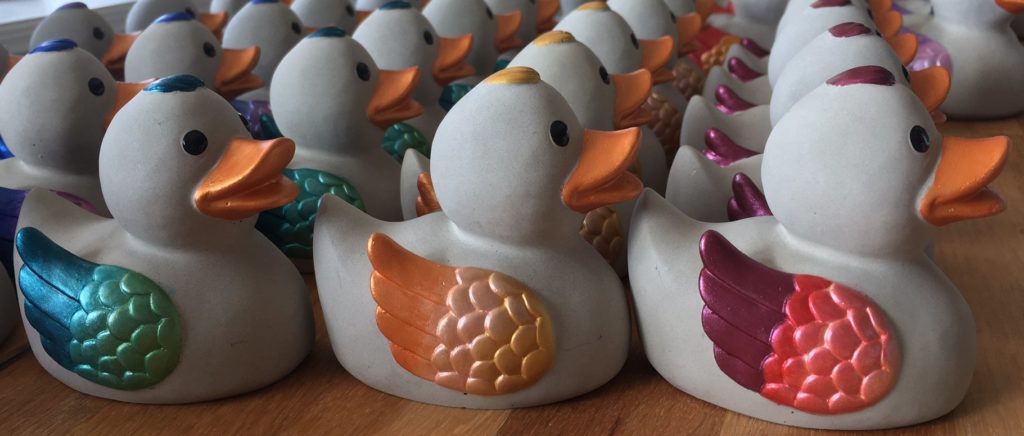
Now I have painted all the small ducks. They are so cute! These are the last ones:
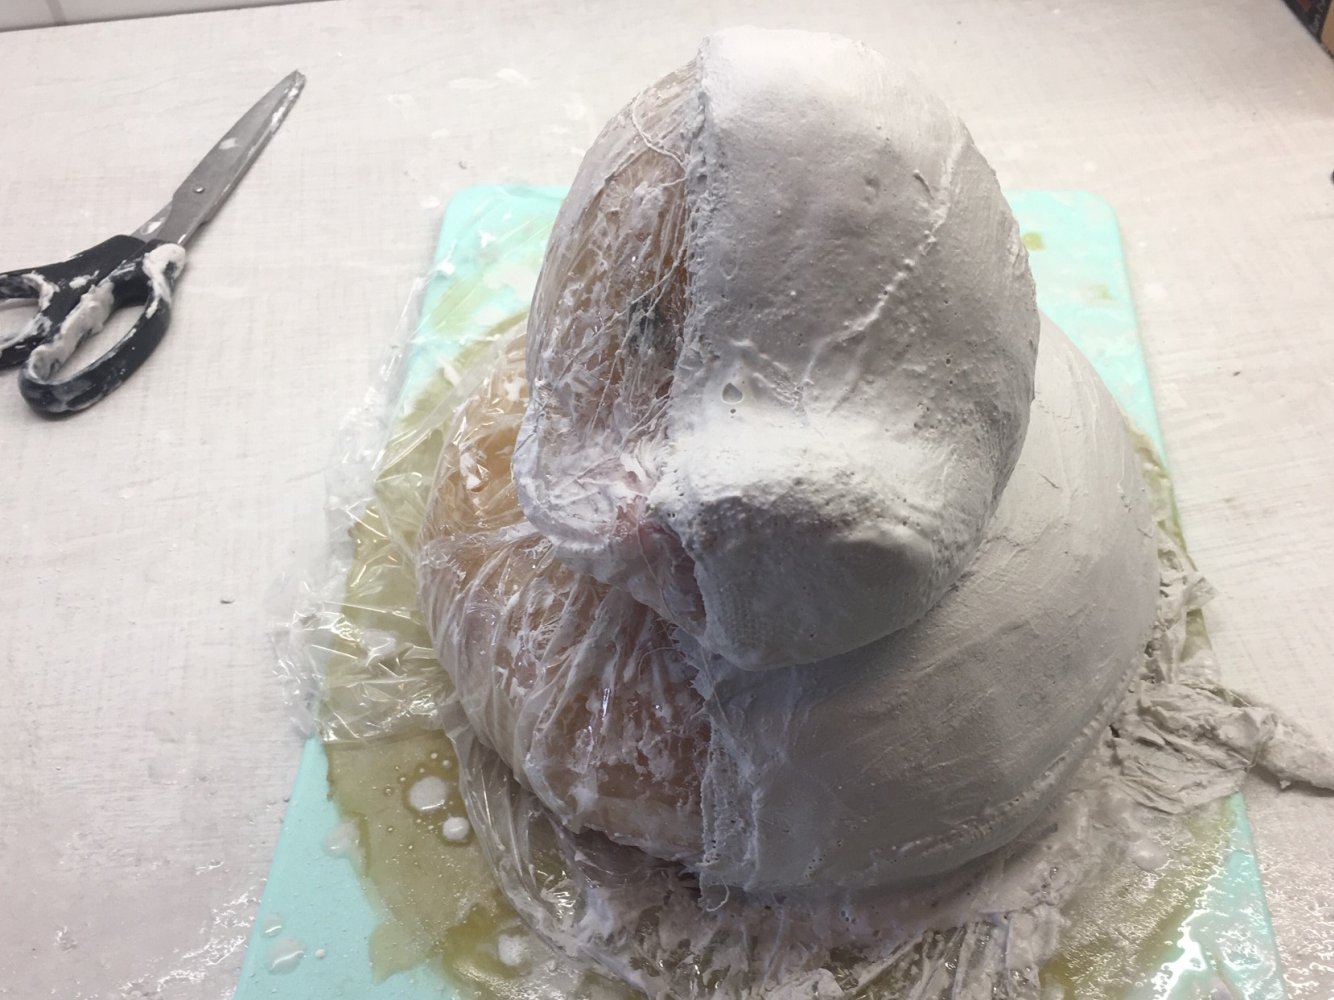
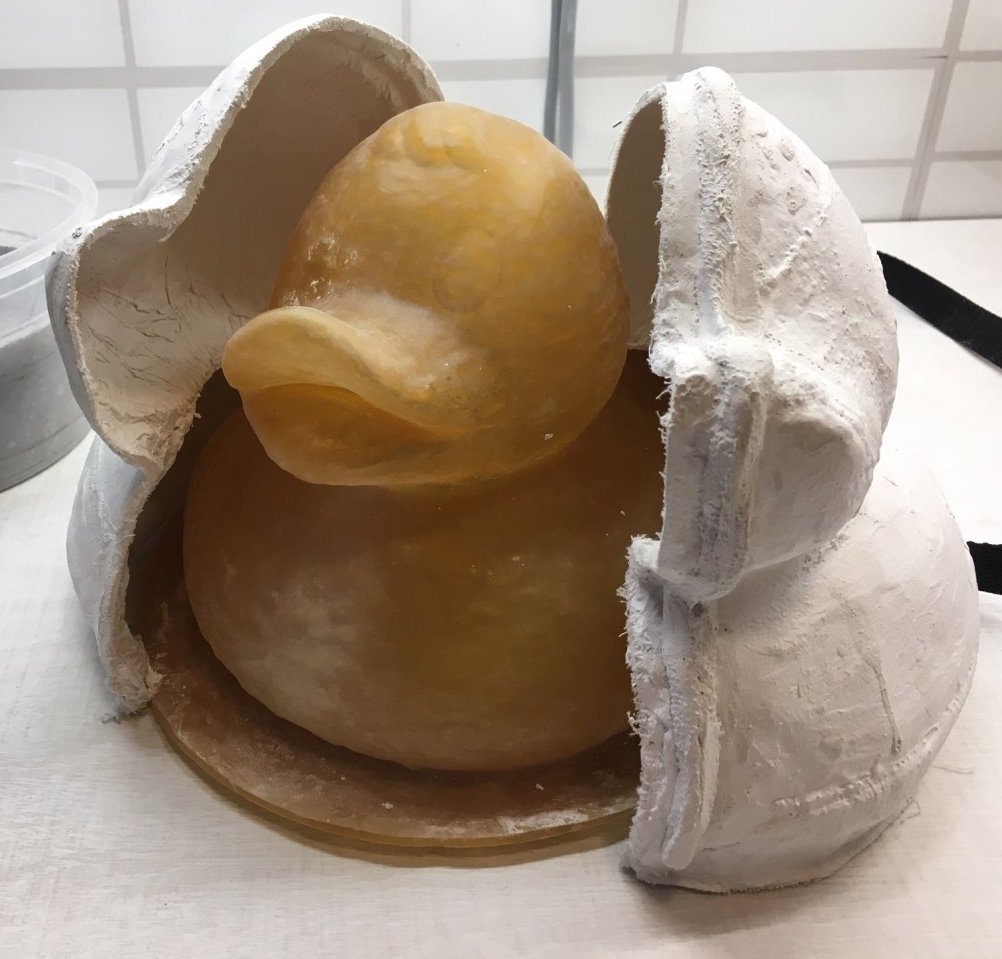
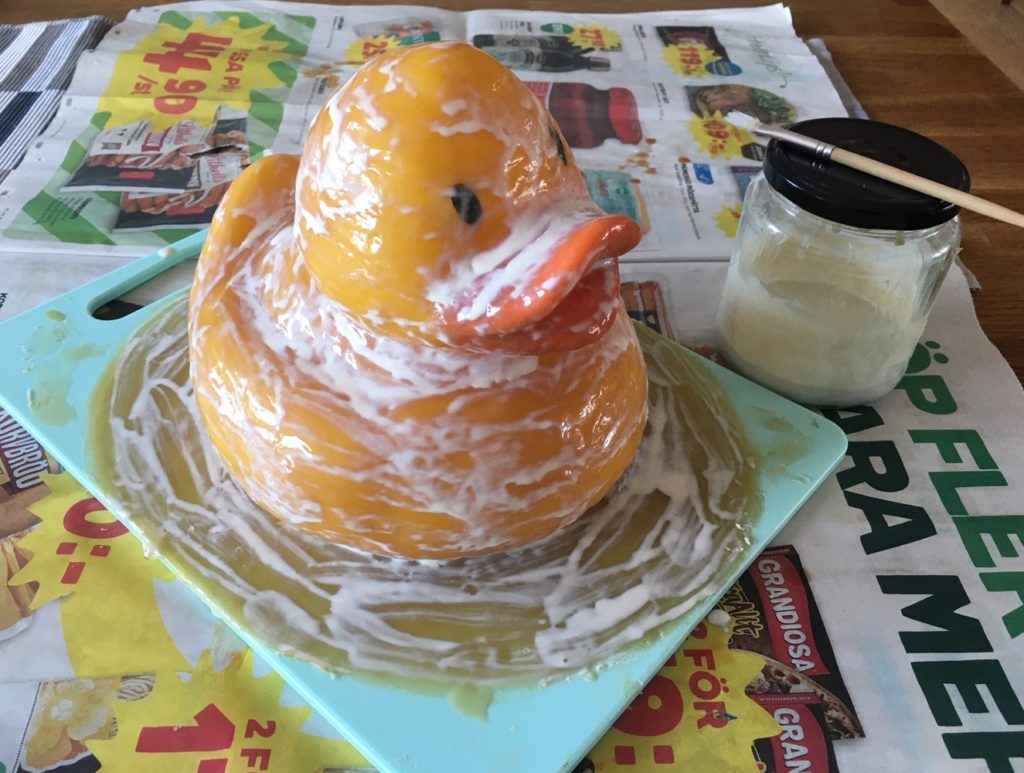
The work on the big duck mold is progressing. I have finished the latex mold and have made a support for it using plaster bandage. I have made it in two halves to make it easy to remove it. On the first half I made a small ridge about 10 mm in from the edge so the other half gets good support. When it had hardened I trimmed it with my dremel so it looks nice.
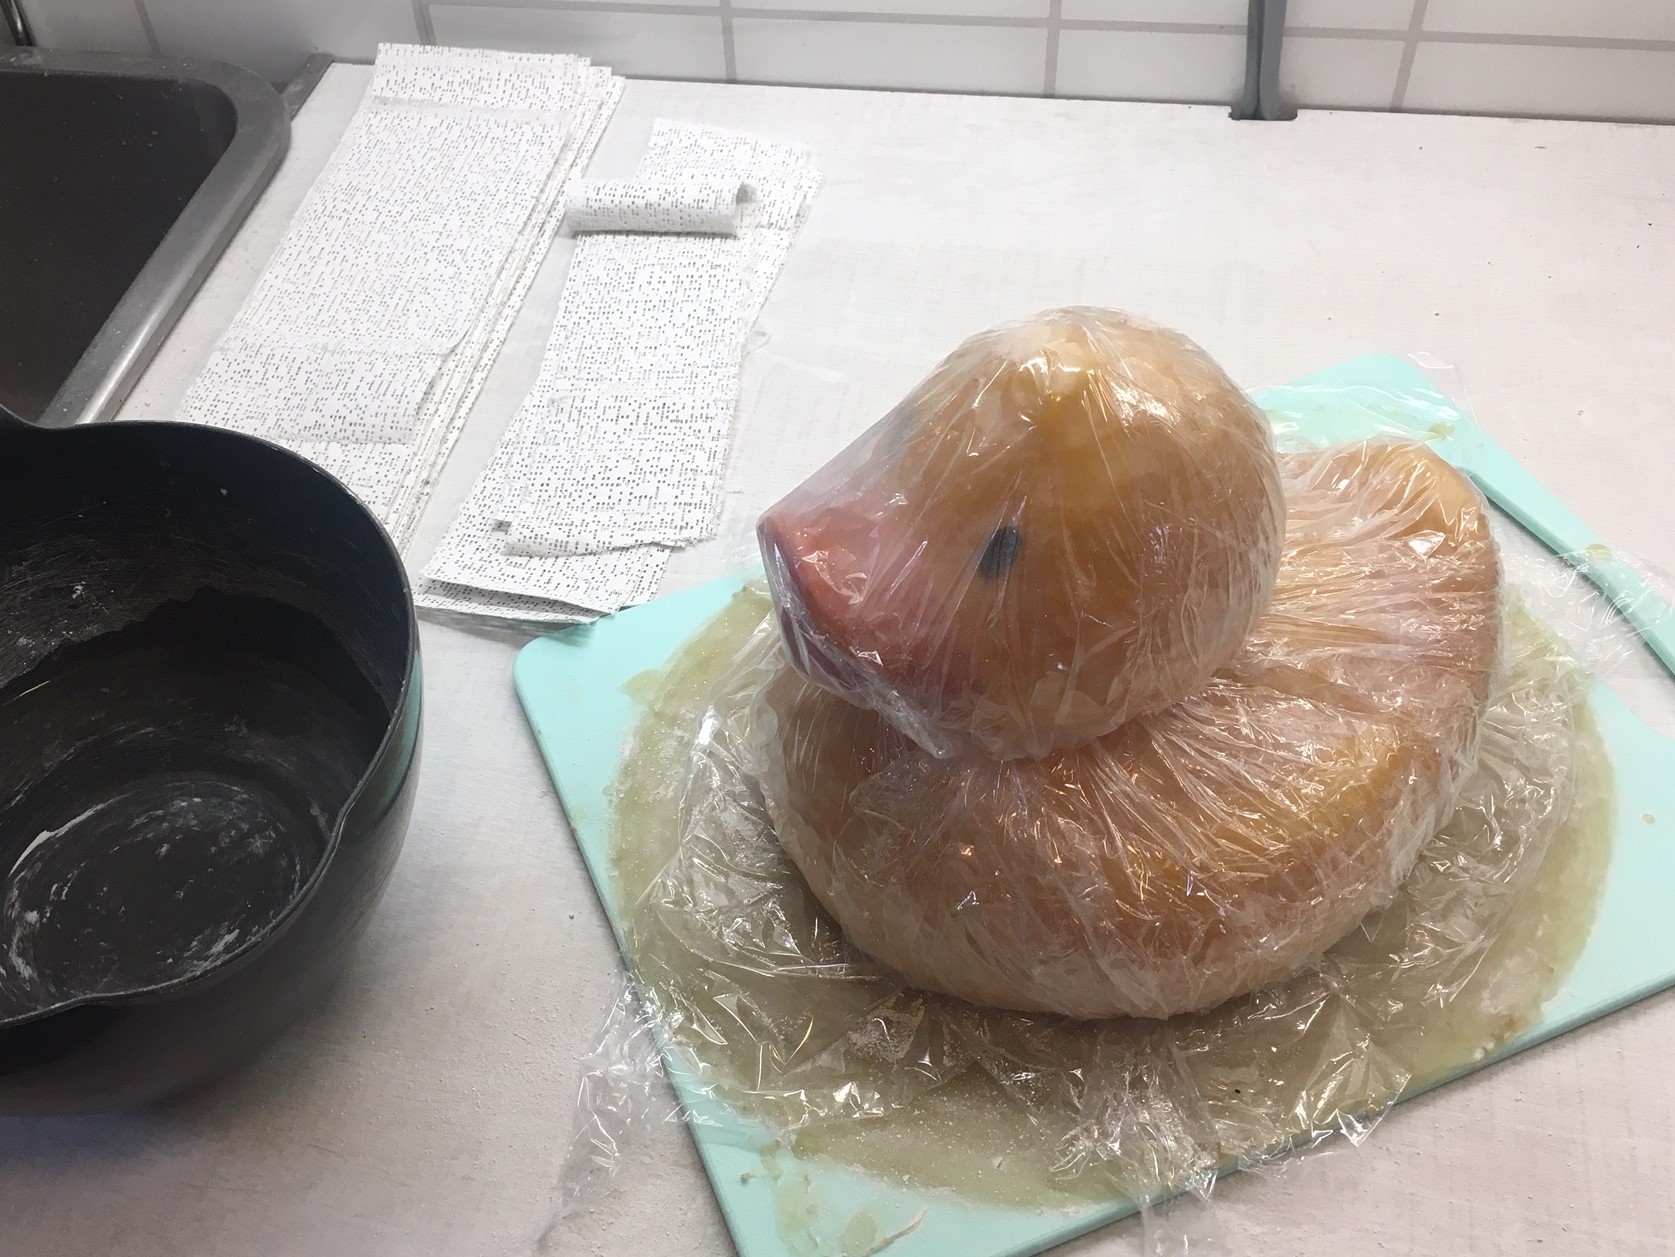
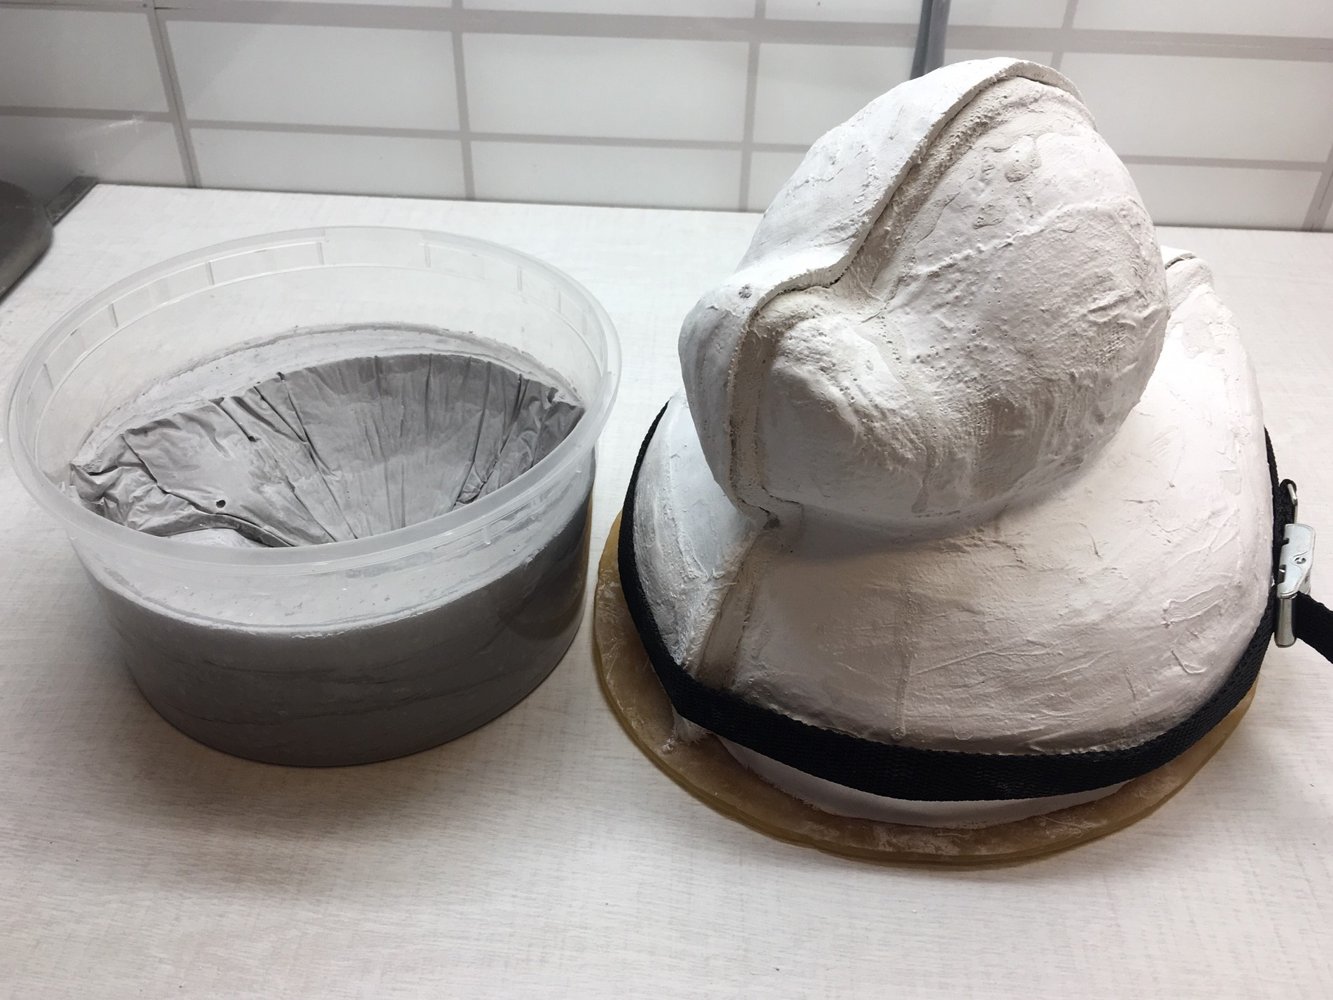
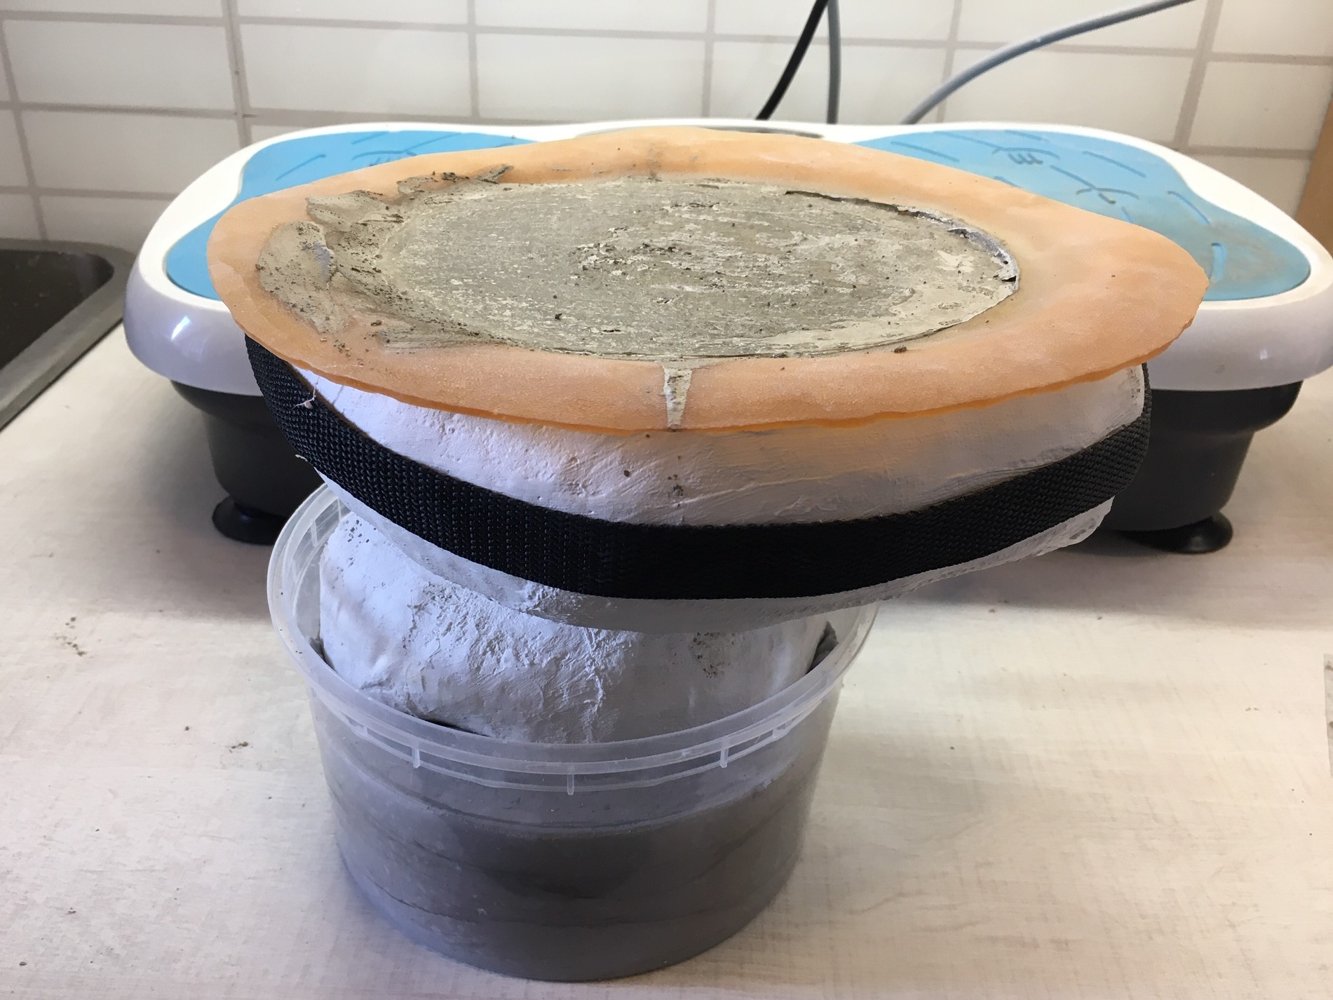
When the two halves was finished I needed something to keep them together when casting. I used a strap for this but needed something more to hold it in the right position. I filled a small plastic jar with plaster and put the head down in it. I had put a thin plastic film on the head so it didn’t got stuck in the plaster.
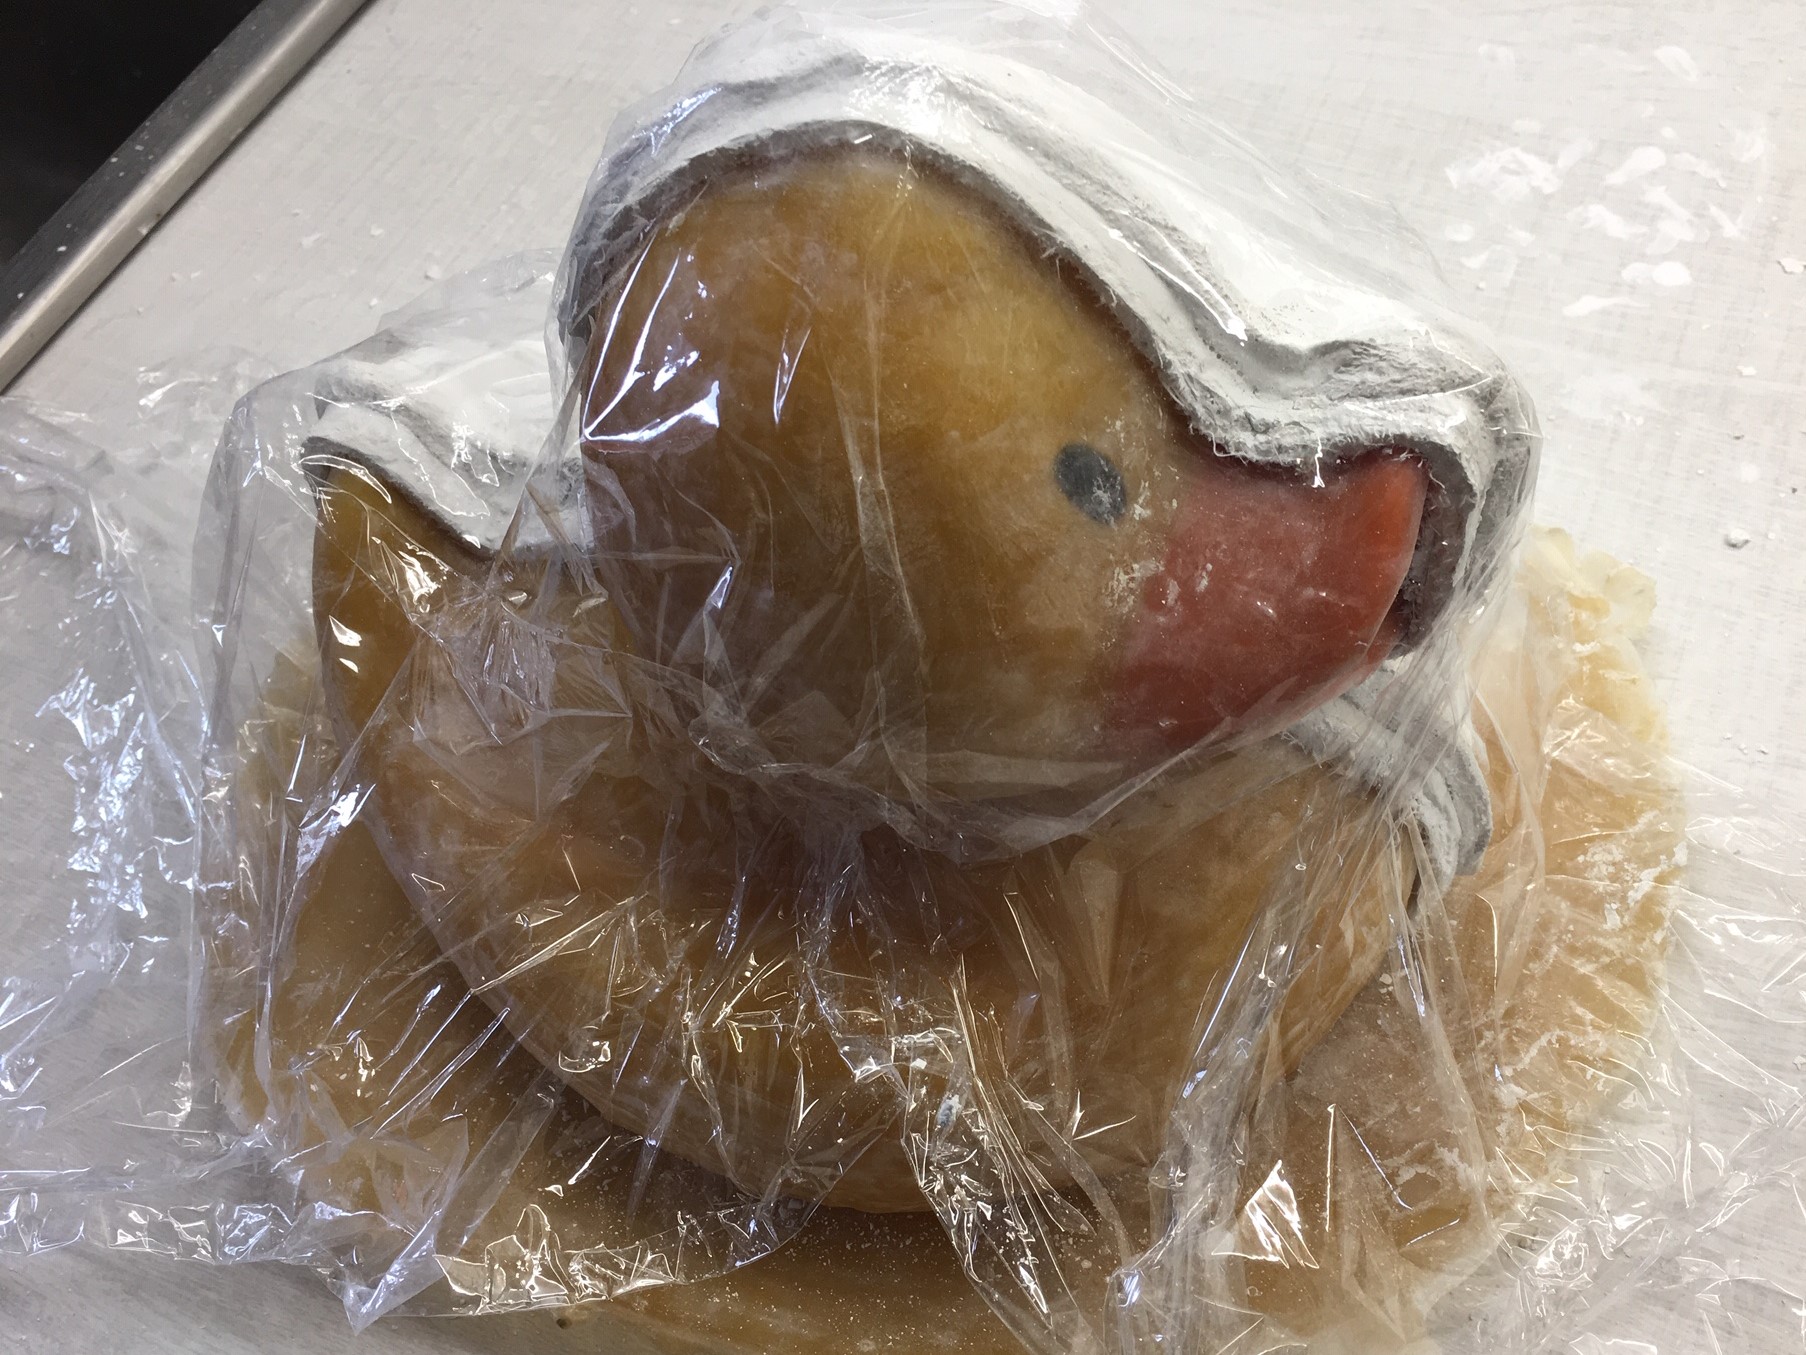
Now I was ready to try it out! The mold and the support worked very well. It was easy to cast and everything went well. When I removed the mold, I saw that the beak was a little too thick in the upper part because I hadn’t put in a support for the beak in the two halves.
Now I have fixed this and I hope the next big duck will be perfect!
After a very long break from writing here, I’m back again! I hope to continue with regular updates from now on. I recently lost my job, (not because of the Corona pandemic), and therefore I have plenty of time to do my hobbies.
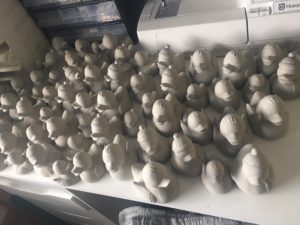
I have been quite busy with making moulds for garden decorations. My funniest project is to make small ducks to have around my pond. It will look silly and so nice! I have made latex moulds on different rubber ducks and now I have cast more than 100 small ducks to put in the garden.
I’m still working on a bigger duck mould and hopefully it will be ready for casting within a week or so.
To paint all the ducks is very painful for my shoulders so I can only paint about 15 ducks a day. I use Inka Gold when painting and it looks so good!
After a very rainy start of summer we had some good weeks in July. I have been busy working in the garden but I finally found some time to do some concreting. During spring I made some flowers and put them on iron bars. When casting, I used a large straw cut in shorter pieces and plugged in the end, to make the hole for the bar. The flowers where quite fun to paint. I have still a big bunch of roses to paint, maybe during winter I will find some time to do that. 🙂
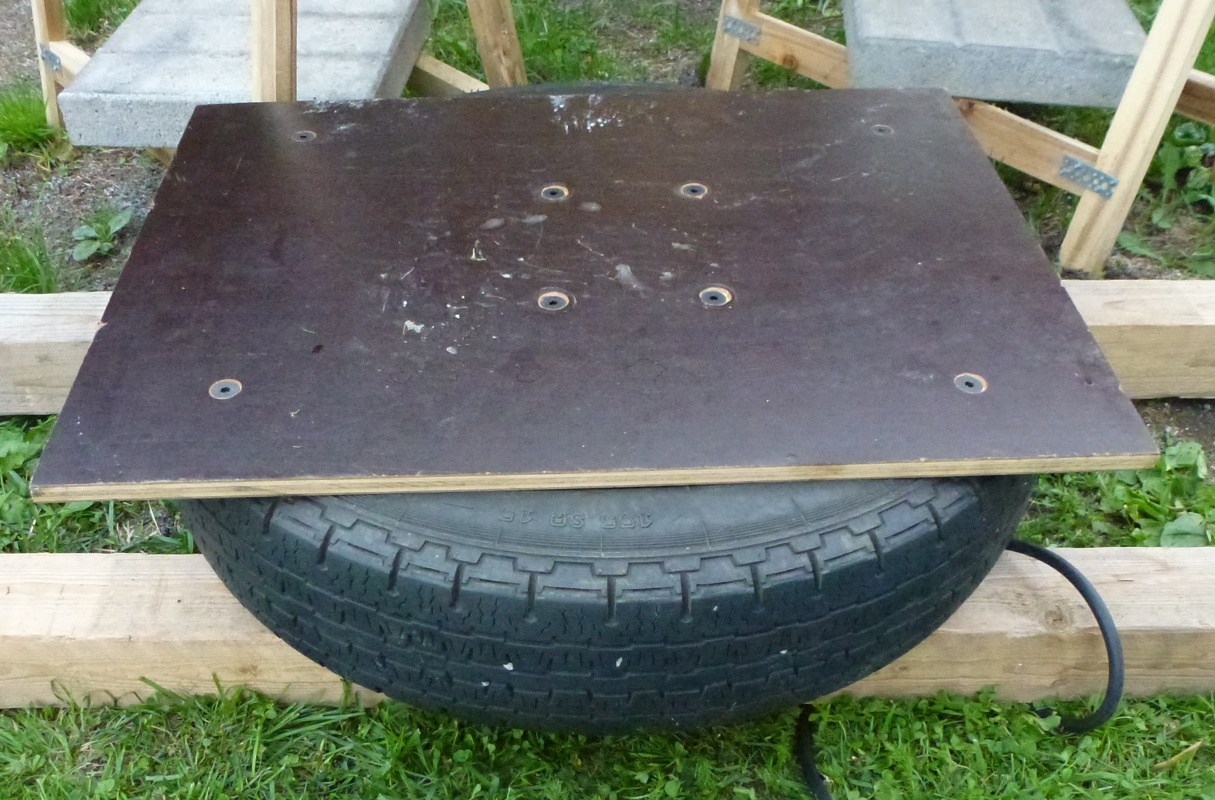
Vibration table
I have since long ago always wanted something that helps vibrating molds when casting. Last year I saw a very neat idea on you tube where they built a vibration table using a car tire and an electric motor. This I had to try! I already had an old motor and an old tire was easy to get. I screwed a plywood on top of the tire and then the motor underneath. On the motor shaft, I attached a small weight to get the vibrations. I had to adjust the weight on the shaft a couple of times to get it to vibrate as I wanted. It works like a treat. I just have to get it higher up because my back hurts when having it on the ground.
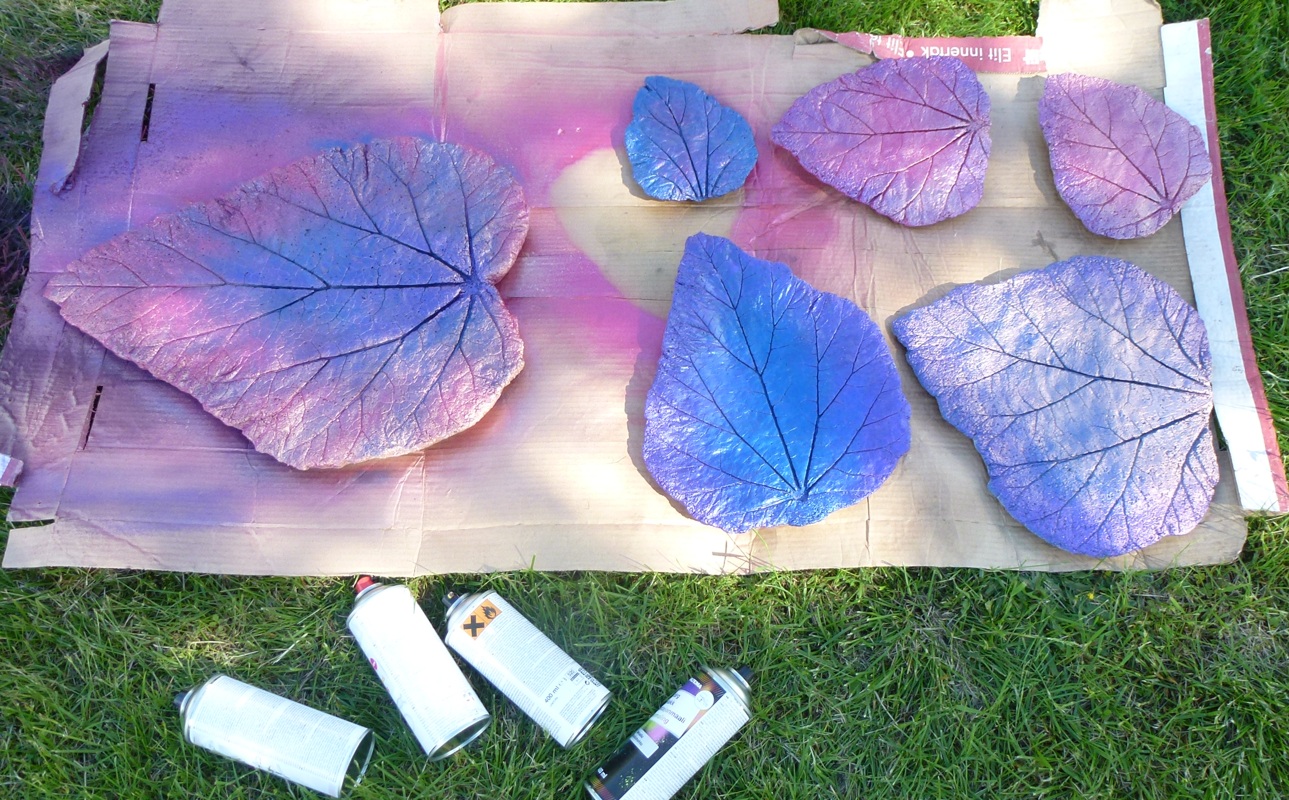
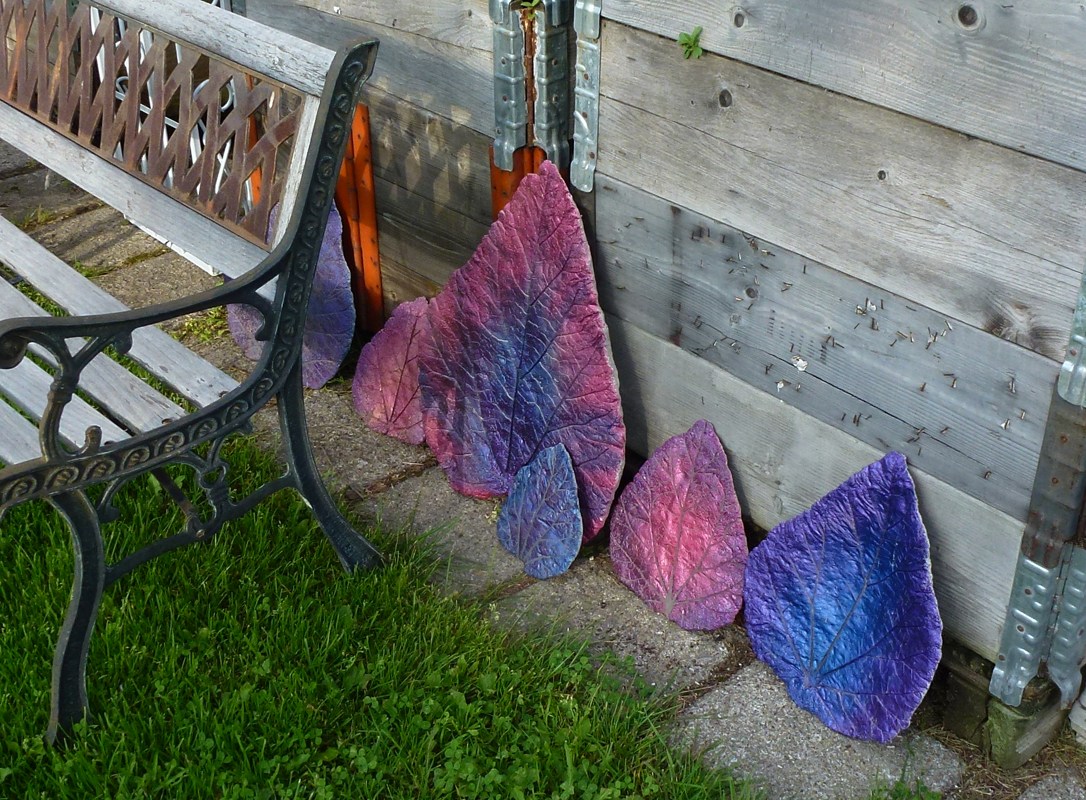
Spray paint
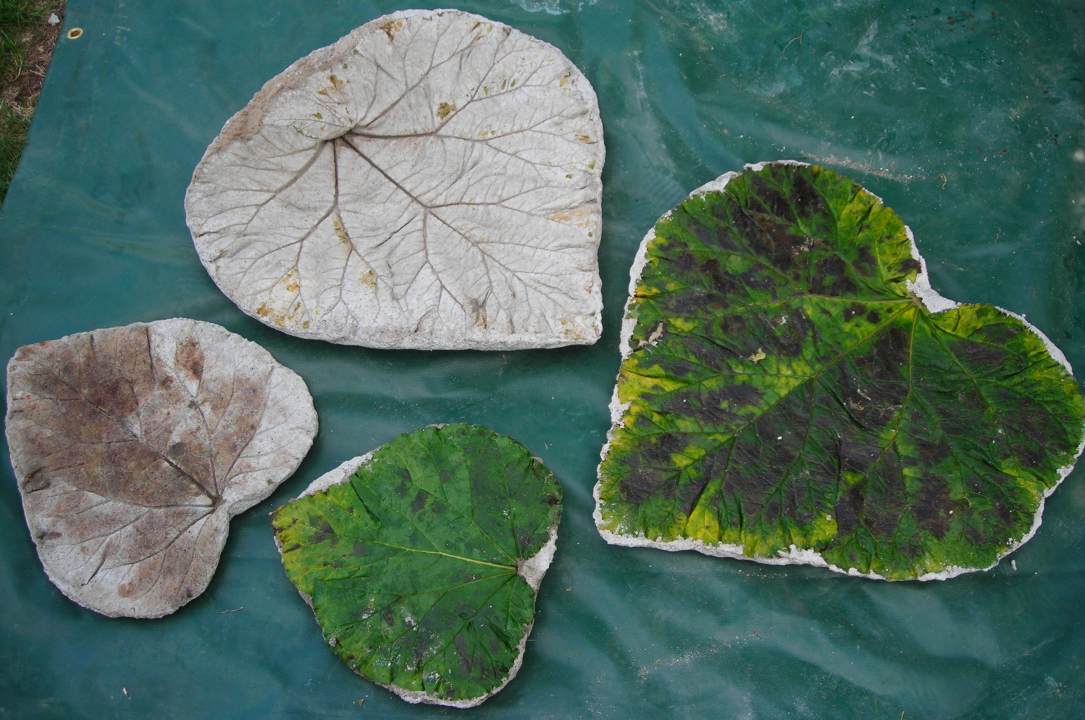
Using spray paint is fun. I bought some bottles with metallic paint and thought I would try this on a cast rhubarb leaf. All of a sudden I had painted several leaves! They are so beautiful! I have to paint more…
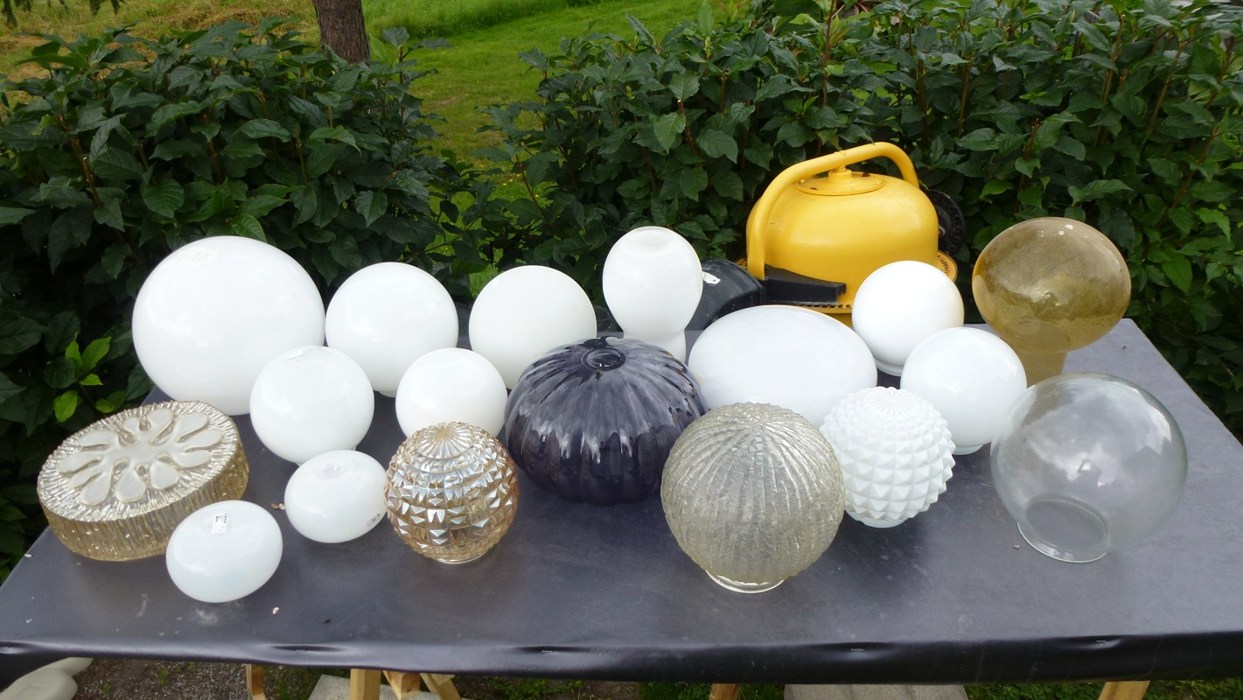
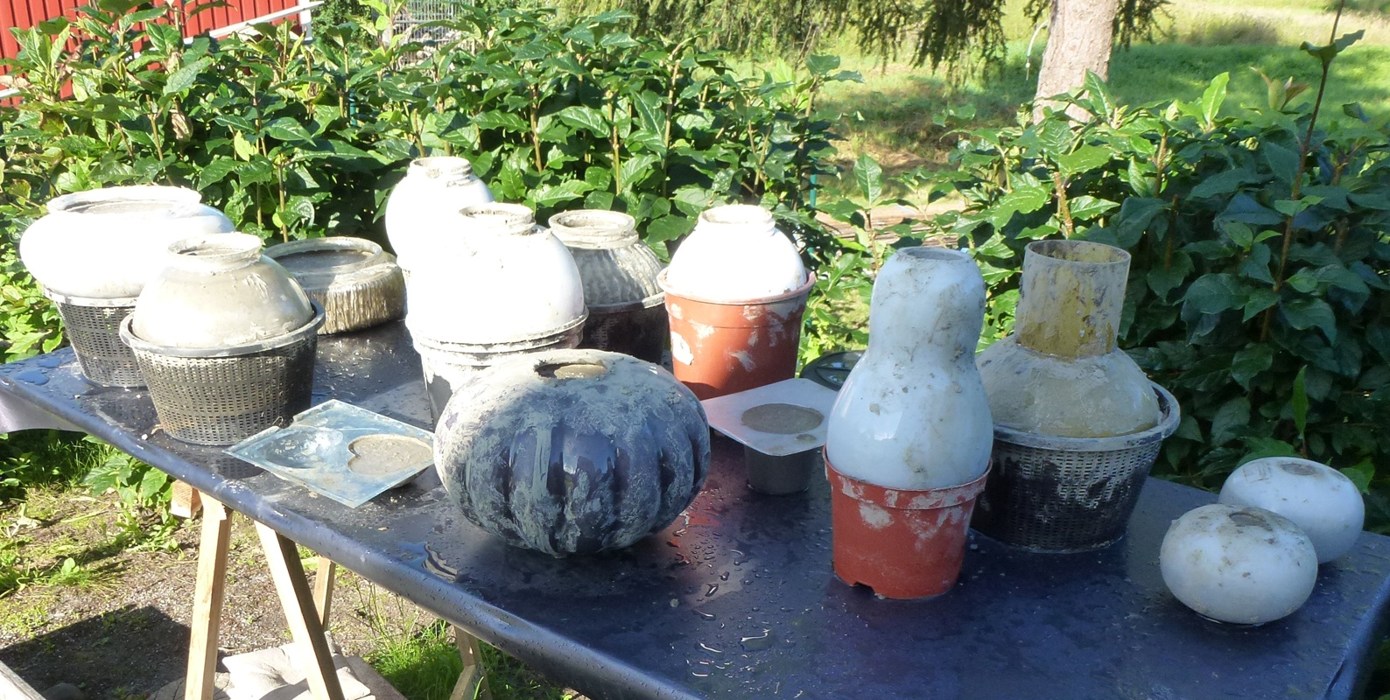
Glass globes becomes concrete balls
During winter and spring I have bought cheap old glass globes on flea markets. Whenever I find a cheap globe I will buy it. Also big glass vases and other glass items are useful if the shape is right. I fill them with concrete and after some days I put them in a bucket of water and crush the glass using a stone. Sometimes the glass will not come off directly, but if leaving it in water for a day will make it easier.
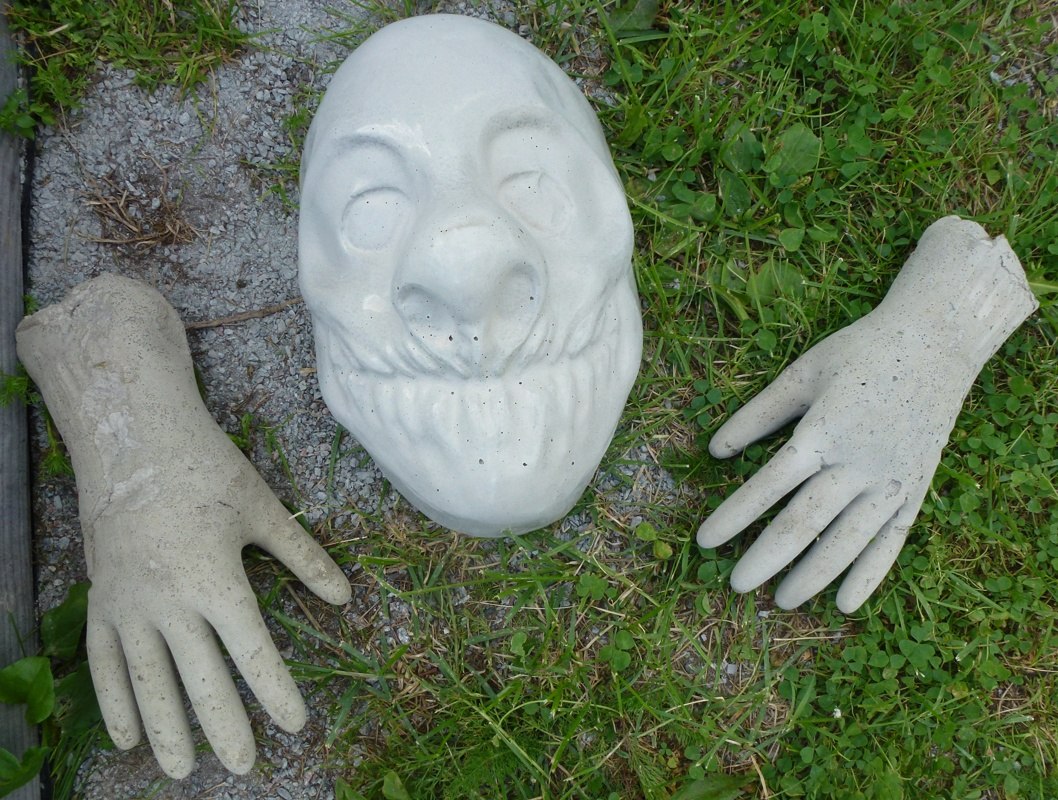
Horror in the pond
Last fall my daughter’s boyfriend bought a mask for a masquerade. I quickly snatched the package that the mask came in, because I saw a potential mold for casting. It was a flimsy plastic package shaped as the mask. Now I finally got to use it. I used sand to support the mold. I also did cast a pair of hands using dishwashing gloves.
Now, visitors in my garden will get a small shock when they are looking down in the pond!
Moahaha…
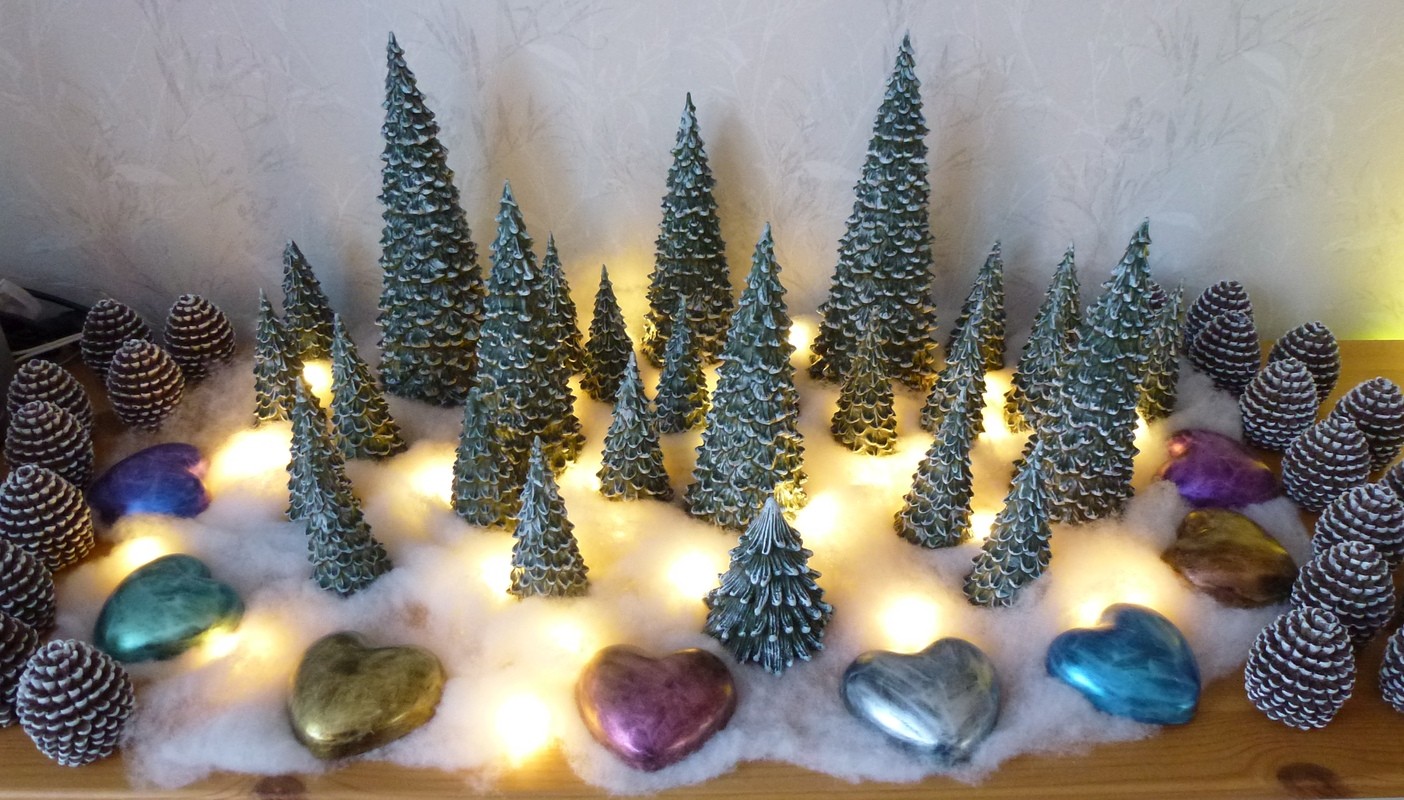
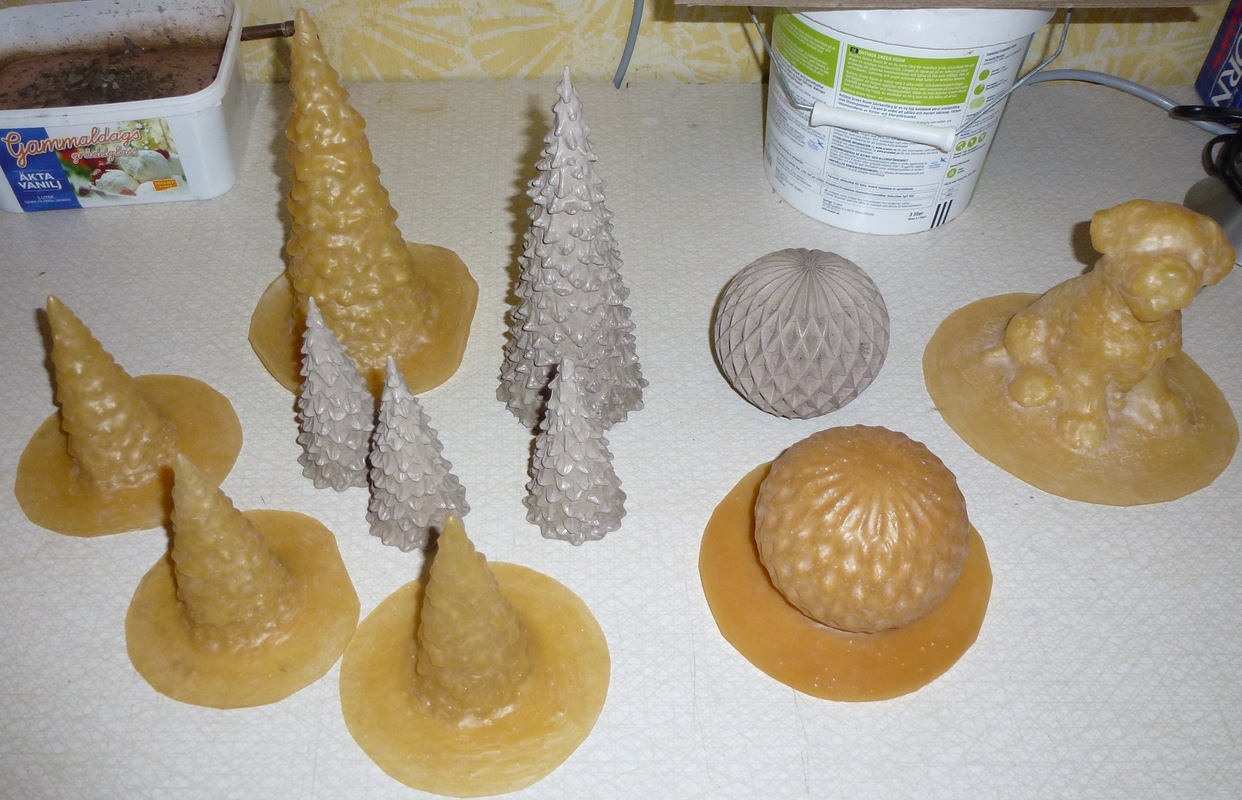
During the past moths I have been quite occupied making latex moulds and castings items for Christmas. I had a plan to make a landscape with spruce trees and a led string. For this I bought some plastic Christmas trees on eBay and made latex moulds on them. Then I could cast several trees. I use fibre-reinforced self-levelling compound when casting, not concrete when making small or detail objects. I have found that self-levelling compound works much better than concrete for this.
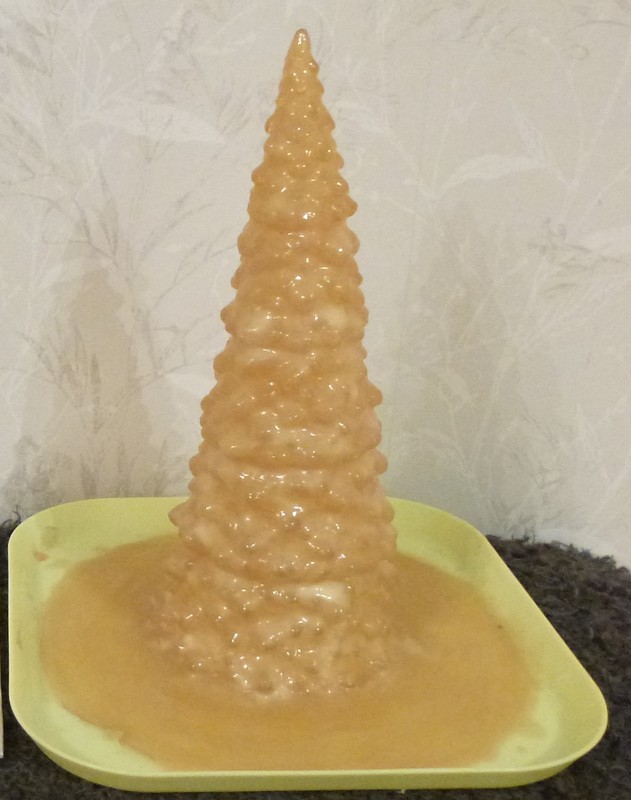
This is a mould in progress. I’m using liquid latex for this. It is ready after about 20-25 layers of latex.
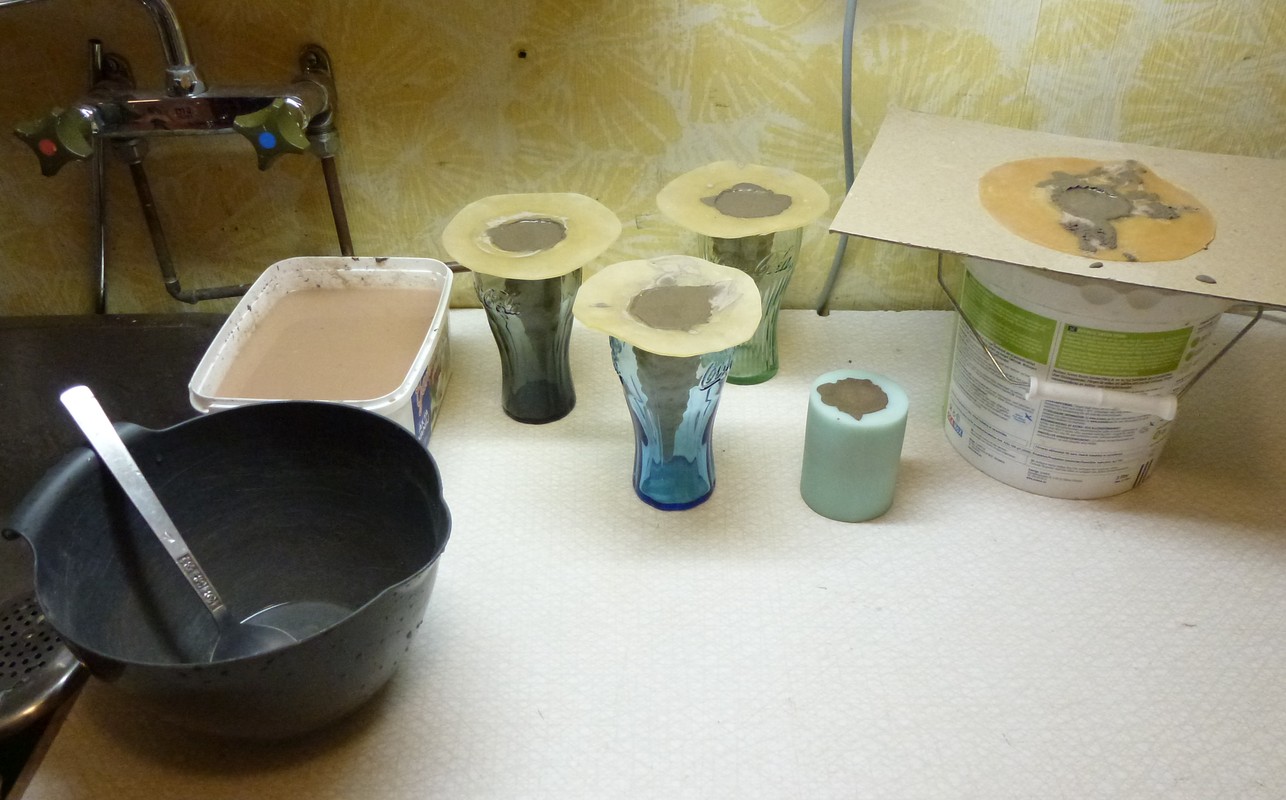
I’m mixing the compound powder with a little water in a small bowl. Then I fill my moulds up and shaking them a lot to get rid of all air bubbles. Afterwards, I clean up the bowl with water. Remember to not pour the water out in the drain! I use a bucket to pour all the cleaning water into. When all the sediments have sunk to the bottom, I pour the clear water out. In the end I will have a big lump that fills up the bucket.
More moulds and some casted items.
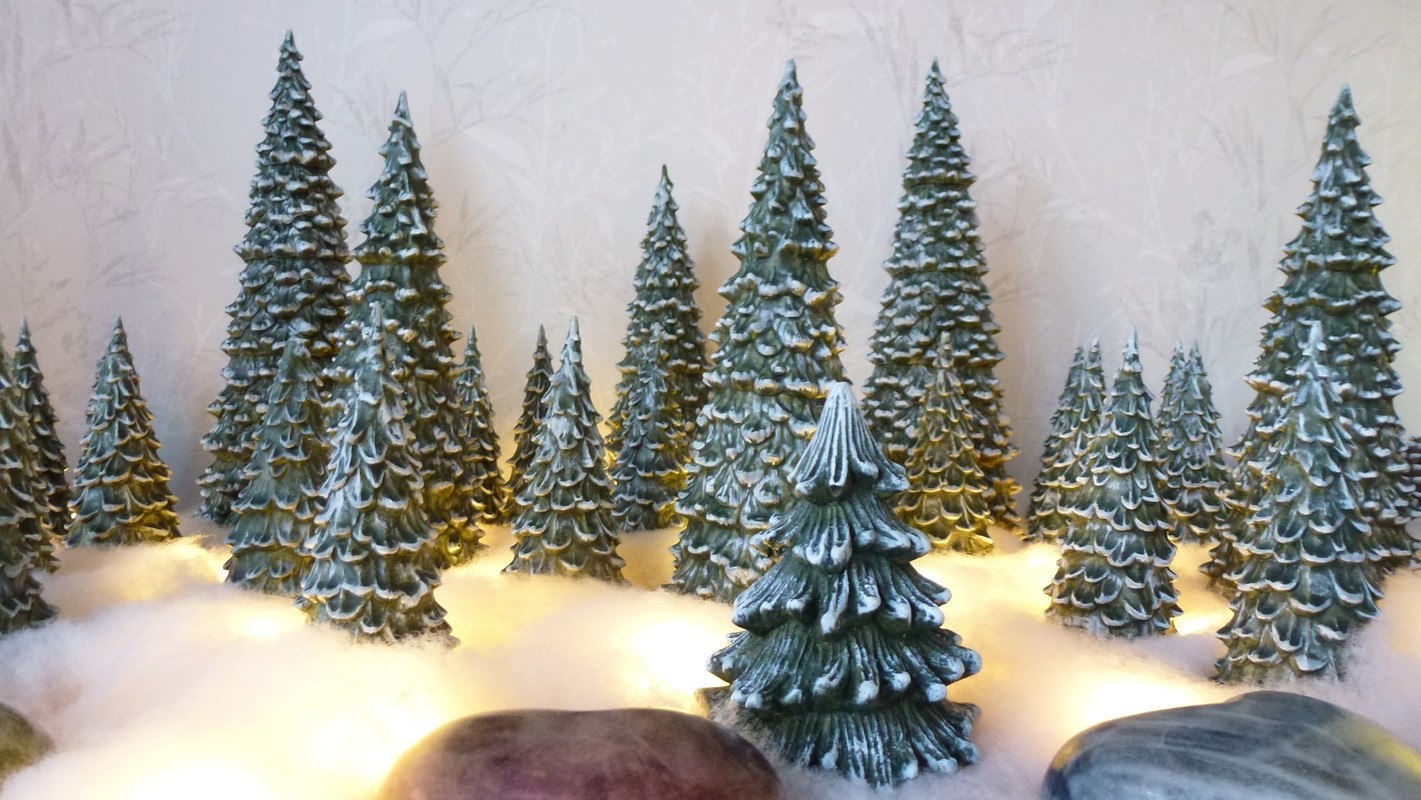
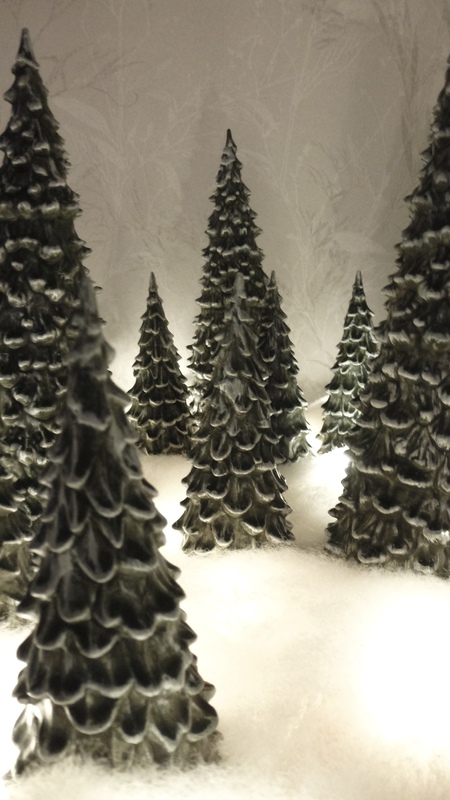
Finished landscape!
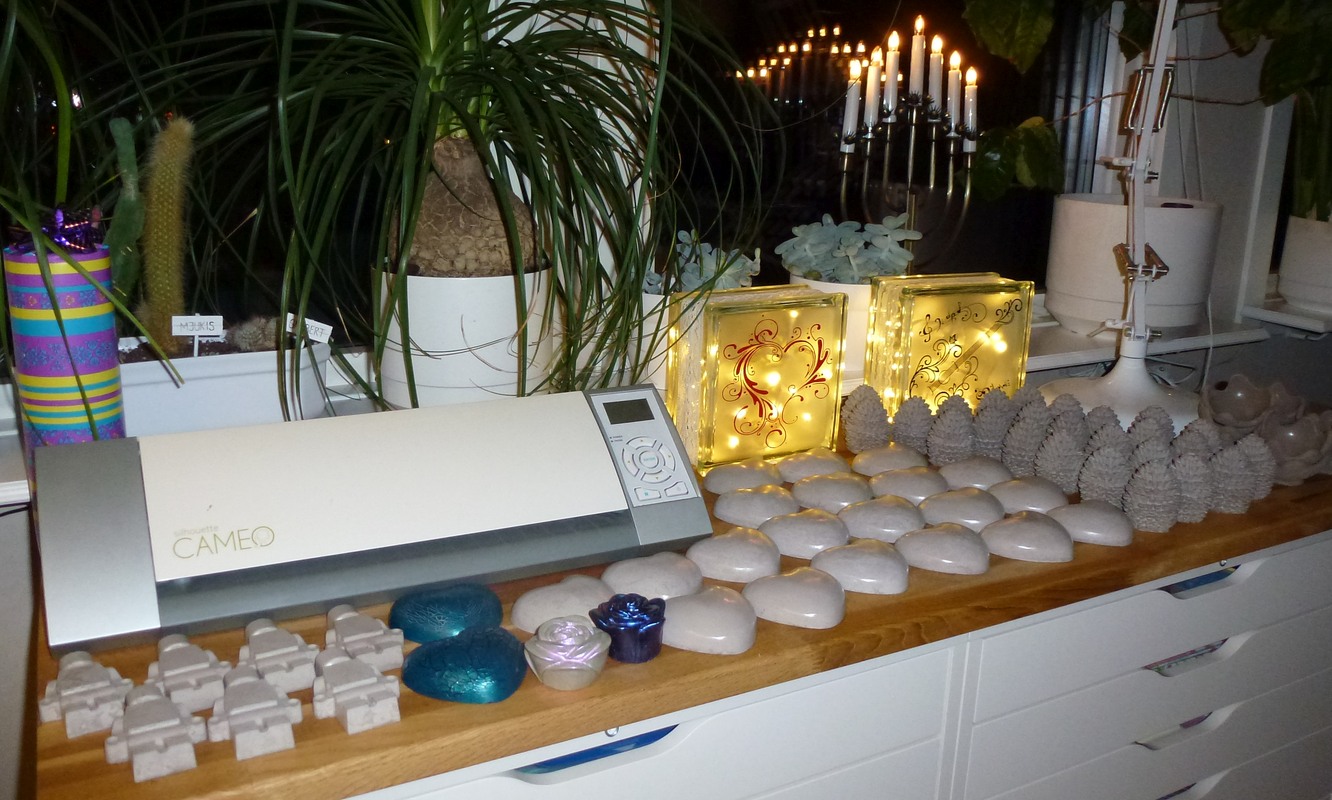
Other casted items
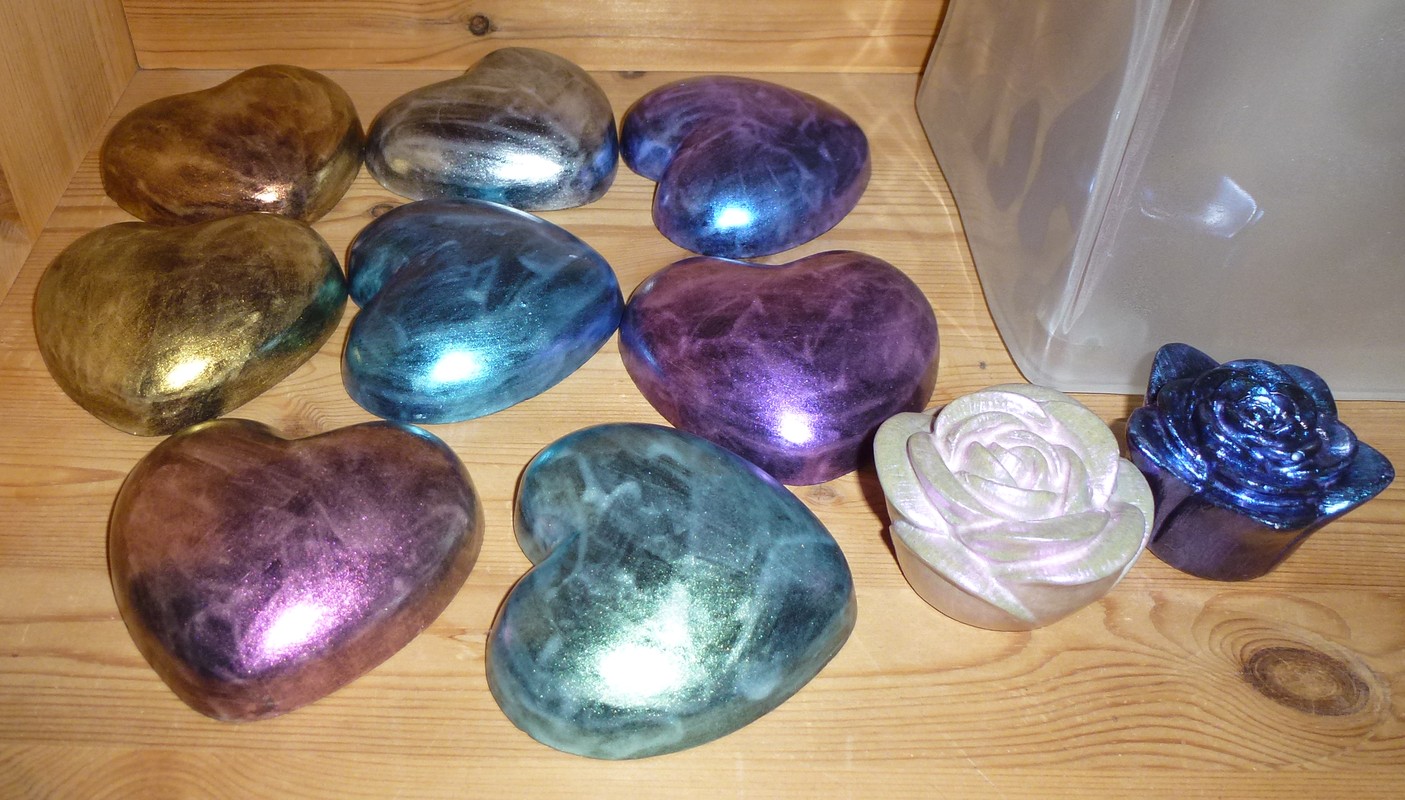
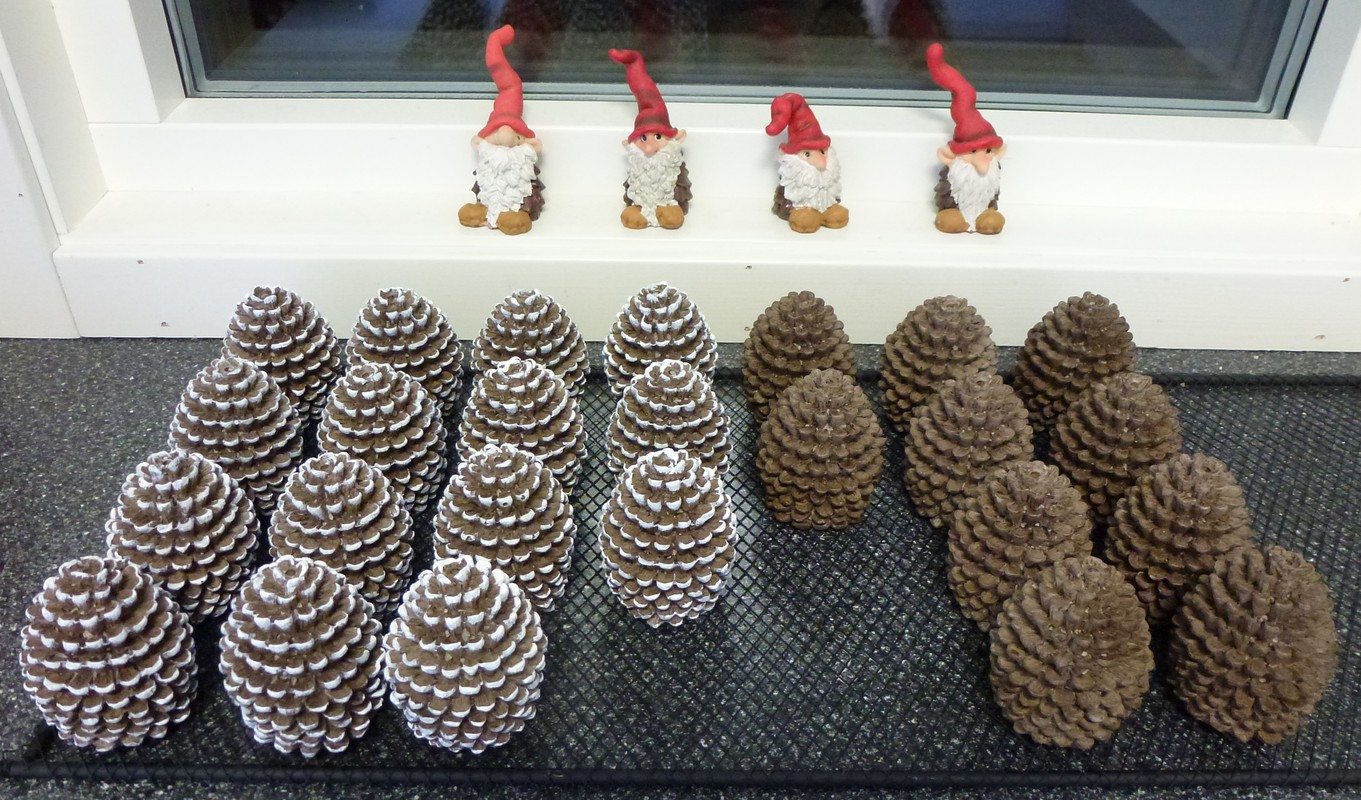
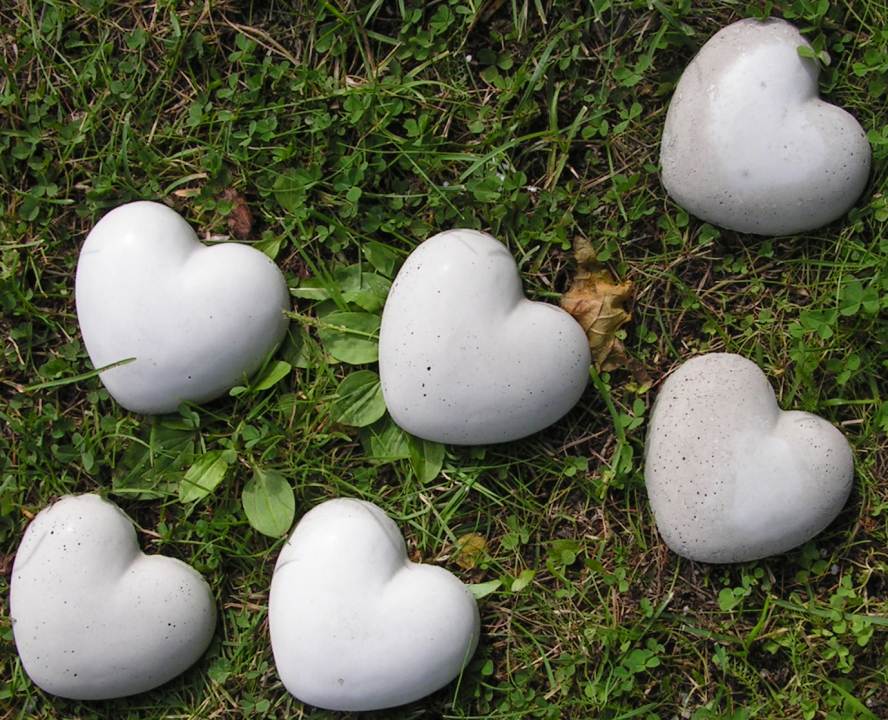
Some of all the new things I have made.
Here I have painted the hearts in shimmering colours.
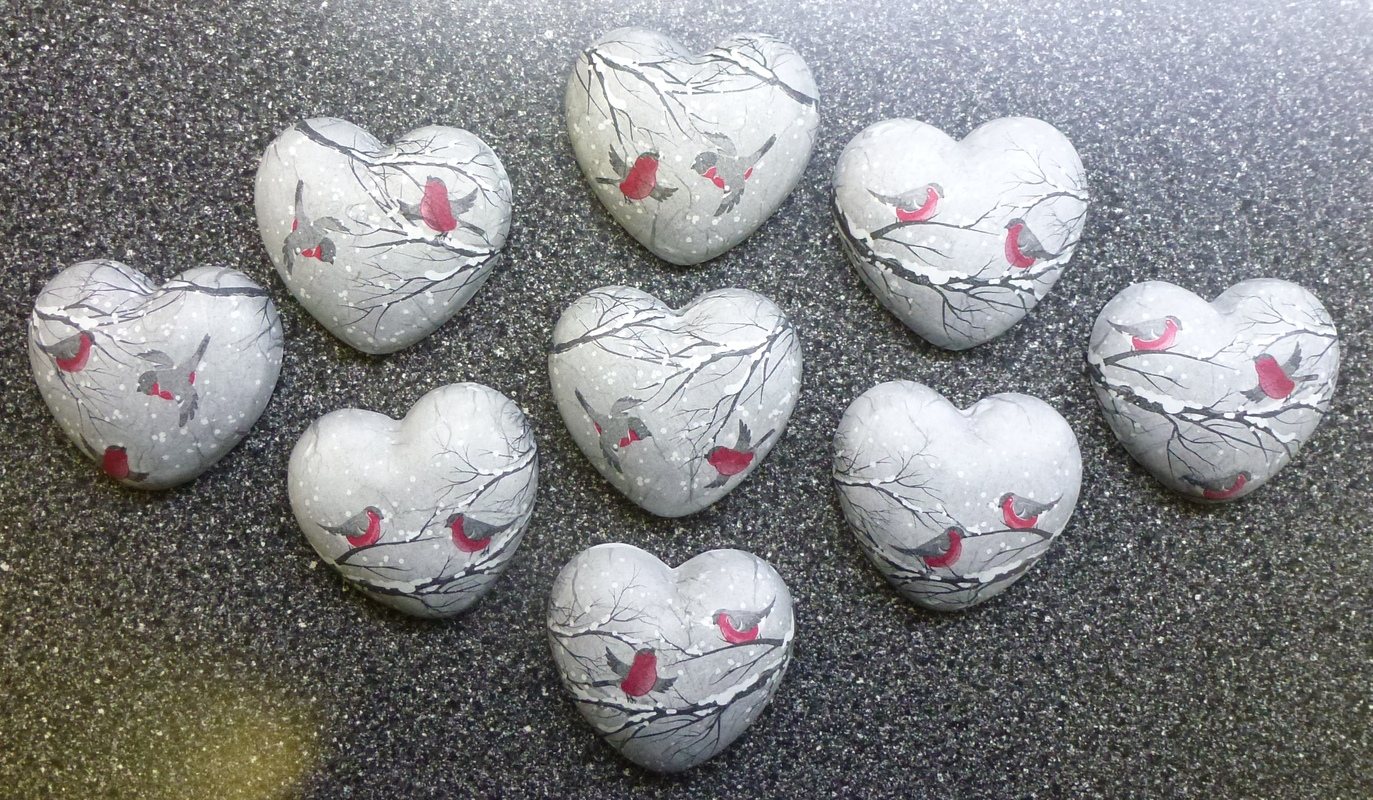
On these hearts I have made decoupage using napkins.
To cast bigger items in concrete are not appropriate to do indoors. I long so much for spring to come, so I can be outside doing this. Meanwhile I have to find other things to do to ease my desire for casting. I have so many ideas that I want to follow out. 🙂
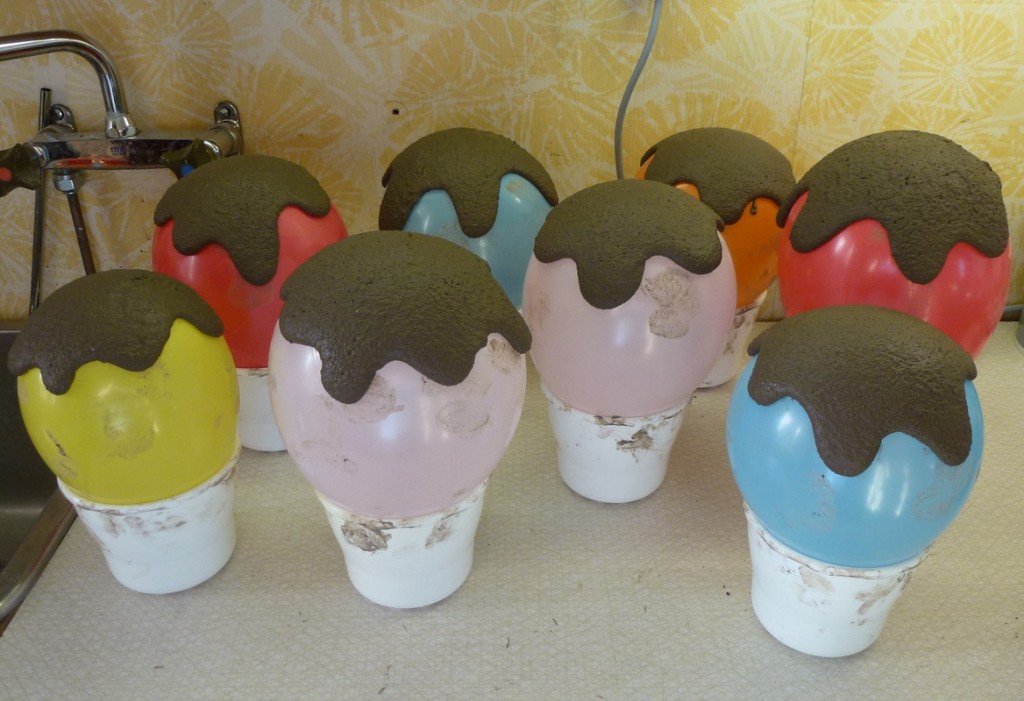
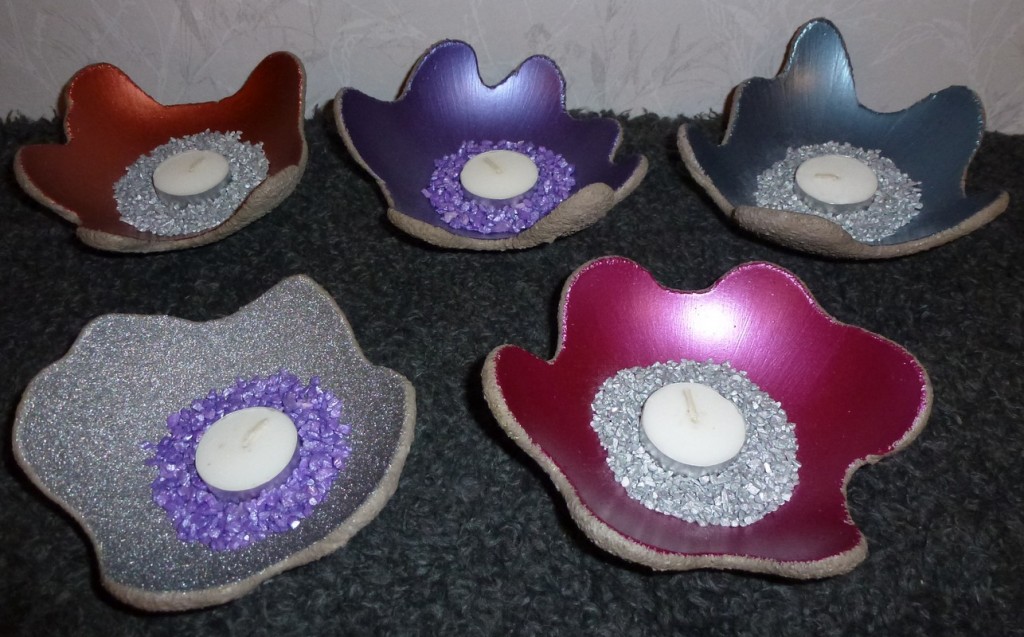
First out is the “dragon egg shells”, casted in fibre-reinforced self-levelling compound. It’s a cement based mortar for floors but can be used in many other ways too. One thing to keep in mind when casting with this, is that it has not the same strength as concrete.
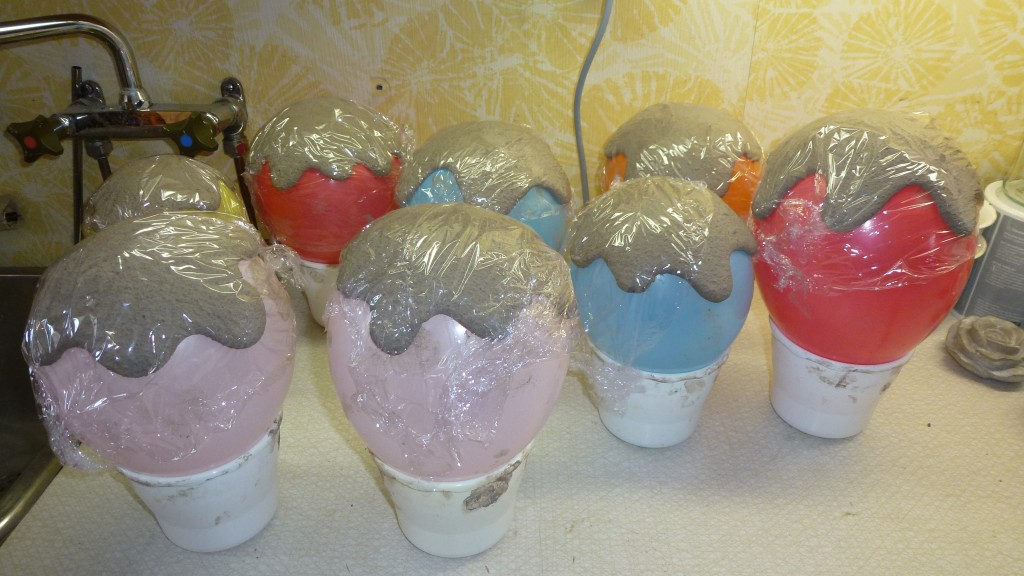
I mix the compound powder with water so the mix becomes quite thick, like a bun dough. To make the “shells” you also need some balloons and something to put the balloons on to hold them up. I used plastic pots.
Shape the mix to a flat ball and place it on top of the balloon. Hold the balloon and the balloon holder firmly and tap it a couple of times to the table. The mix will start to slowly spread out. Shape the mix to small petals and tap it to the table some more times. Don’t tap it too much, then it will become too thin and will break when handling.
After about an hour you can put a plastic film over it. Leave to cure for one day.
Remove the “shells” from the balloons and wrap them in the plastic film. Leave them to continue cure for another day. You can rinse the balloons in water to wash them and them reuse them.
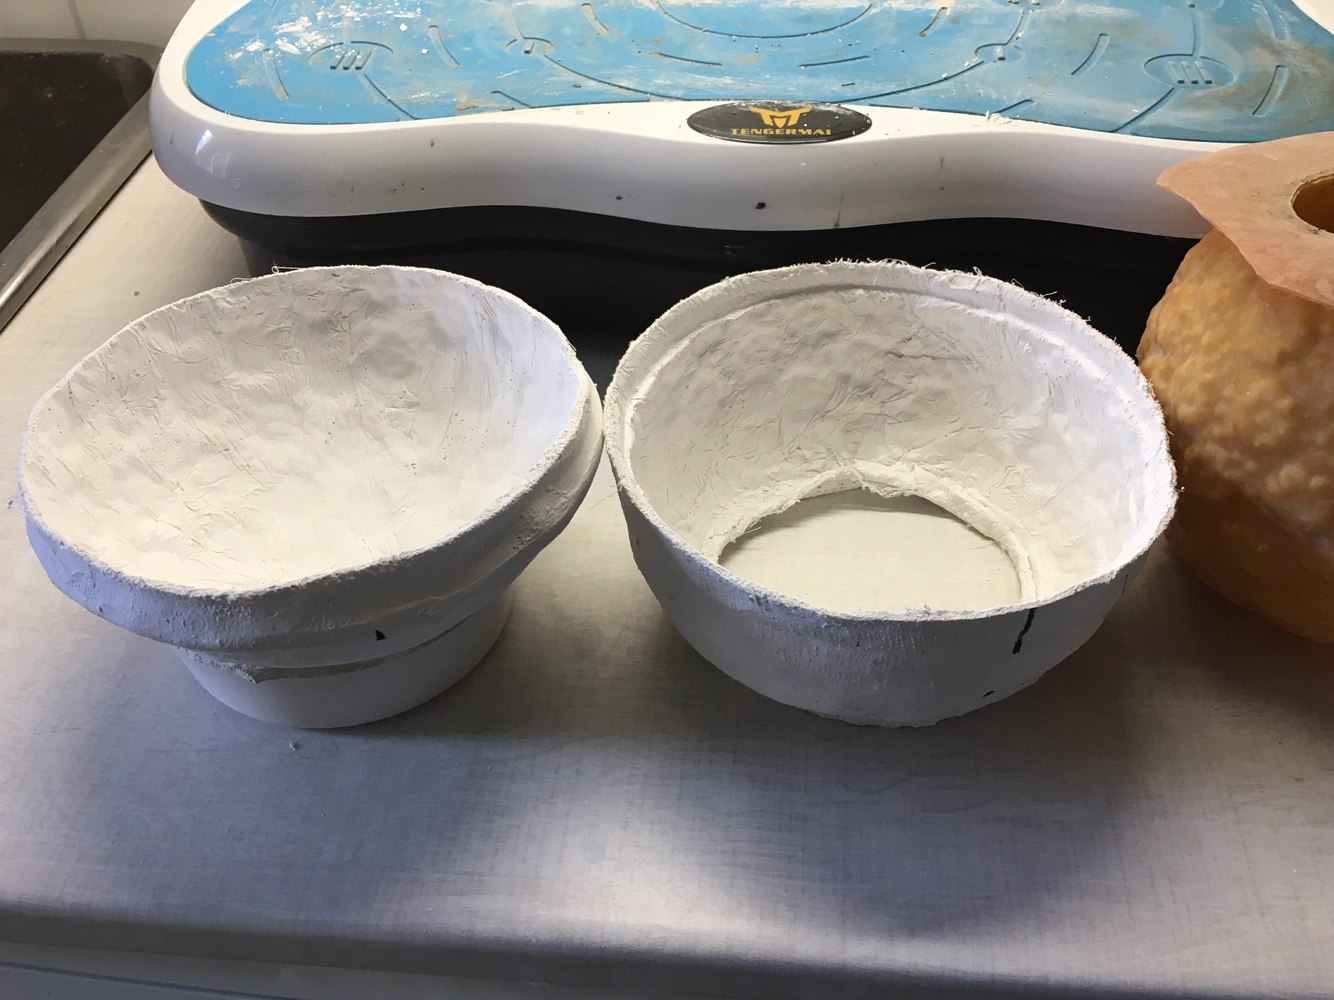
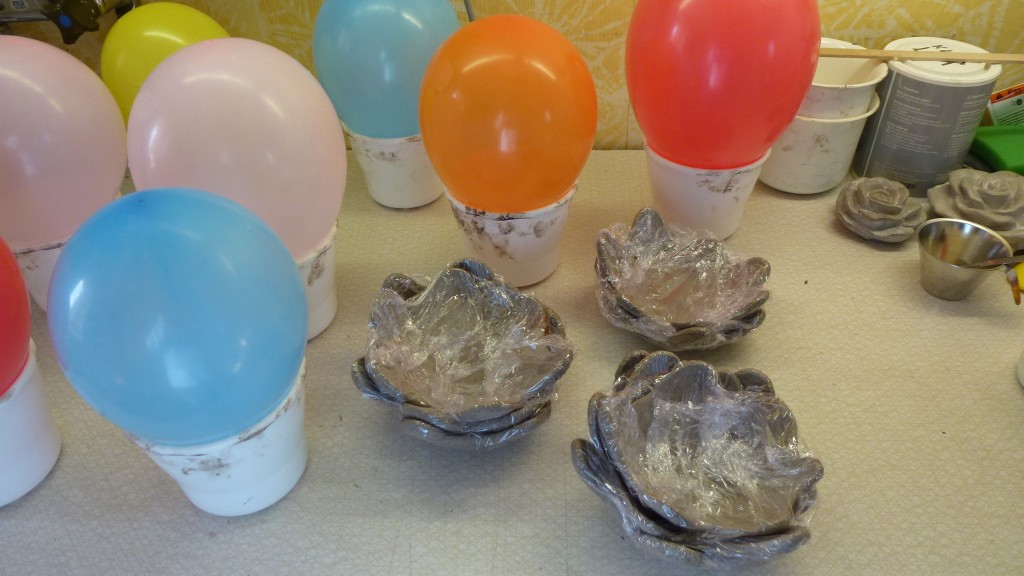
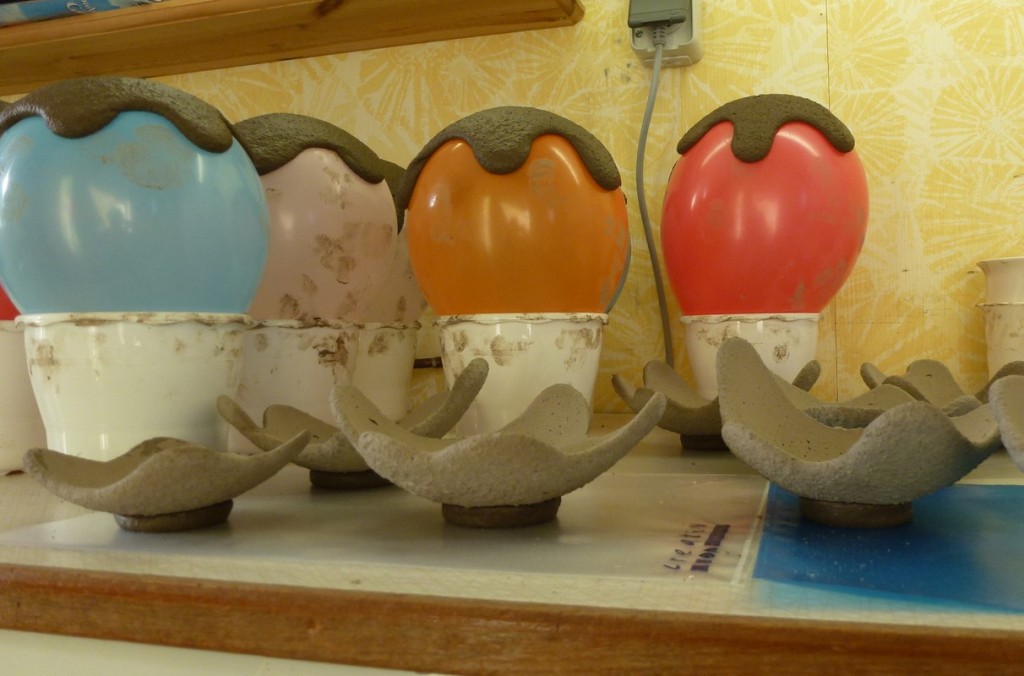
Now it’s time to give the bowl a base. Form a small ball from the mix and put it on the bottom of the bowl. Gently tap so it will spread slightly. Turn it over and press it gently down on a plastic film. Leave it to cure for a day before you remove it from the plastic.
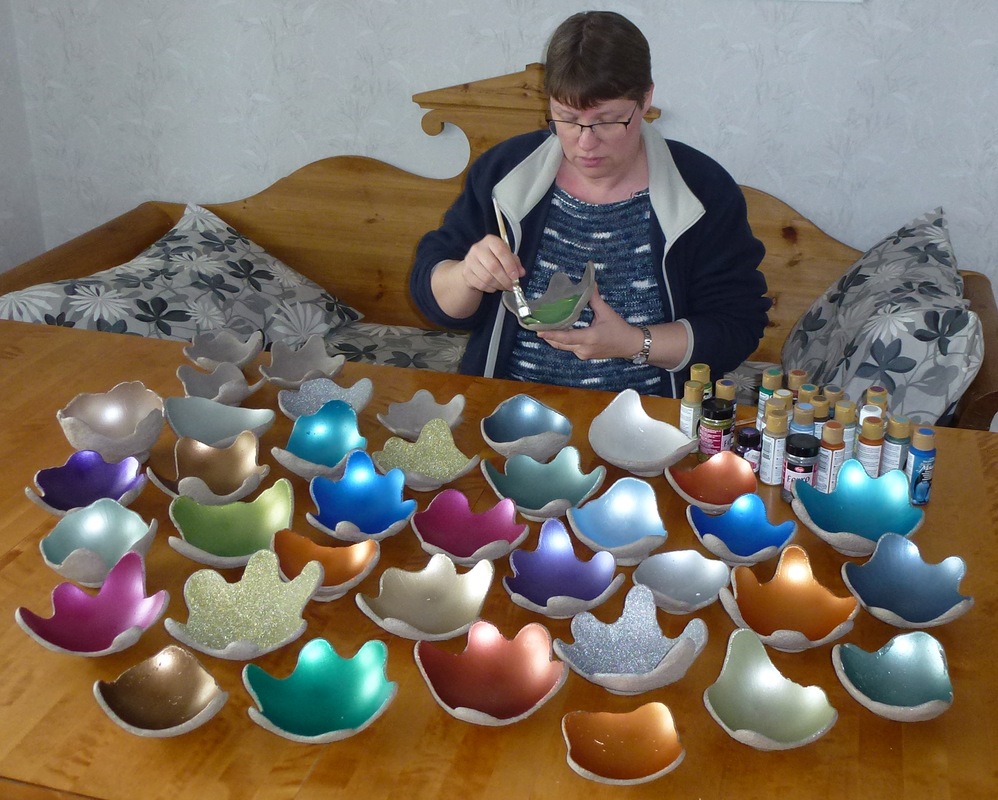
When the bowls have cured for a week you can start painting them. First I painted them with a uncoloured concrete sealer on both the inside and outside before I painted them with metallic paint.
They look very nice with a tealight in.
I have many other casting projects on going and I will post pictures from them later. 🙂
For those who are waiting for new cutting designs, you have to wait a little bit more. I can’t do everything at the same time. 🙂
Casting in hypertufa is fun and not at all difficult. Hypertufa is a mixture of Portland cement, sand and peat moss. If you want you can replace the sand with perlite, it makes the pots and trays a lot lighter as perlite weighs almost nothing. Tufan takes a little longer to harden than ordinary concrete.
When casting bigger things it is a good idea to reinforce the castings. In my first attempt, I used chicken wire but I found it difficult to fill the hypertufan in the mold when the chicken wire was there. Then I bought a woven glass fiber cloth, which I unraveled. I cut the fibres into 3-5 cm pieces. One handful of this mixed in each batch hypertufa seems just right. This reinforce and holds the Tufa together without problems.
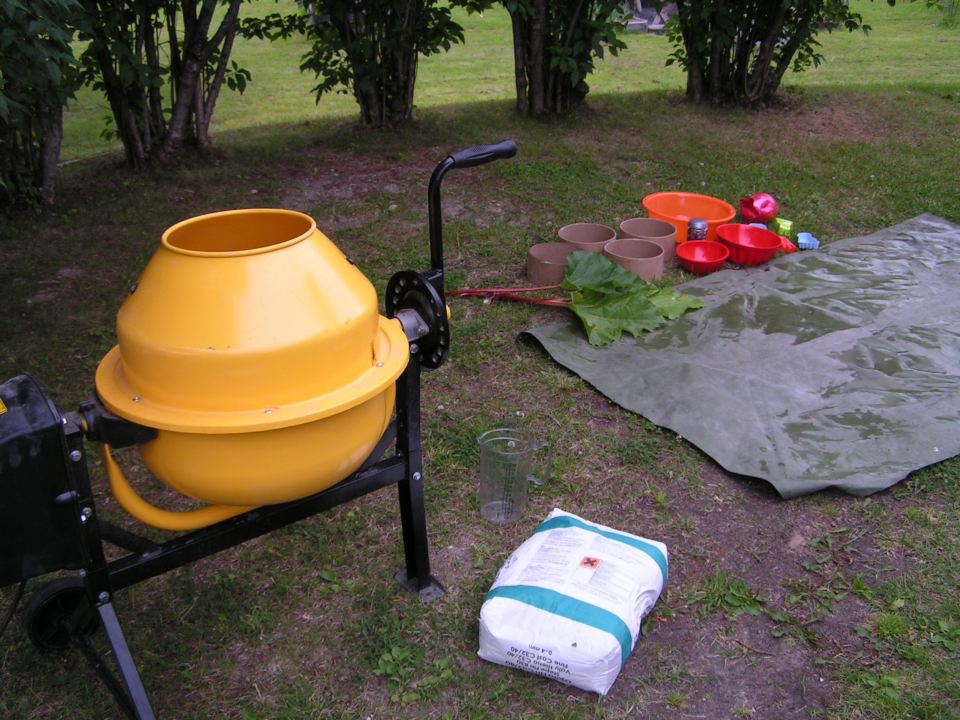
A concrete mixer is very useful and makes the casting so much easier. I bought the smallest one I could find and It is just the right size for my needs.
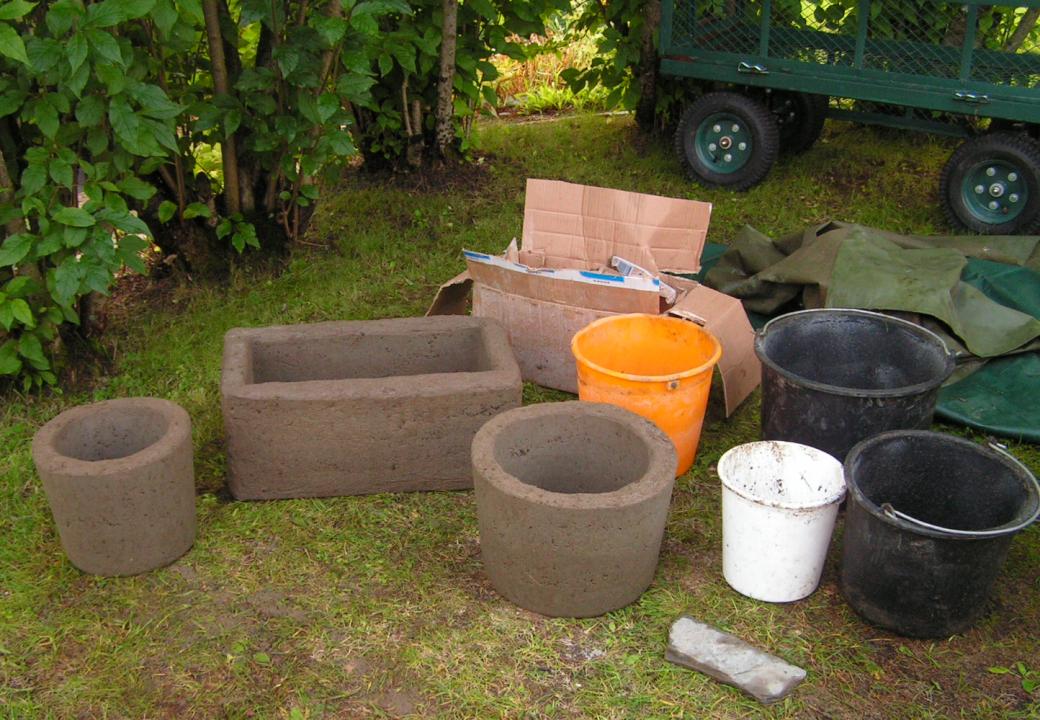
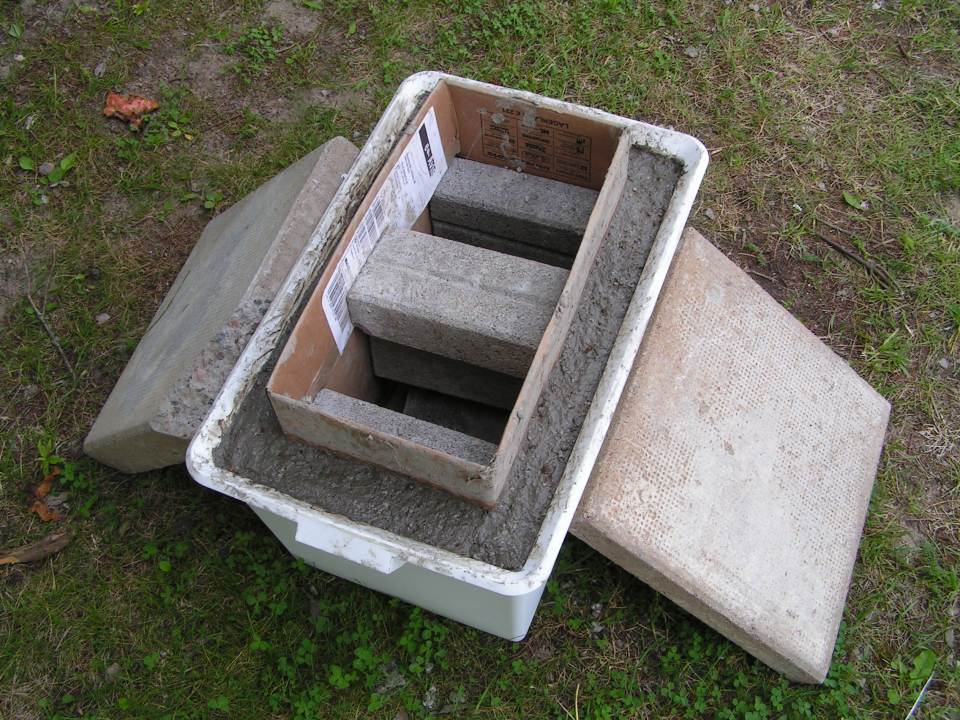
When casting larger pots and trays, I use buckets of different sizes ordinary cardboard boxes and plastic tubs as molds.
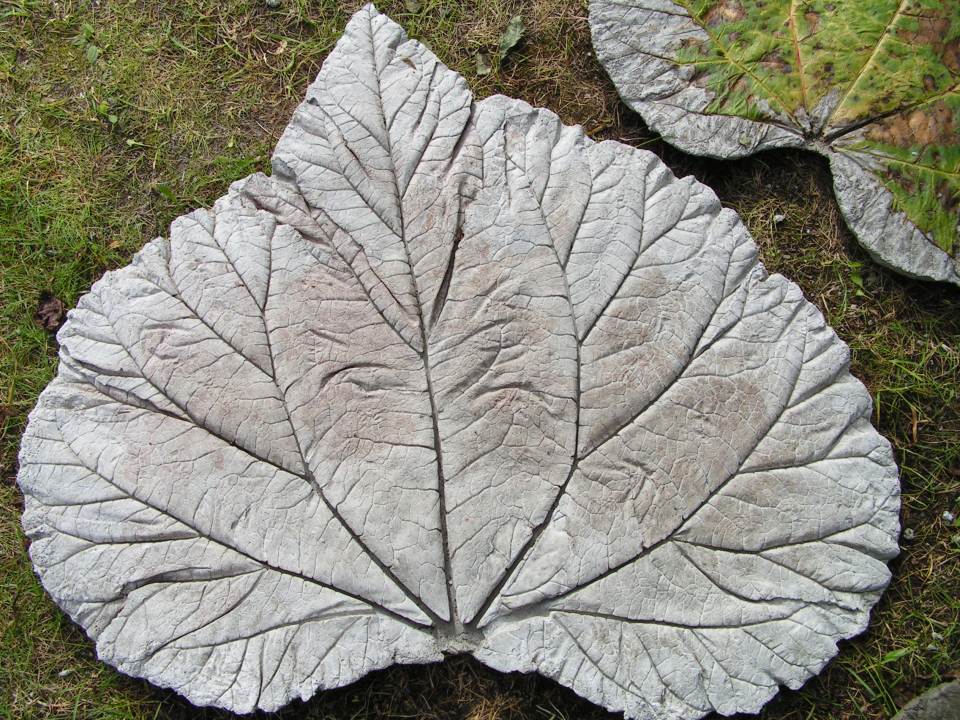
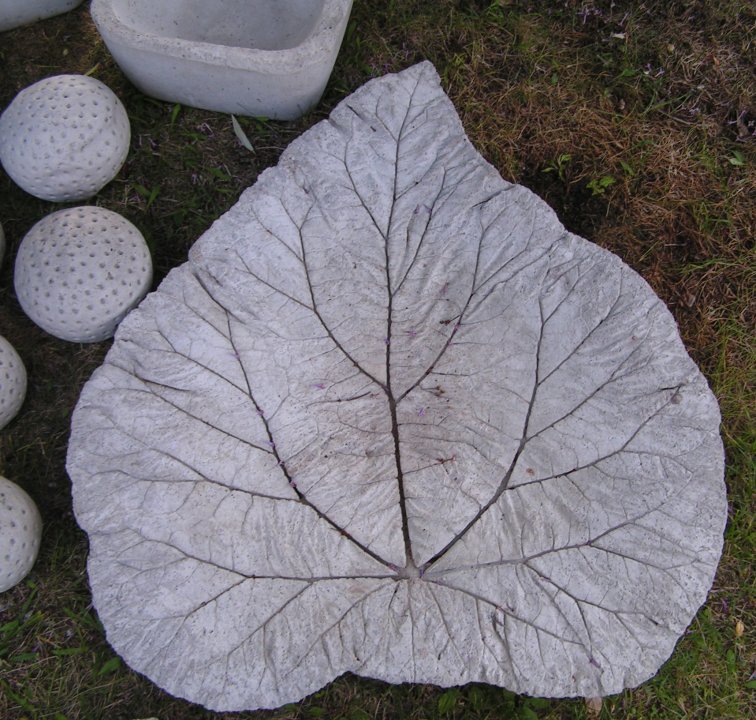
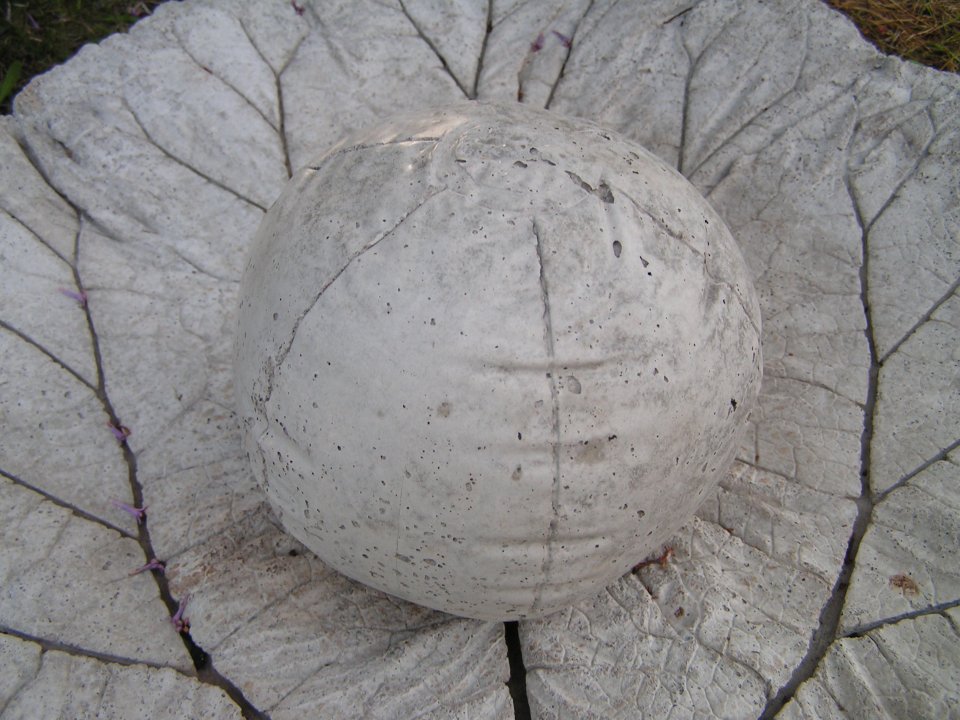
Rhubarb leaves become very nice bird bath and stepping stones. In order to cast a bird bath, you need a large rhubarb leaf and a small or a piece of a leaf, sand and concrete. It is good to have a tarpaulin or similar to be on when casting.
Pour up a small pile of sand, it is good if the sand is damp. Shape the pile as a low hill with flat sides. I cut away the stem and carve so it will be as flat as possible where the stem was. Lay the leaf up side down on the sand. Take the small piece of leaf and place it under the big leaf where the stem was, this is just because the leaf is heart shaped. This will prevent that the bird bath will leak.
Mix the concrete and pat it over the leaf so that it becomes thinner towards the edges and thicker in the middle. Try to stay inside the leaf edge, it will look better that way. When finished, put a plastic sheet over it and let rest for two days before you turn the bath.
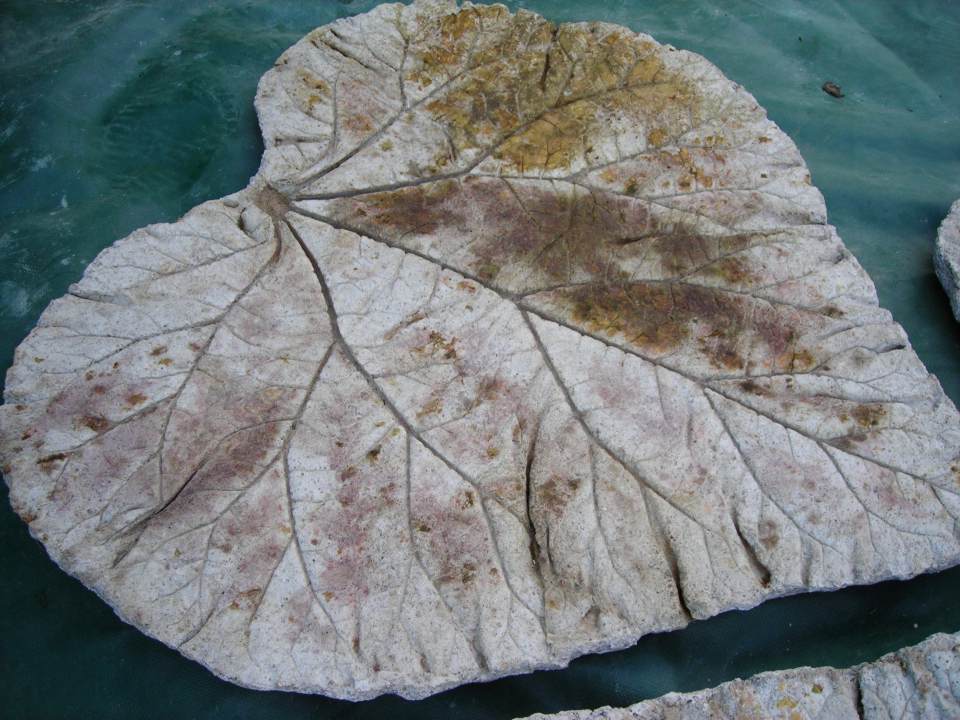
Then you can gently start peeling away the leaf. You will probably not get rid of all leaf residue at once. It’s better to let it be fore some days so the leaf will dry. Then you can brush and scrub off the residue.
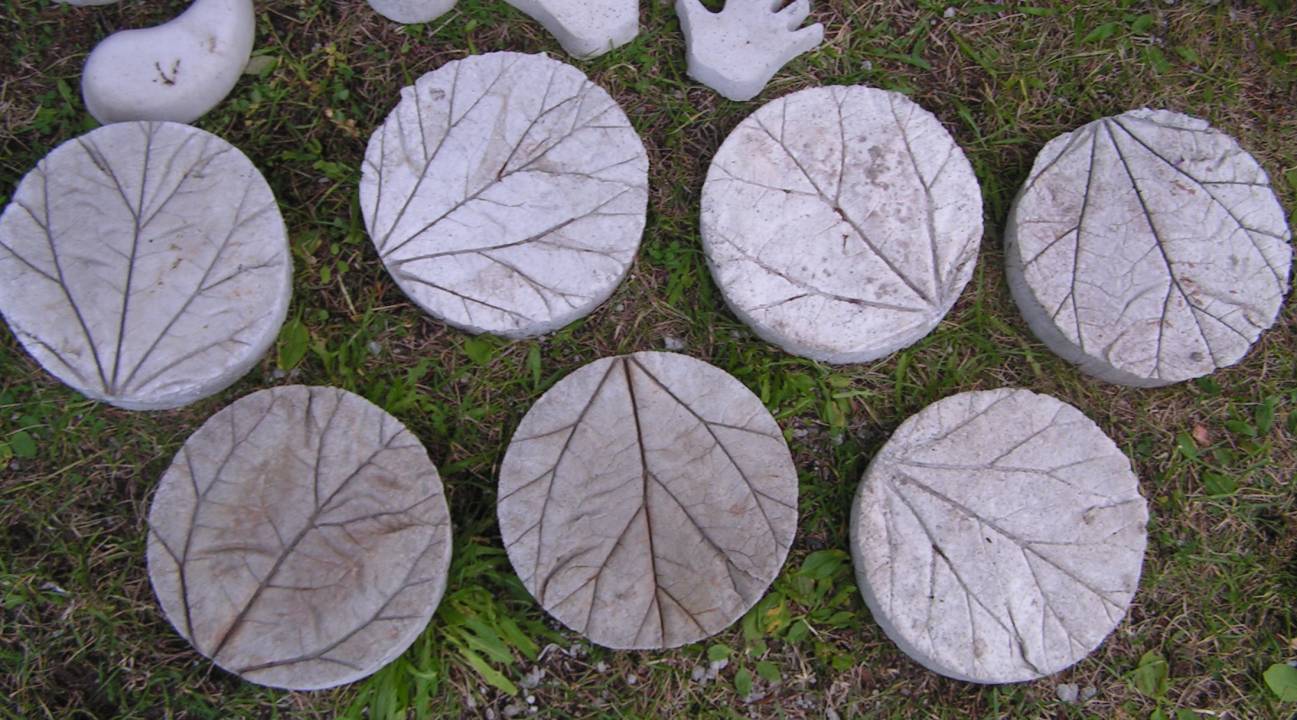
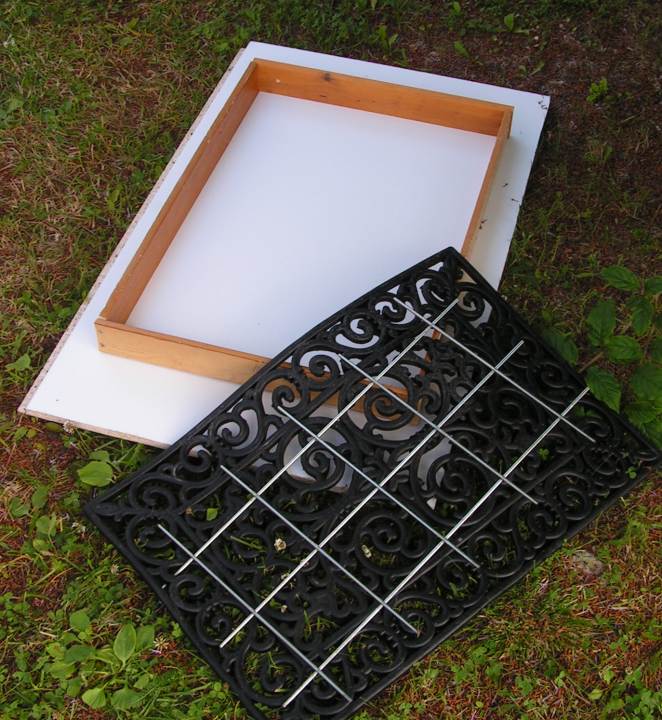
A really nice thing you can cast is larger stepping stones using rubber doormats in a mold. I got hold of two different rubber mats with different sizes. I made one mold for each mat and used a steel mesh to reinforced the concrete because it is so big.
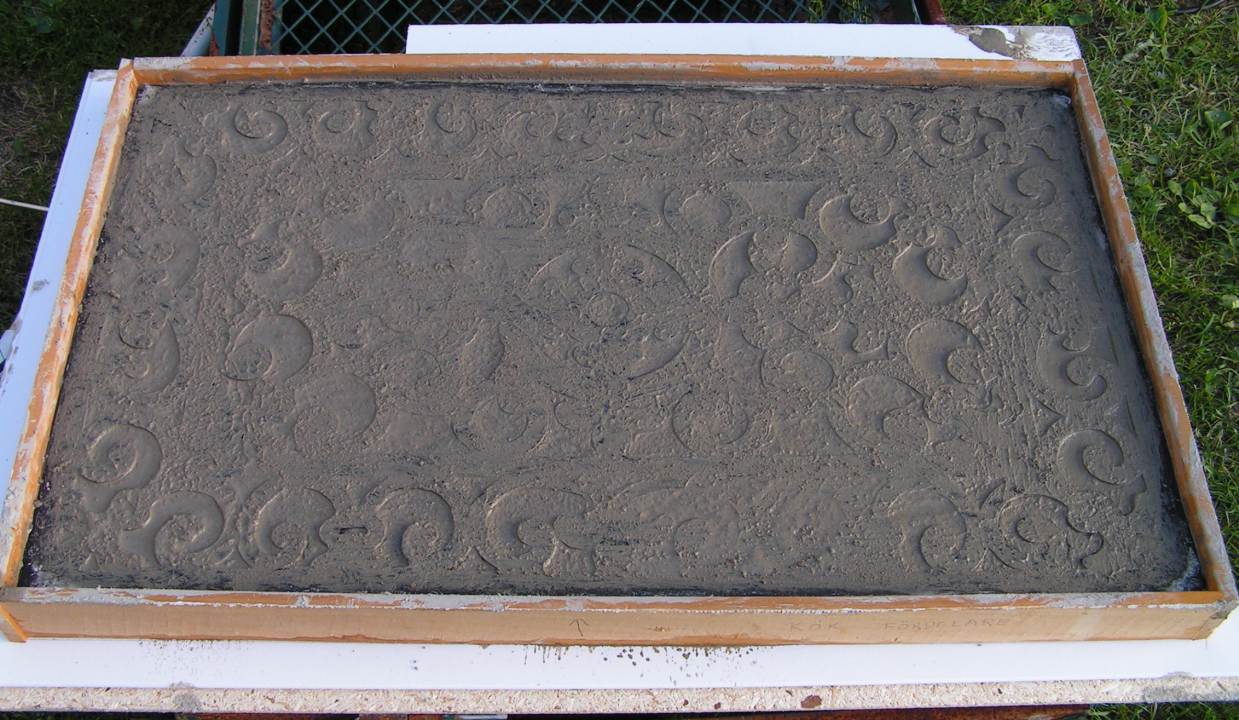
When casting, I filled one layer with concrete in the mold, then I put the steel mesh in and one more layer of concrete. I patted down the rubber mat up side down.
Then, I left it to harden for two days before I took apart the mold and removed the rubber mat. To get a nicer finish I used a rotating wire brush to get rid of the casting flash.
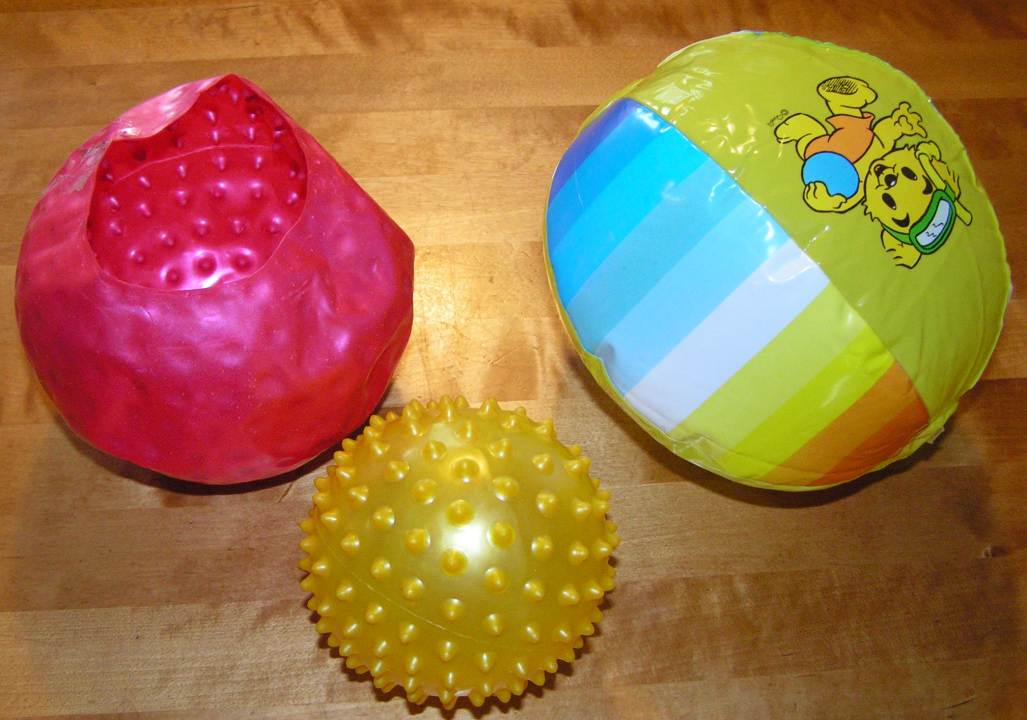
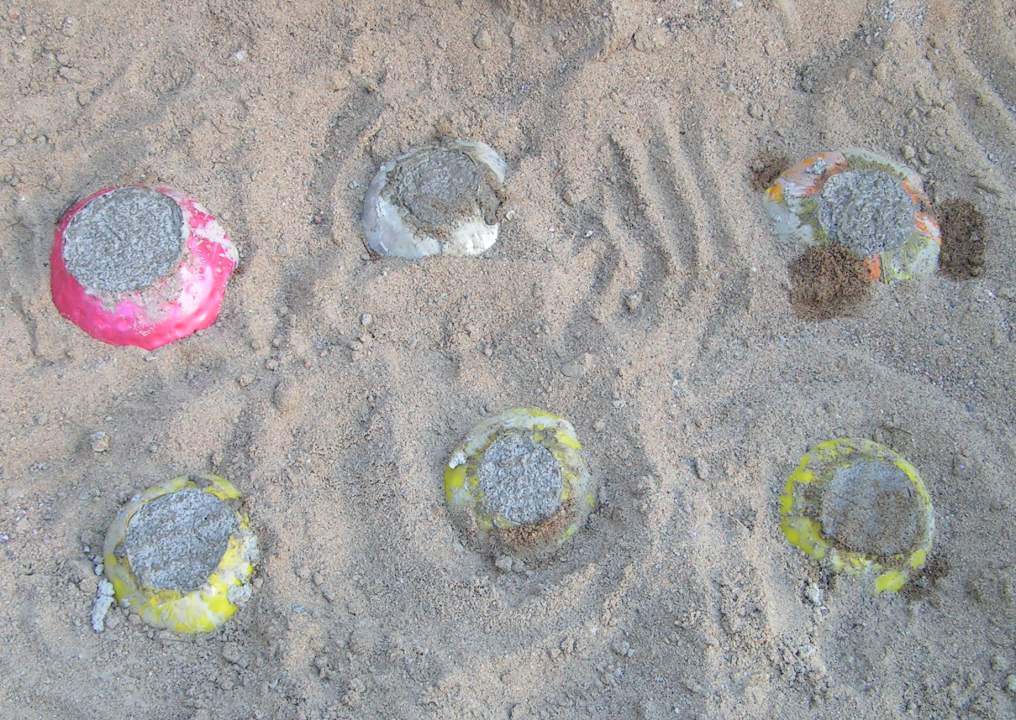
When you are up in casting you start to look for objects that can be used as a mold. One day we went to a store where I saw a bunch of soft rubber balls with knobs on. It struck me suddenly that they could be used as a mold if you cut off the valve and turn them inside out. We also had a mini beach ball lying around at home. It cut it up too!
After filling a ball with concrete I dug a round-bottomed pit in our old sandbox and put the ball in. I left them in the sandbox to rest for a few days before I picked them up and cut a straight line down the side of the ball and then wriggled it out. I could then reuse the balls by taping together the cut again.
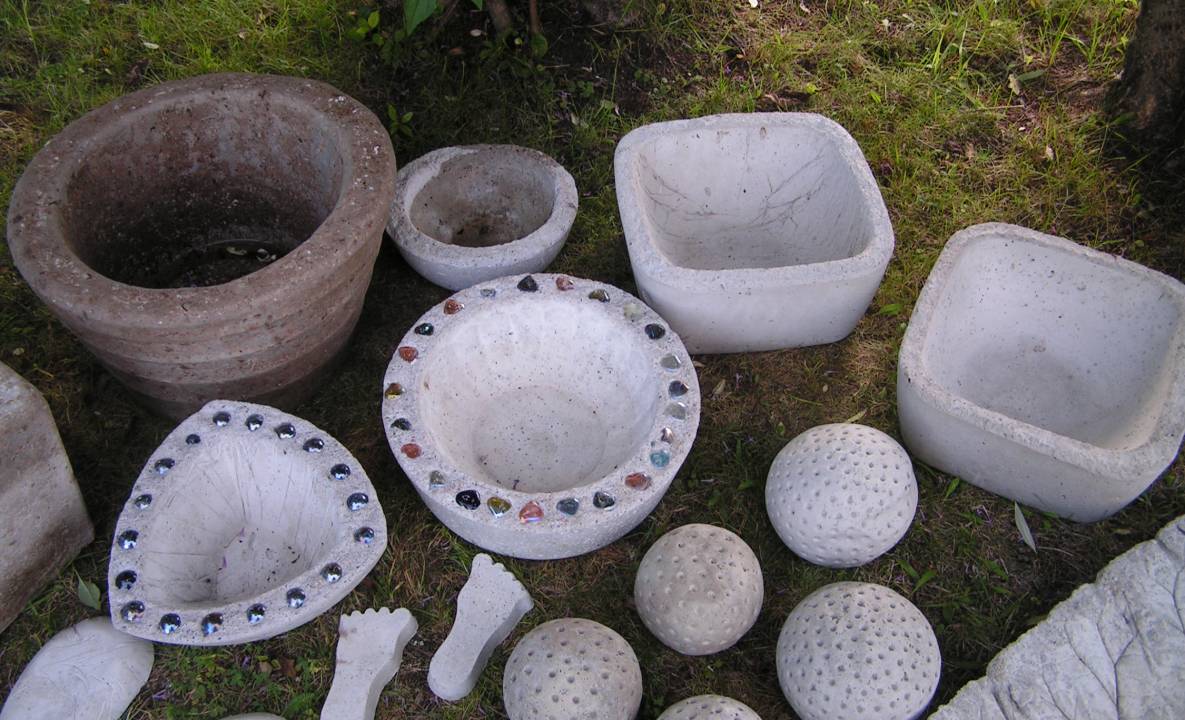
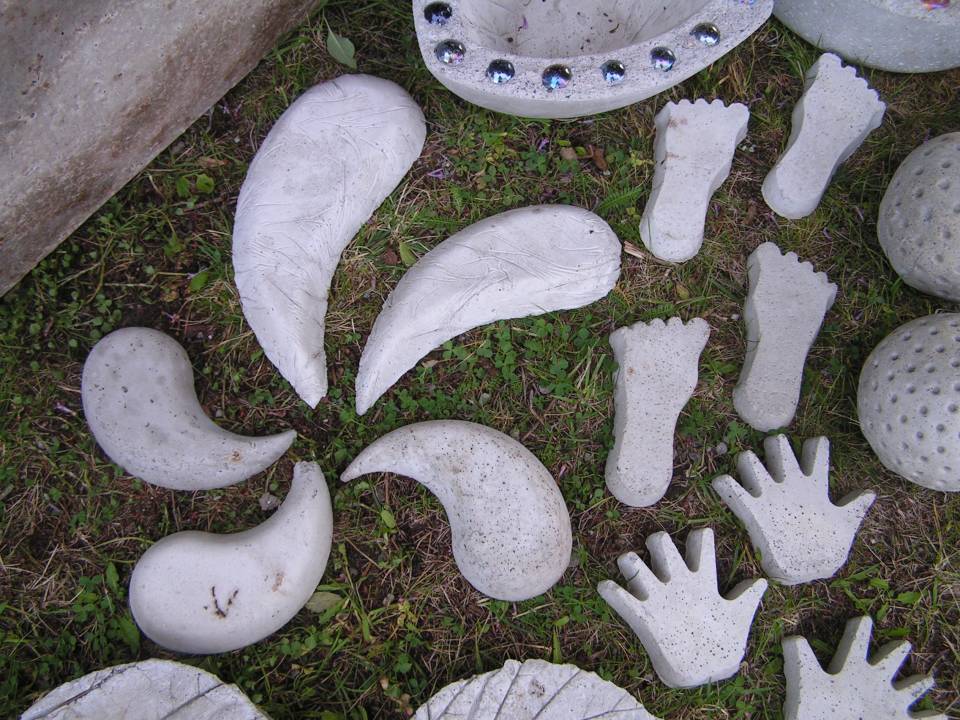
Sand molds for children gives great little figures. Bowls and plastic tubs of various sizes will be fine concrete bowls. Some I have decorated with glass beads that I pressed into the concrete.
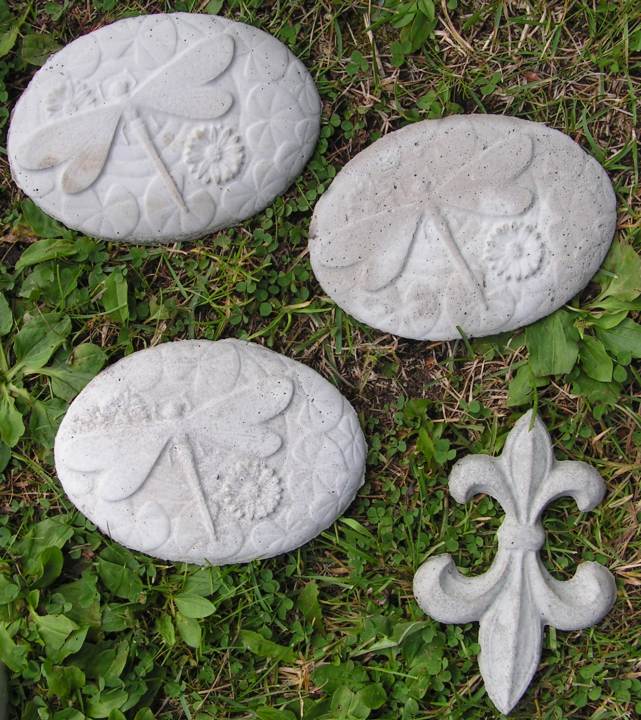
I found an incredible variety of molds on eBay and I had to try this. It’s amazing how well it turned out. The molds are made in plastic and can be reused many times. Now I just have to find out how I can use all the things I have casted. I have some plans …