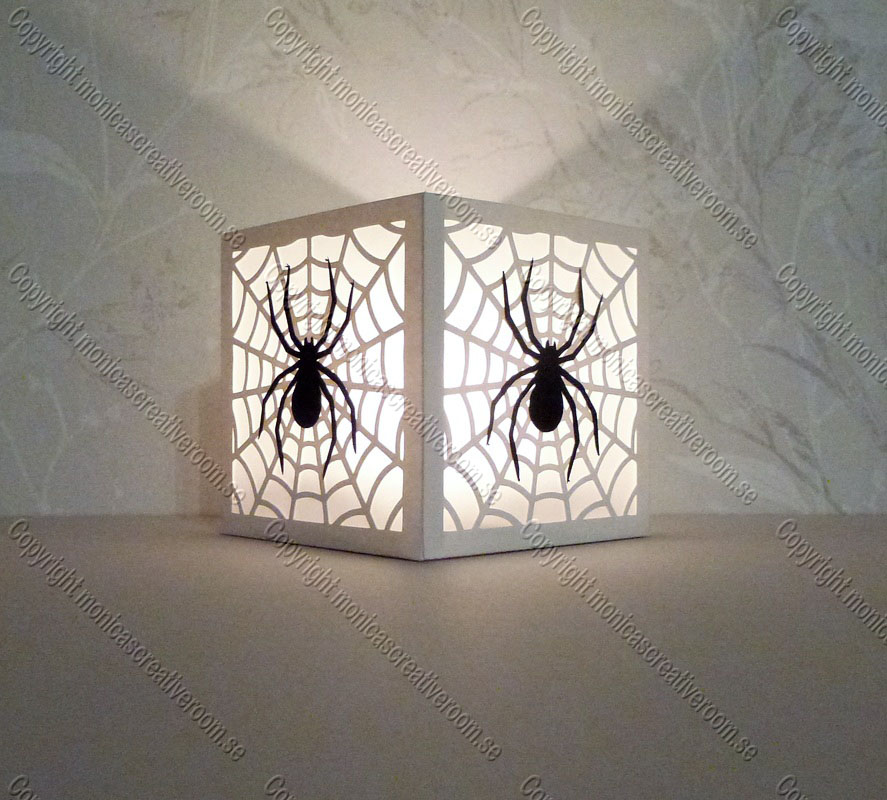
It’s a little bit late but I couldn’t resist to make a tea light box for Halloween. I also included a spider for decoration. 🙂
You can find the new file here.
Monica
It’s a little bit late but I couldn’t resist to make a tea light box for Halloween. I also included a spider for decoration. 🙂
You can find the new file here.
Monica
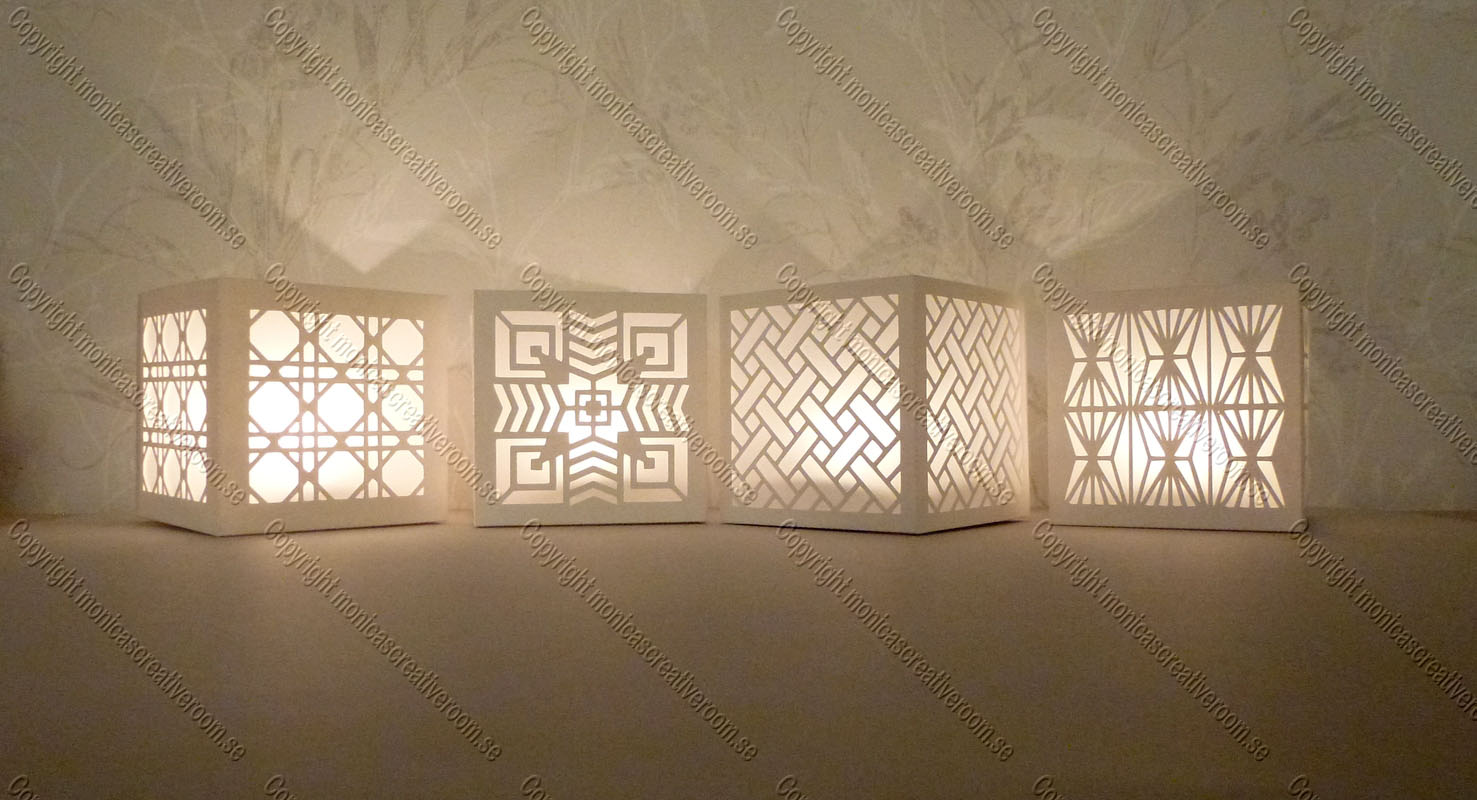
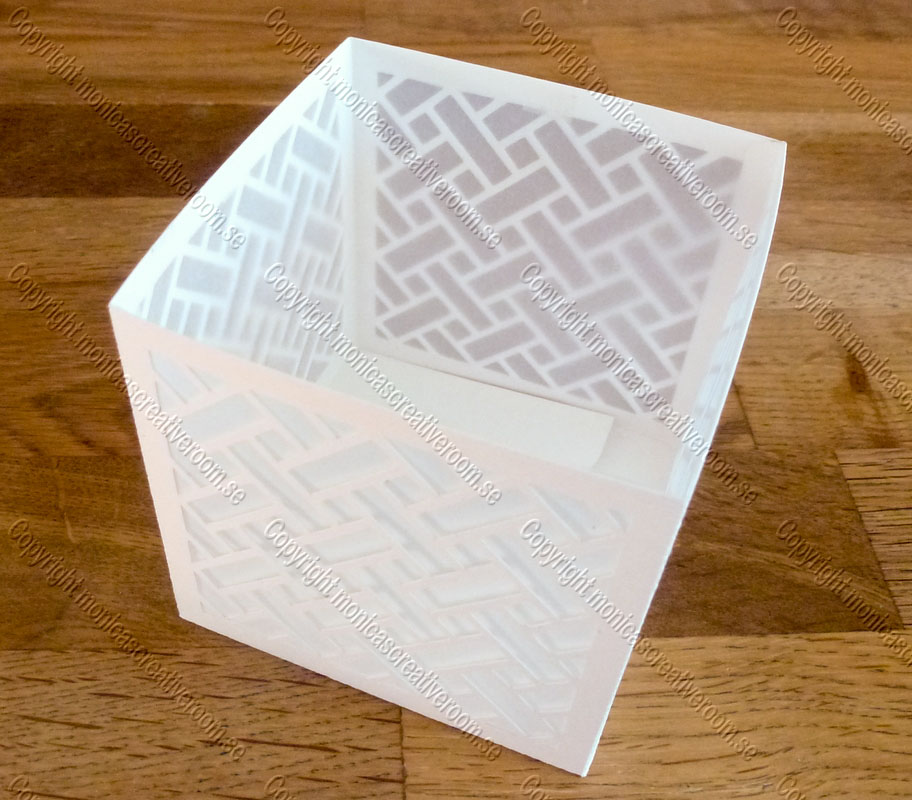
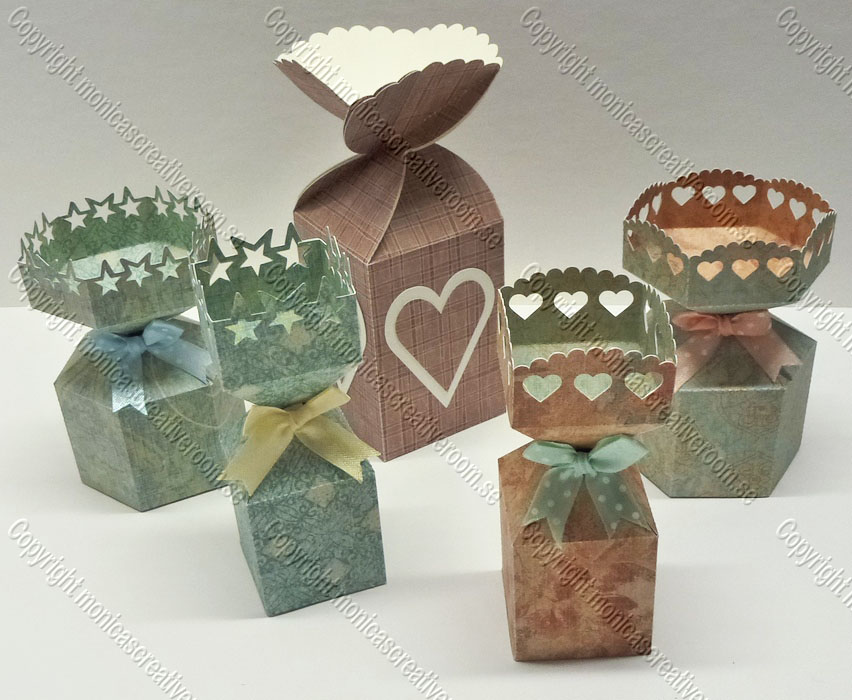
Now when the days are getting shorter we need to light up our homes. For this I have designed some tea light boxes. These will be nice to put on the table for Christmas, I think. Only use battery tea light for this!
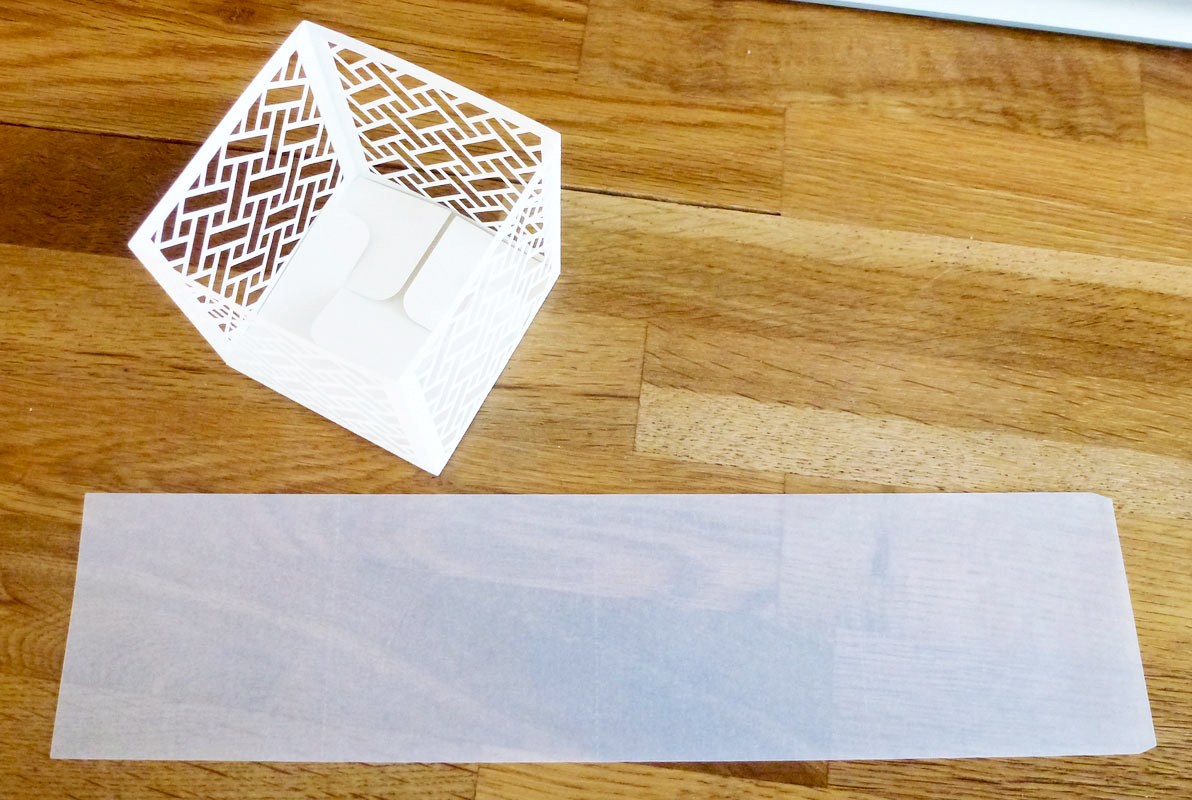
I have put vellum inside so the light will look softer. There is a design for the vellum insert included in each file.
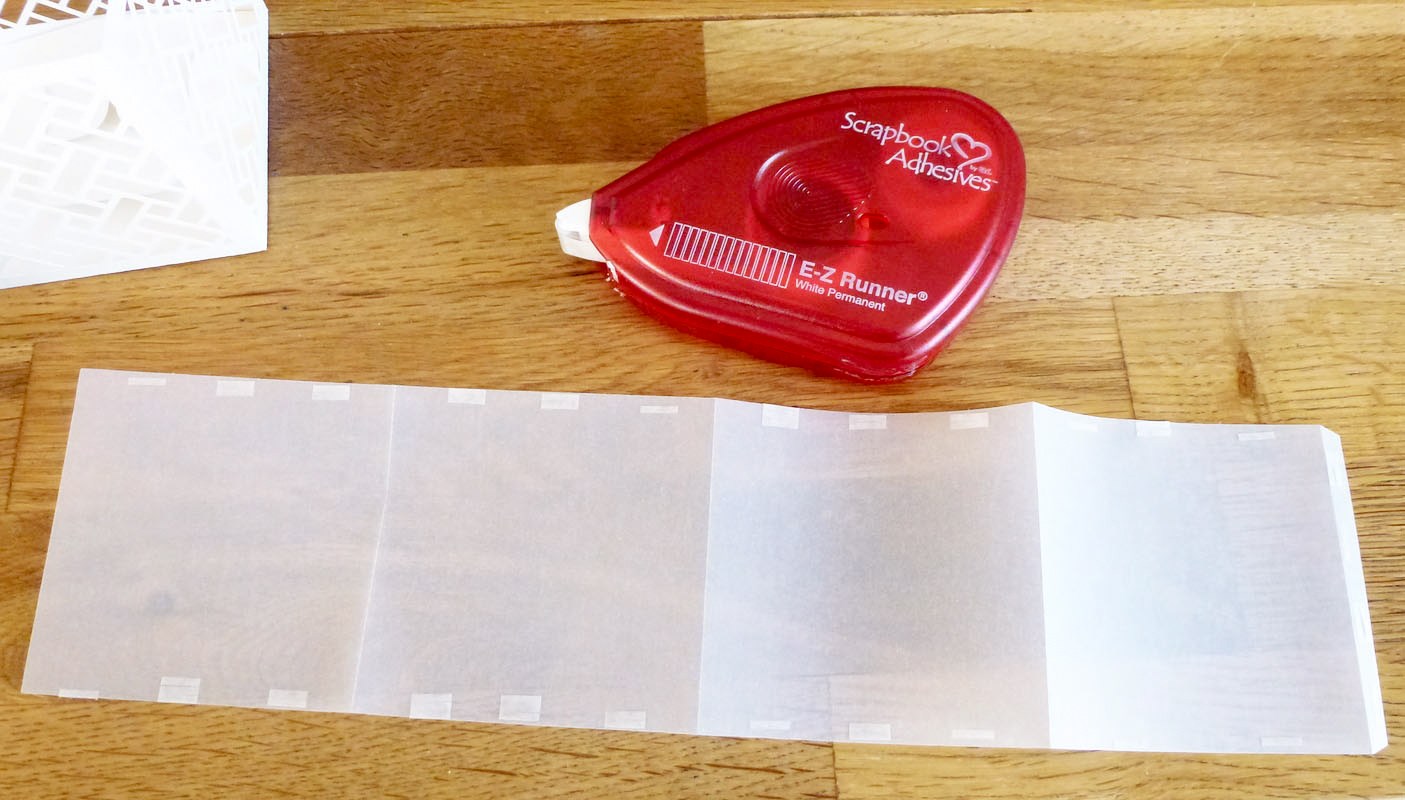
I hope you don’t have any problem cutting my intricate designs. When cutting on my Silhouette Cameo, I mostly use 180 grams cardstock. The settings I use is “Heavy cardstock” the knife on 2, thickness 30 and speed 10. I don’t know if the setting window have changed in the newer version, as I use an old version and will not update if I don’t have to.
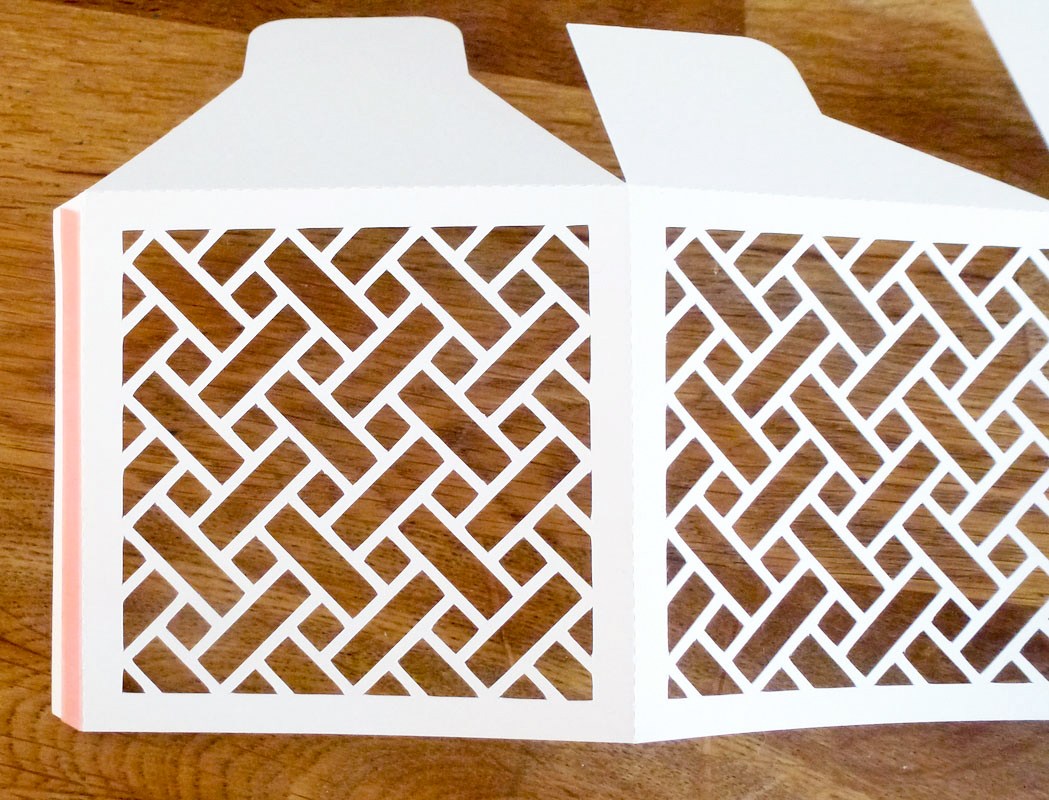
This is how one of the boxes look like when cut and lifted off the mat. I don’t have to weed at all. All scrap is left on the mat. I just use a small aluminium ruler to scrape the small pieces off.

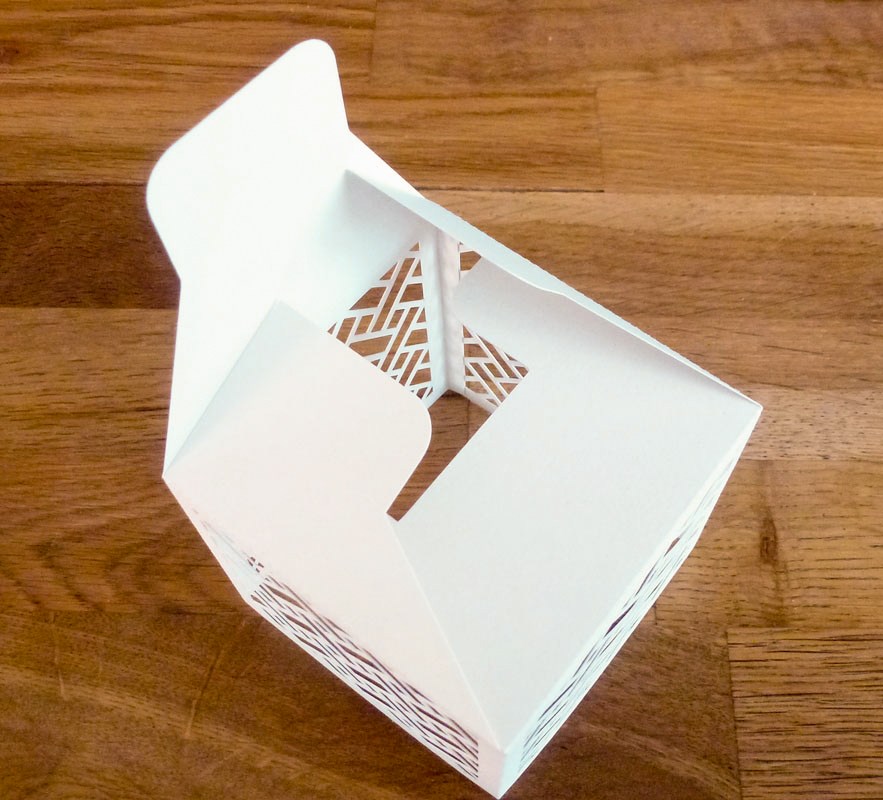
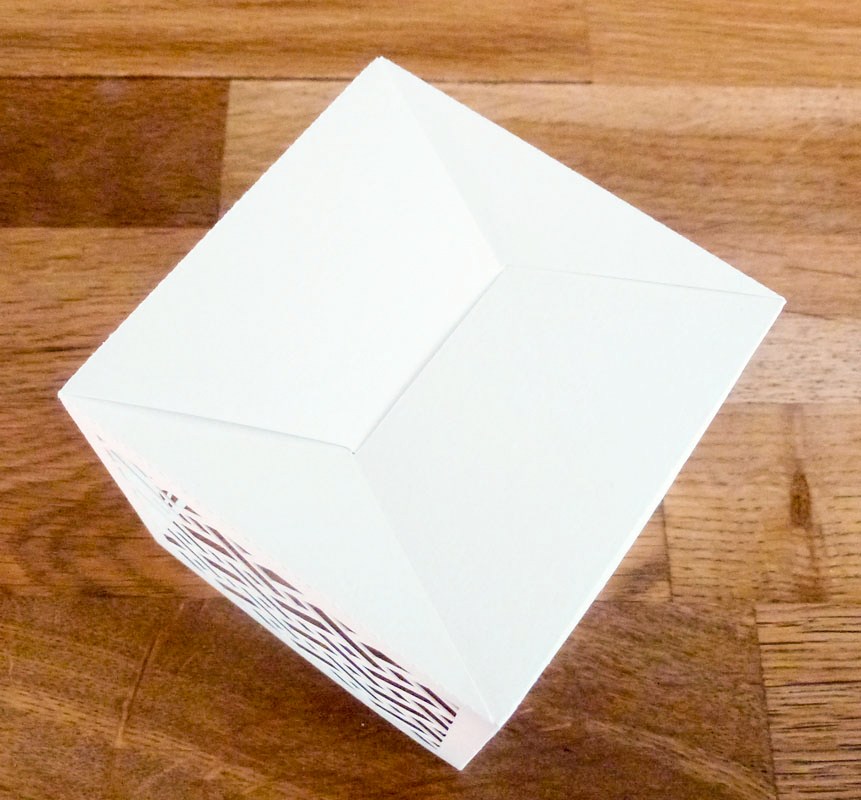
This is how I assemble the box:

There will be more of these boxes later on. Why just make a few when you can make a whole bunch of them! 🙂 I just have to cut them out and prepare all the different file formats before I can upload them.
The first four boxes can be found here.
Monica
I’m sorry that I haven’t updated my blog in a loong time. There has been so much to do in the garden during summer and there is still a lot to do before winter. I also work almost full time and have a very stressful job that drains my energy quite a lot. I hope that soon I will have time and energy to make some more designs.
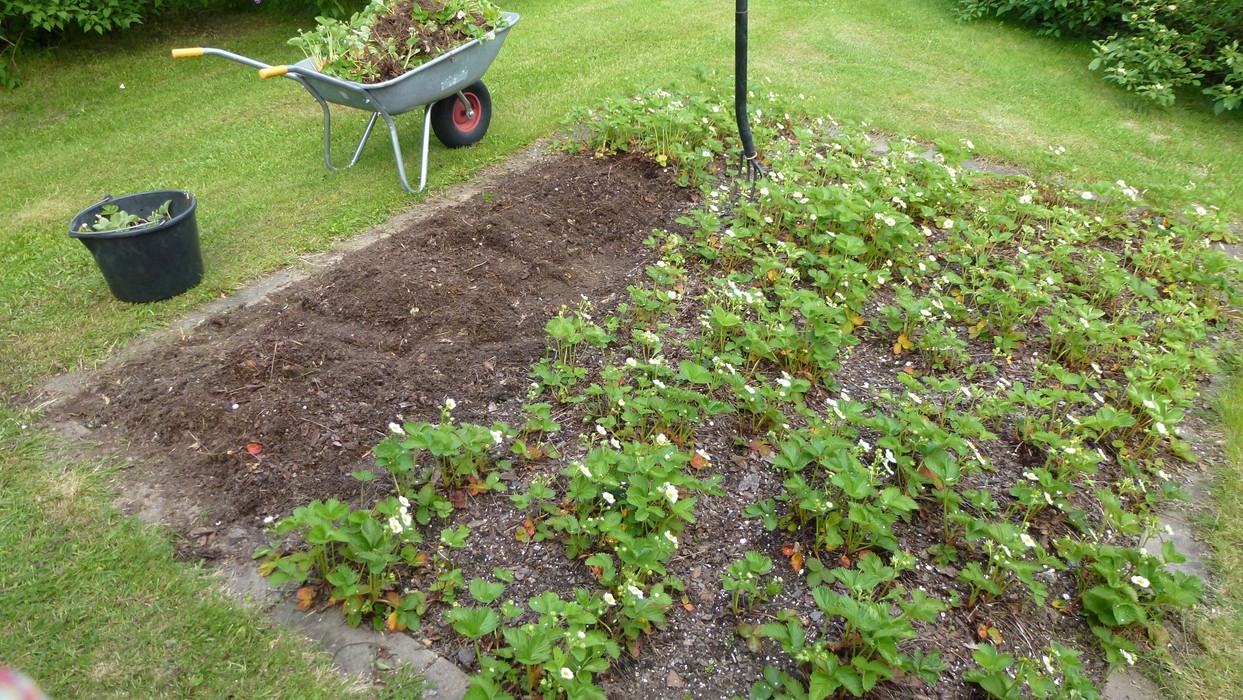
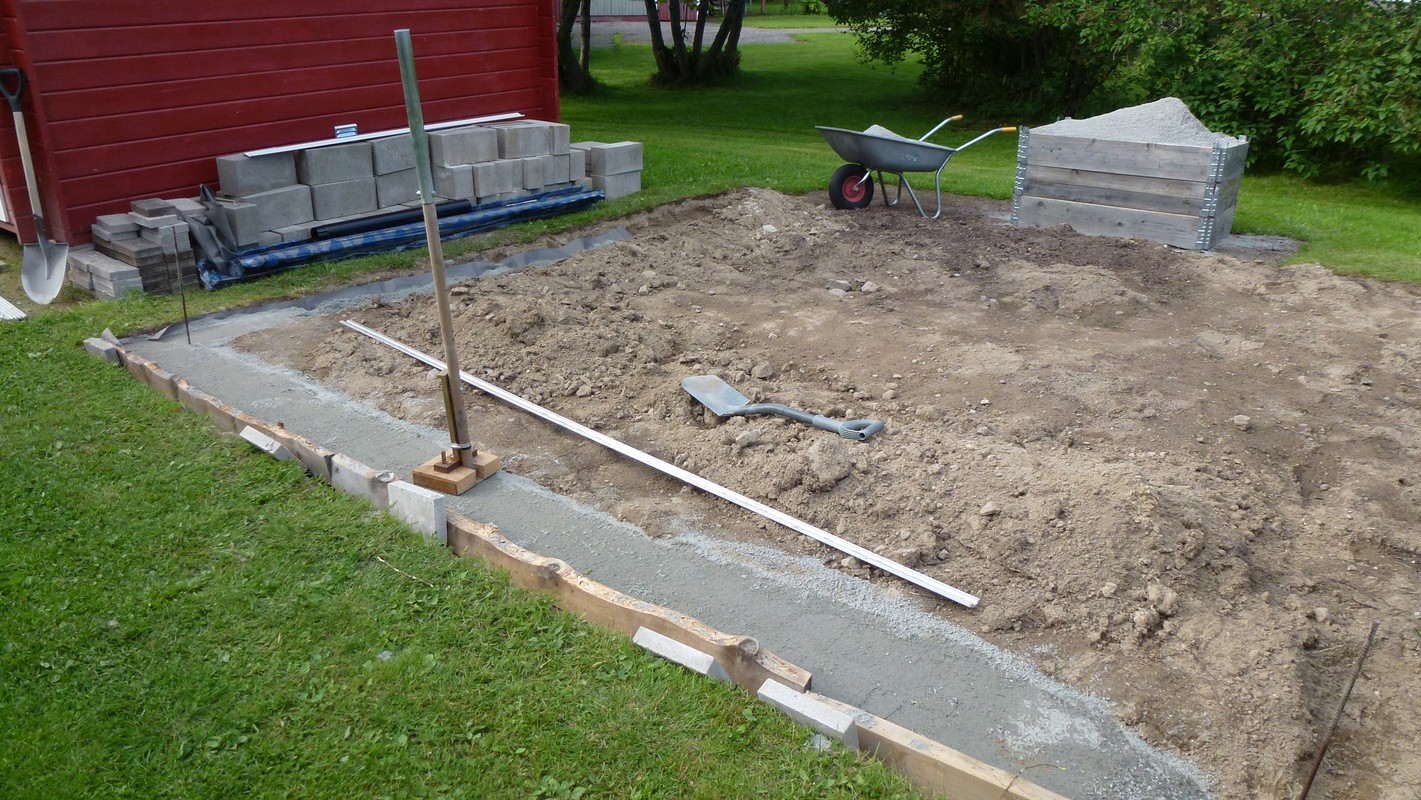
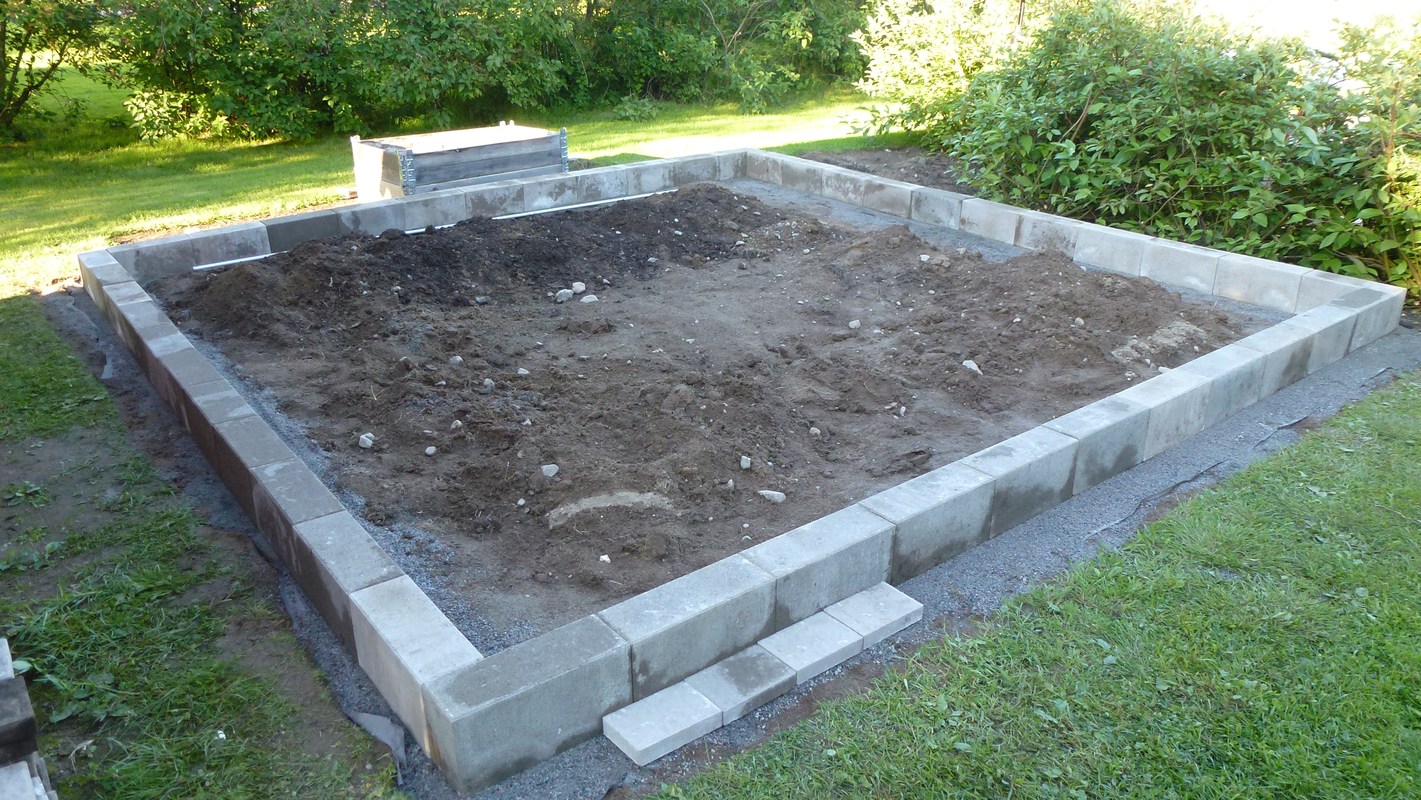
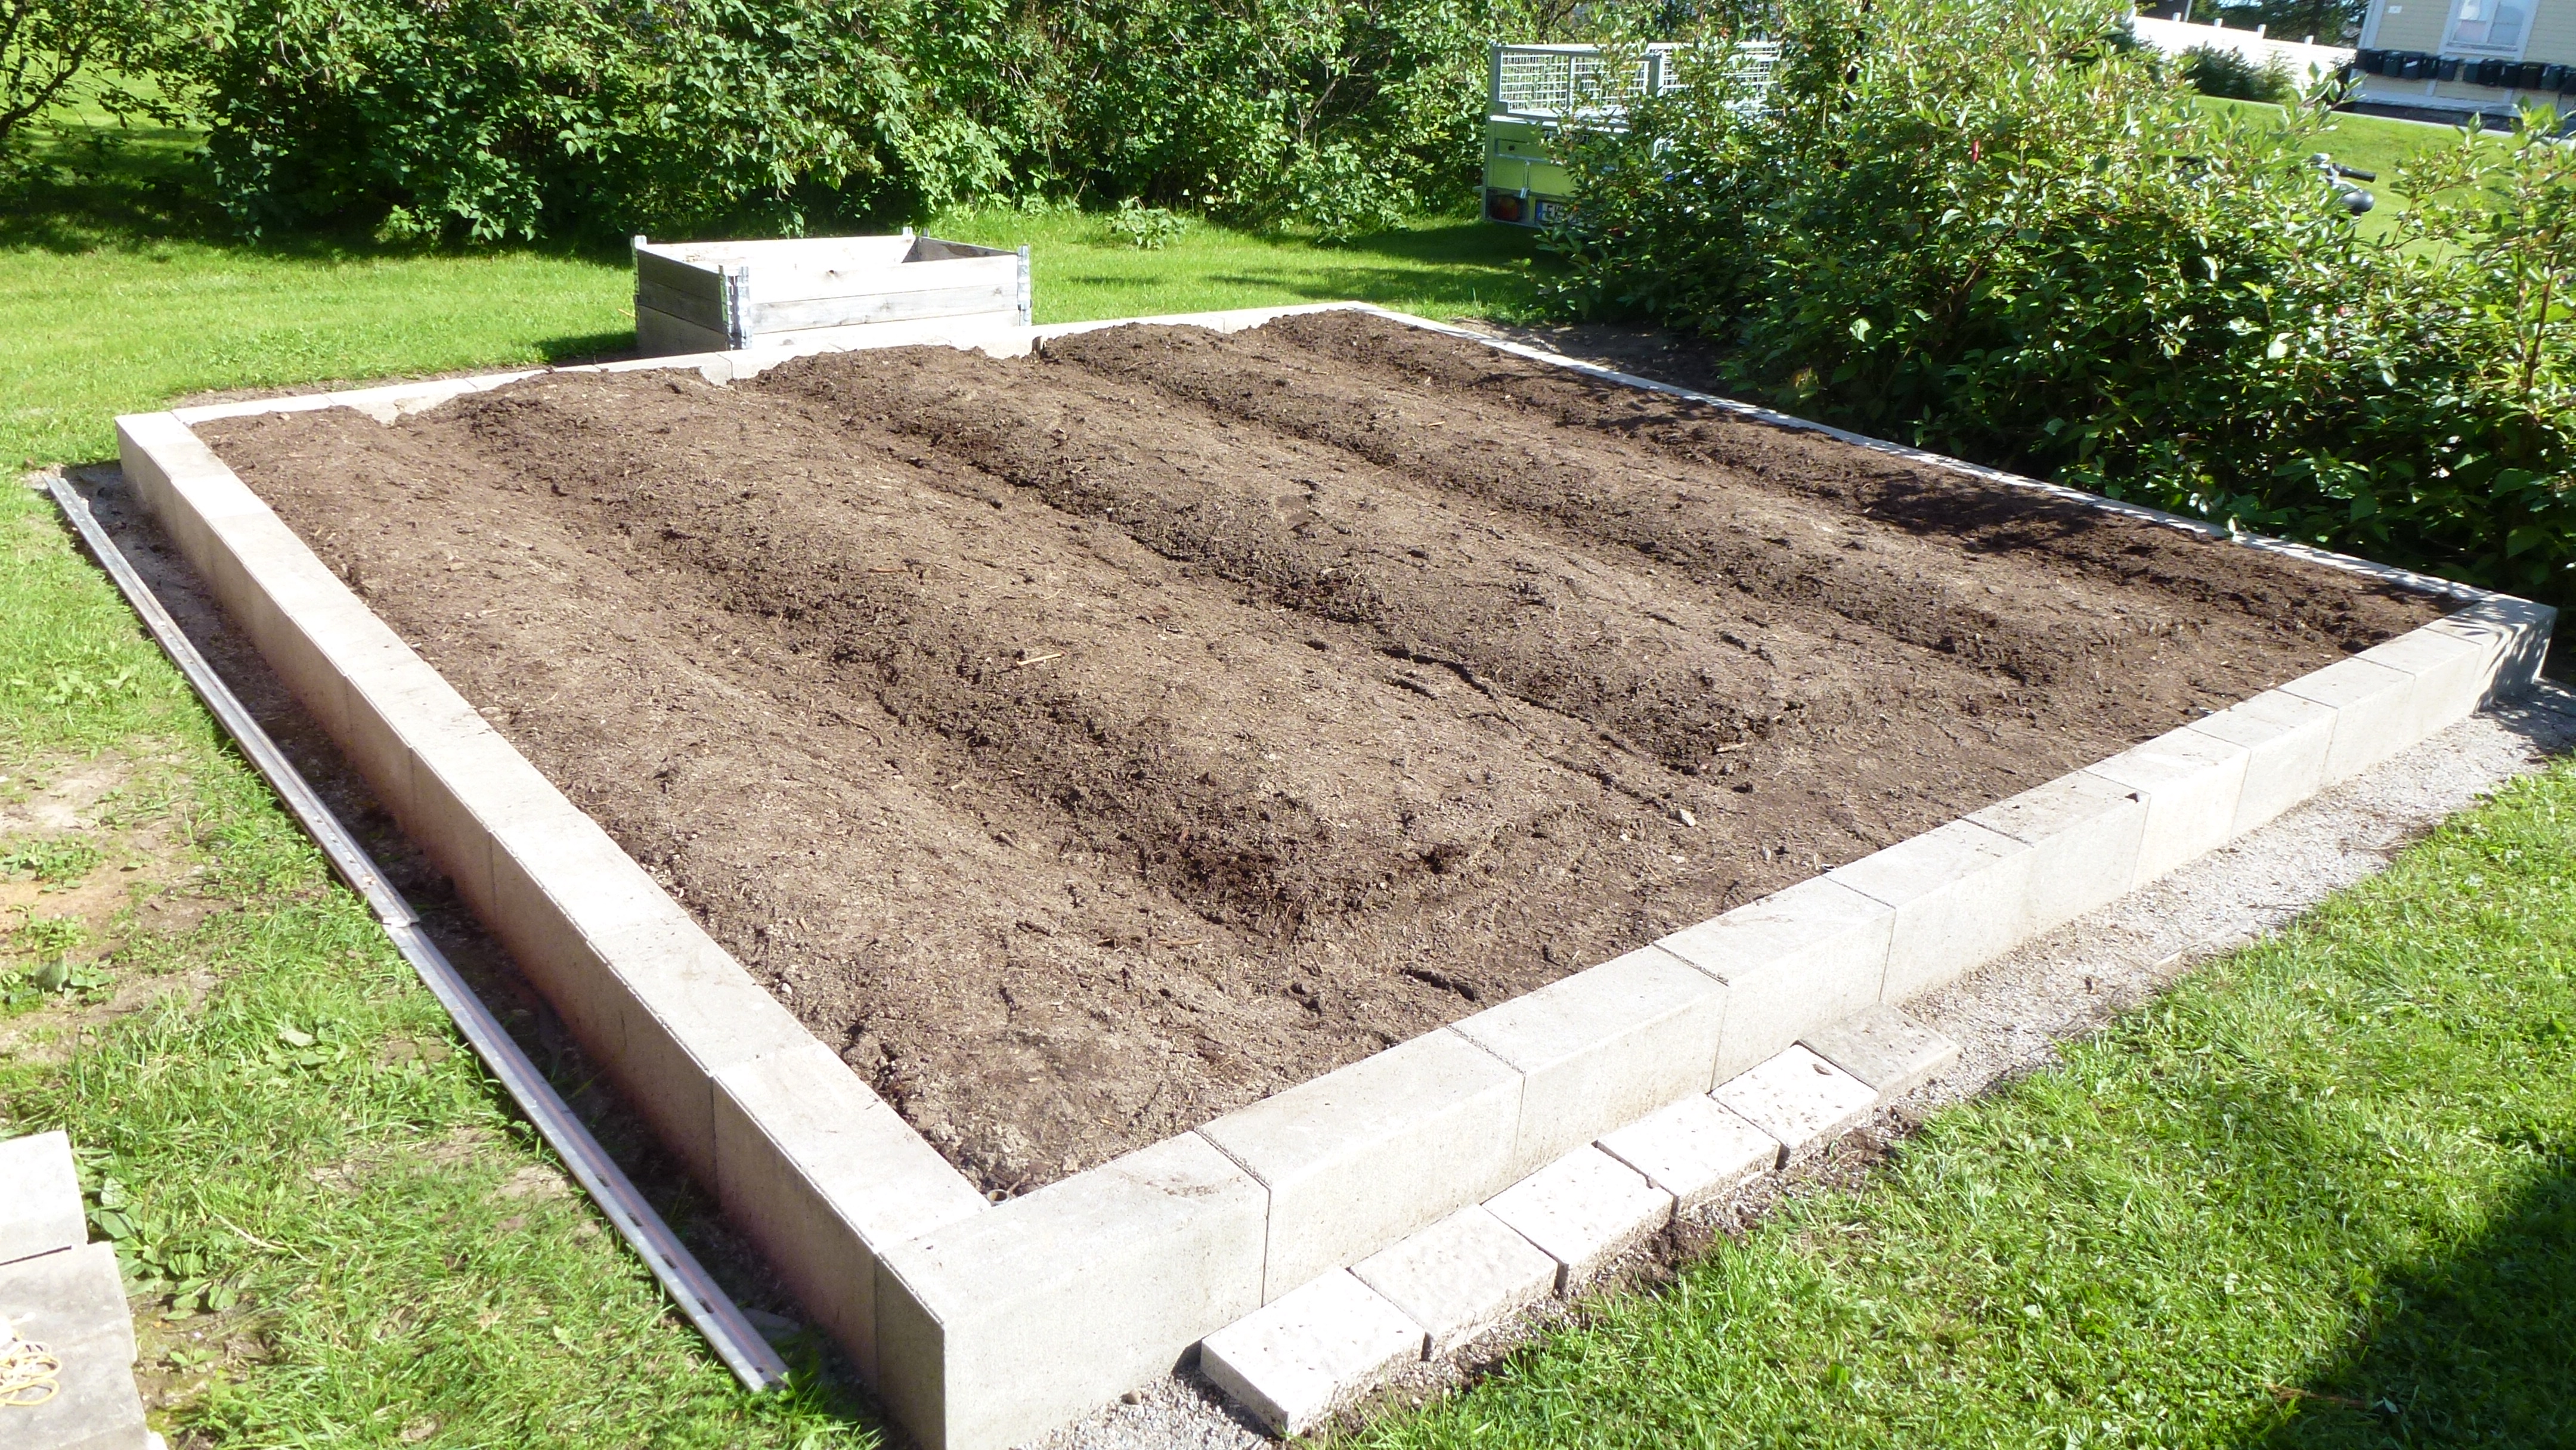
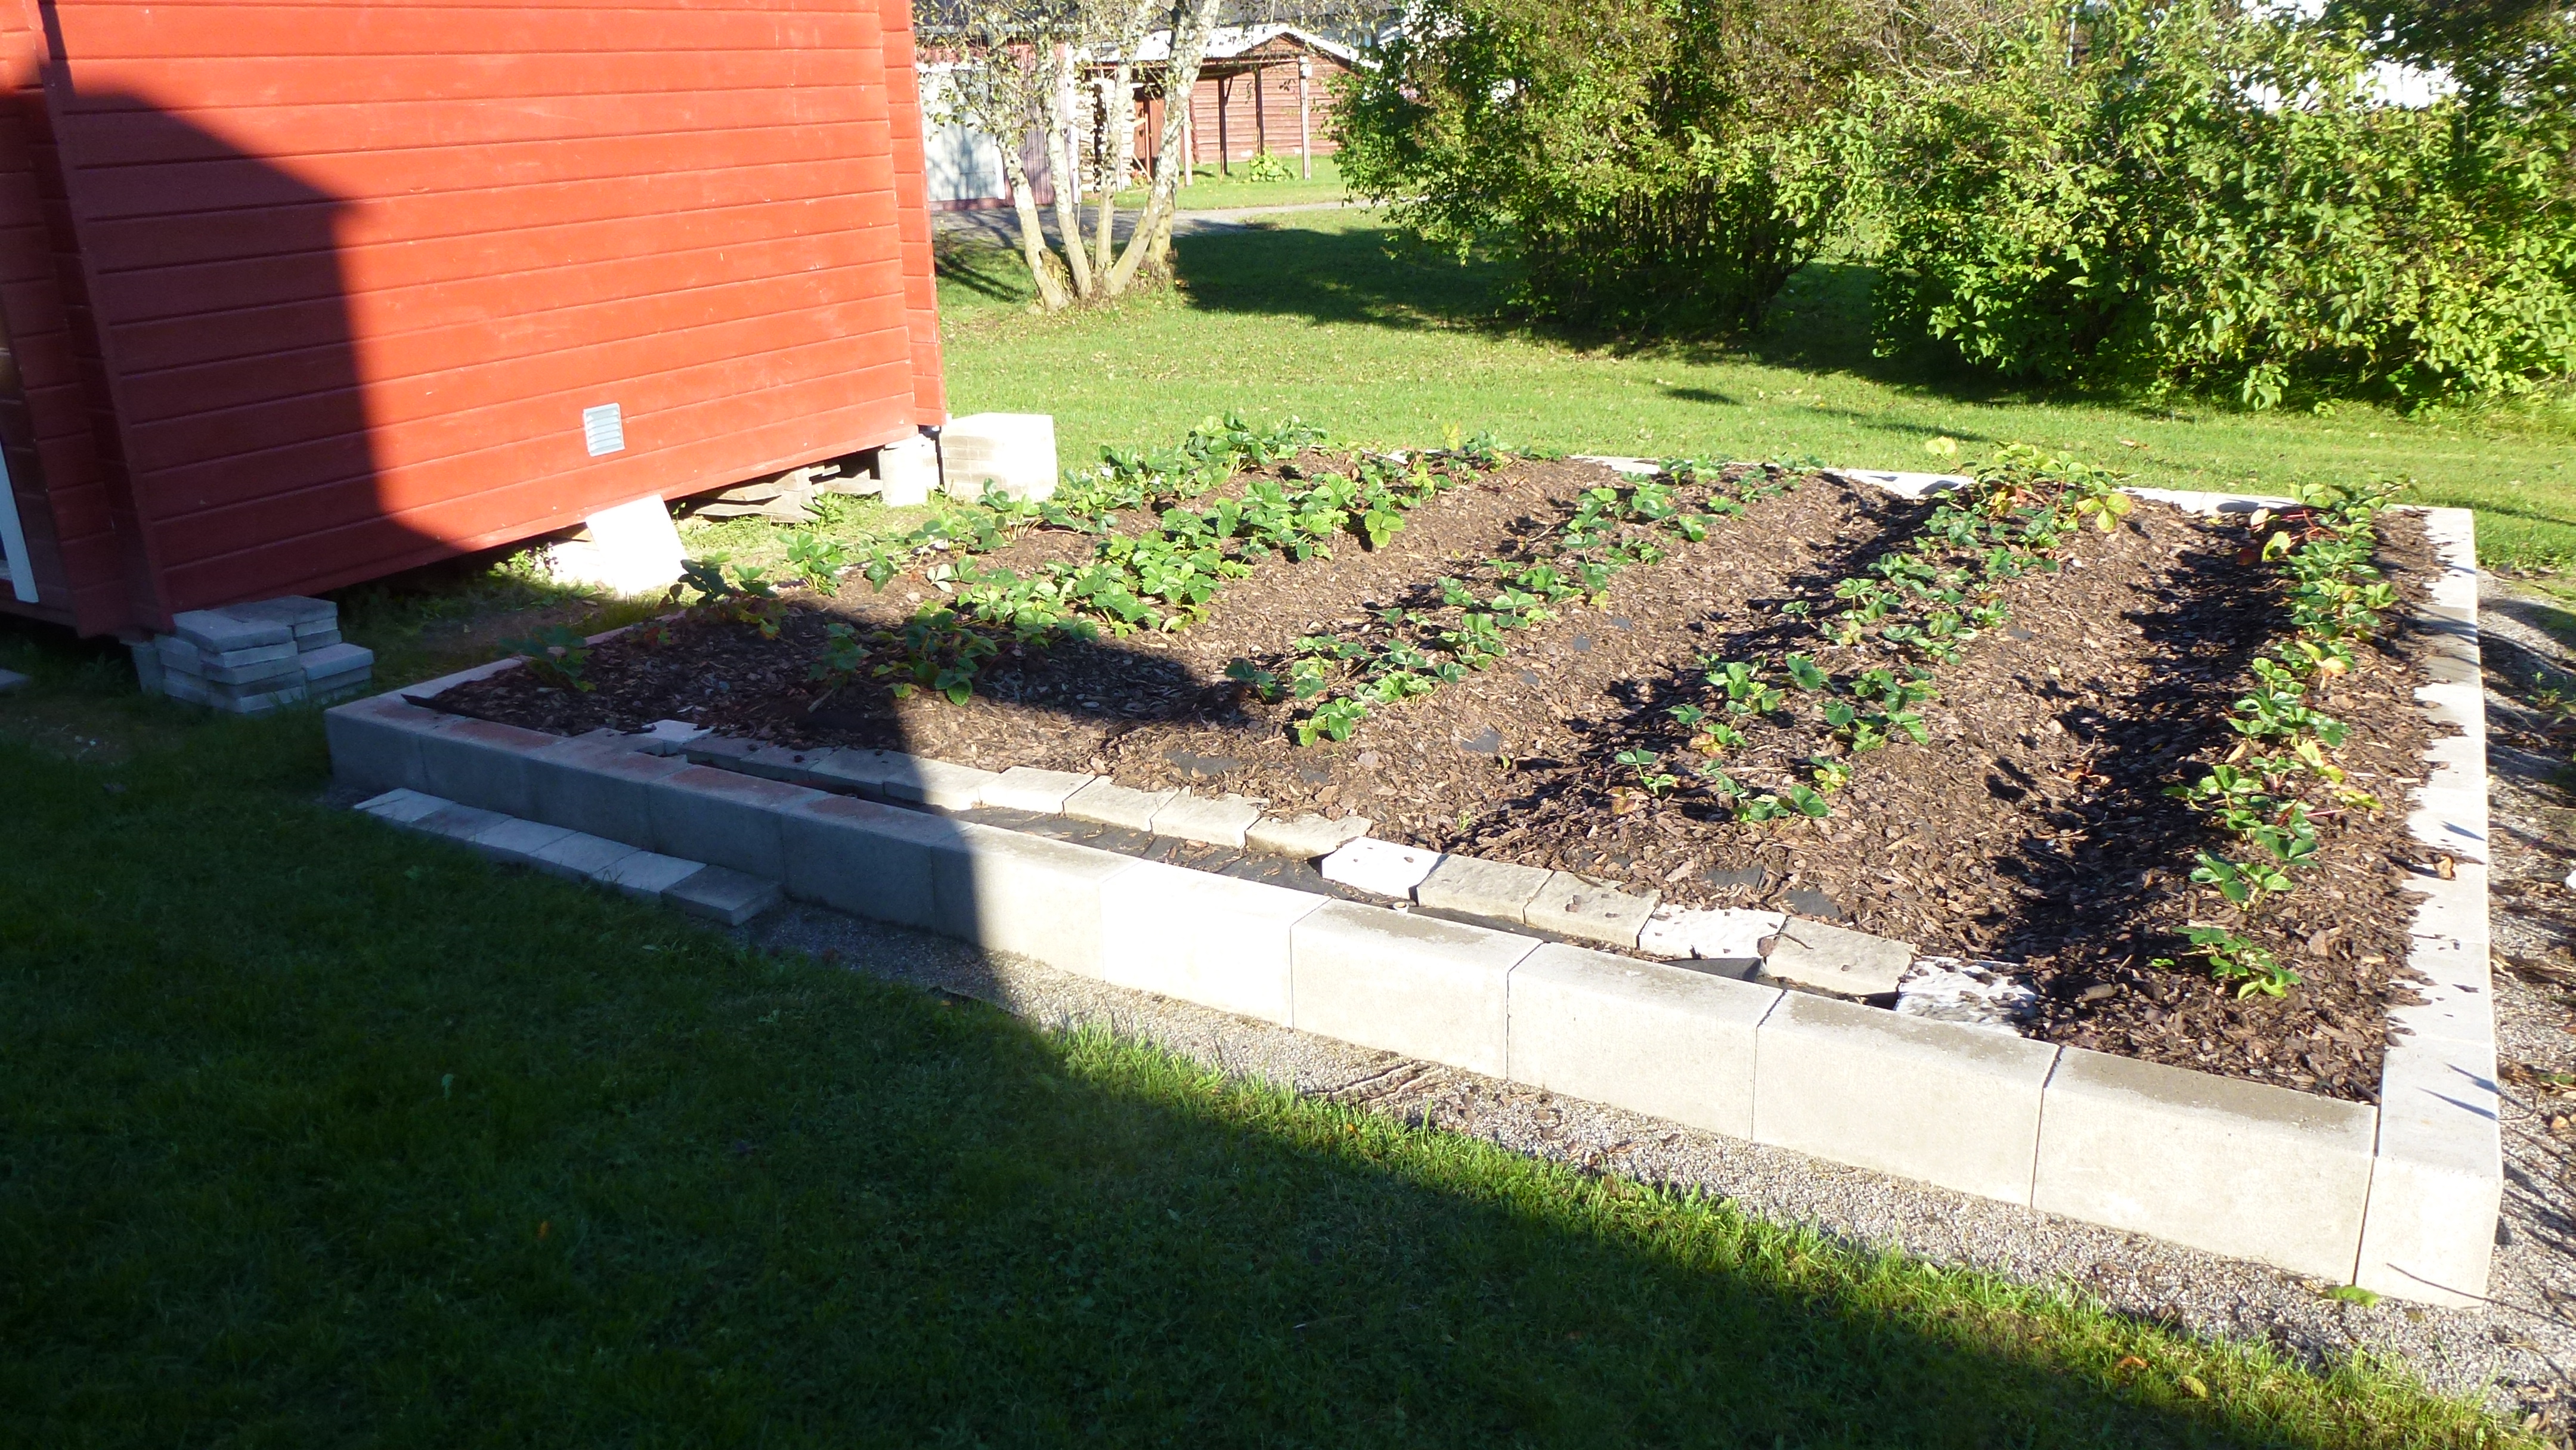
The weather this summer has mostly been cold and rainy, so all my planned work in the garden has been affected by this. One of the plans was to build a bigger place for the strawberries. It took the whole summer to finish this. I started in the end of June and it took two month to finish it, or almost finish it. I will continue next summer putting small concrete tiles around the big blocks to make it easier when moving the lawn.

Today I tried to clean up and organize my paper and cardstock storage. What a tremendous amount of cardstock I have! I will never have time to use it all up! Furthermore, I can’t just skip buying more, when I see a great offer! 🙂
Monica
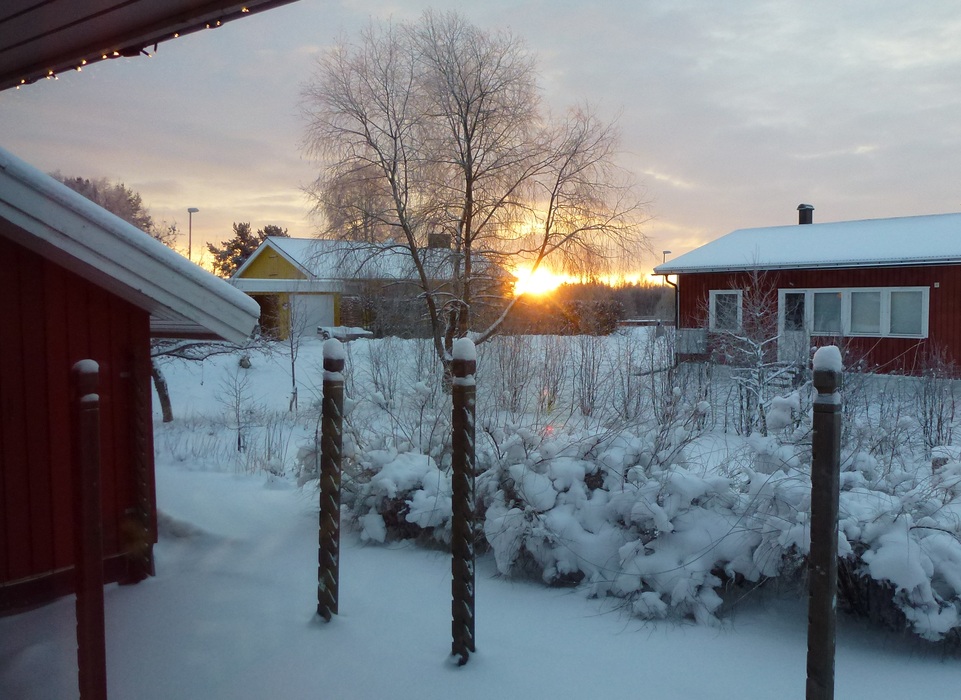
This time of year we have daylight around the clock. Sunset and sunrise are within the same hour so it’s only getting slightly less bright at night.
I love this time of year, it’s so uplifting after the dark winter. You can be outside working in the garden as long as you want (except for the mosquitoes that are terrible in the evenings and make you want to go inside).
I was up in the attic last night at half past twelve, it was half way between sunset and sunrise, and I took this picture. The sun will rise a little to the right of the picture.

Monica
Here are the new designs I promised. 🙂
I don’t know when I will be able to make more designs, I just have so many other projects ongoing this time of year. The garden and all my flowers need to be taken cared of, and I’m also in a very creative concrete phase right now. 🙂
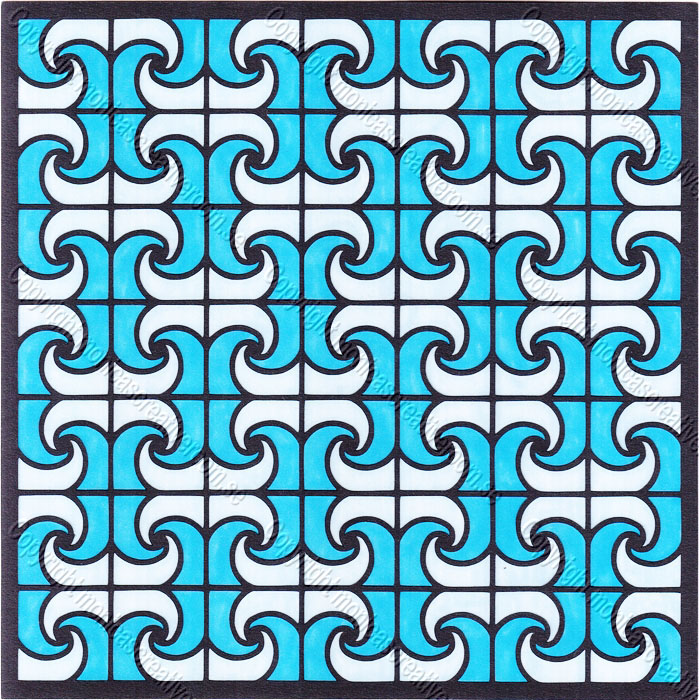
You can find the new lattice patterns here.
/Monica
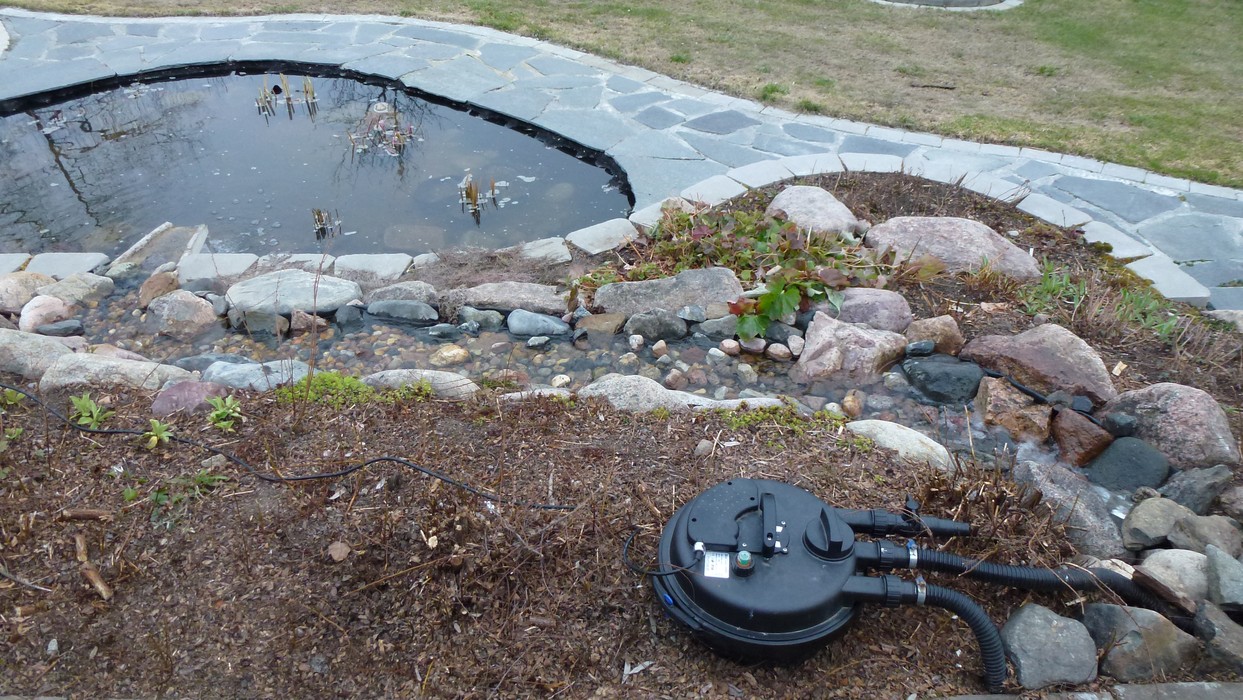
Cleaning the pond
At last all the snow from winter has melted. On the north side of the house there where snow just two days ago, but now it’s all gone. Today was the first day I was working in the garden barefoot. Hooray! It was quite warm when the sun was shining. Now the pond is ready for summer! I took off the net I had covered it with last autumn and scooped up a lot of leaves from the water. Then I lifted up the water plants from the deepest place and put them in shallower water. It was freezing cold in the water! I put the pump in and started the filter to the small stream that is built in the flower bed above the pond. Later I will put in the fountain when the water have cleared.
Last weekend we pruned all the spirea bushes in the upper line of the flower bed. They where so broken by the snow and the mice had eaten all the bark of the rest of them. Nothing else to do but prune them. The garden looks so empty and naked now. Nothing is hiding the filter. I have to put some high flowers around it this summer, I think!

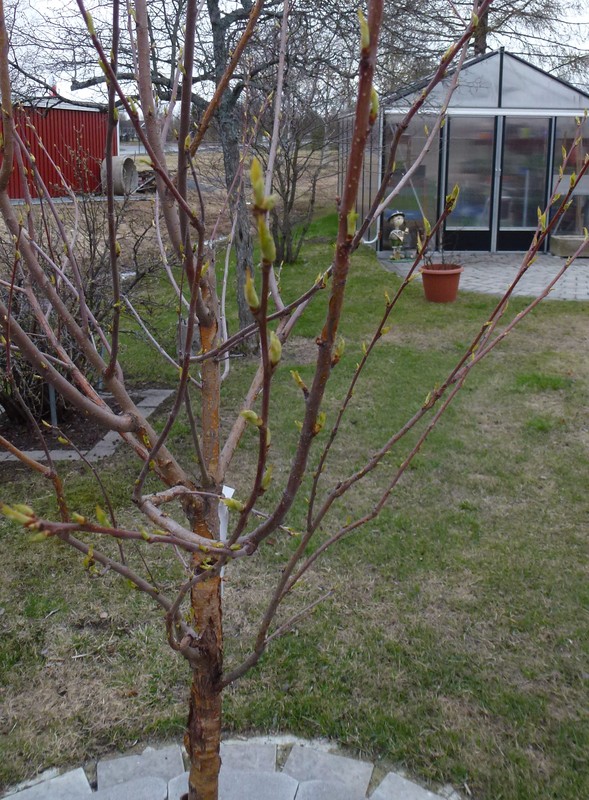
Greenhouse
This time of the year is very busy. My greenhouse is full with flowers and some tomato plants. Last time I counted the flower pots in there, there where around 1000 of them. I have to continue grow them in the greenhouse for some more weeks before I can plant them out in the garden because we still have frost at nights. The tomato plants will stay in the greenhouse all summer together with the cucumbers and the physalis.


Soon the trees will be green again. The leaves have started sprouting!
Later this week I will upload some new lattice files! 🙂
Monica
To cast bigger items in concrete are not appropriate to do indoors. I long so much for spring to come, so I can be outside doing this. Meanwhile I have to find other things to do to ease my desire for casting. I have so many ideas that I want to follow out. 🙂
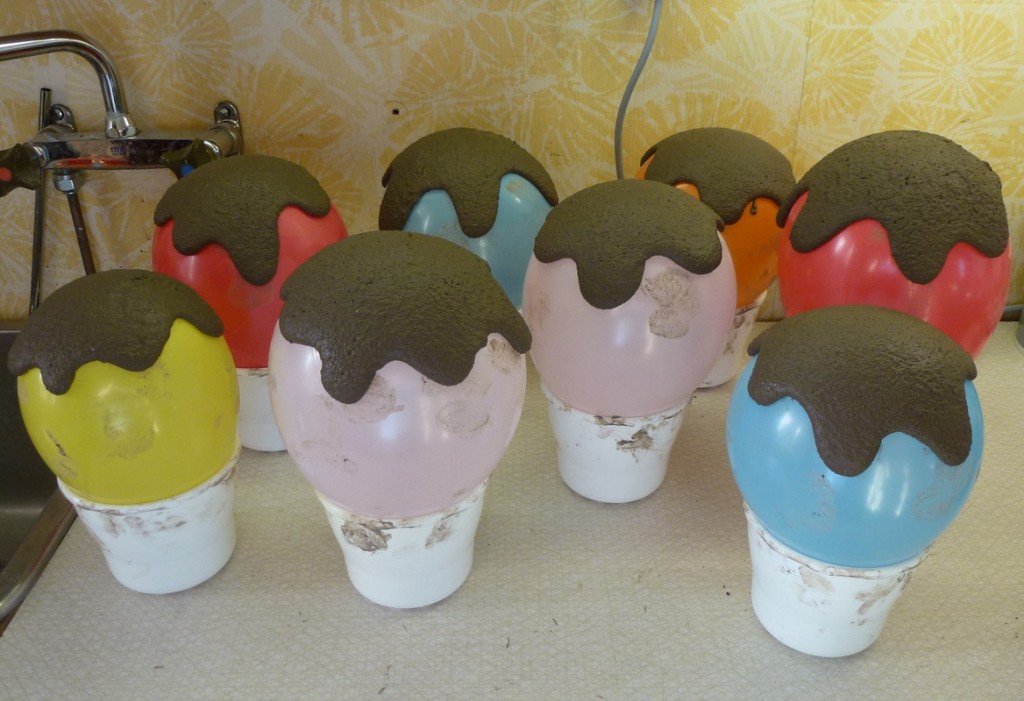
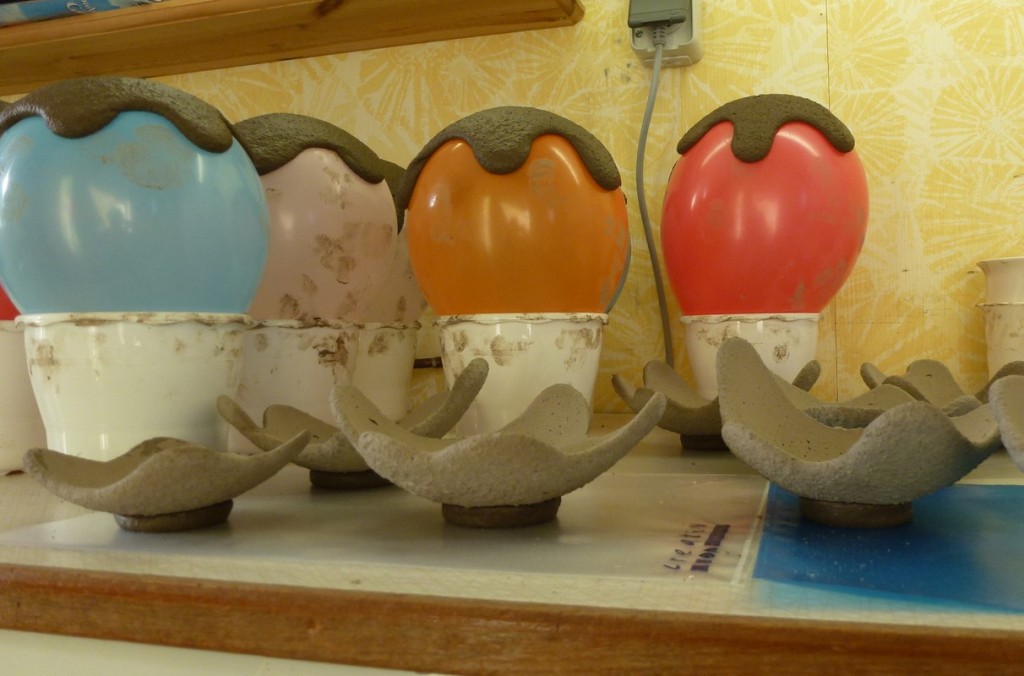
First out is the “dragon egg shells”, casted in fibre-reinforced self-levelling compound. It’s a cement based mortar for floors but can be used in many other ways too. One thing to keep in mind when casting with this, is that it has not the same strength as concrete.
I mix the compound powder with water so the mix becomes quite thick, like a bun dough.
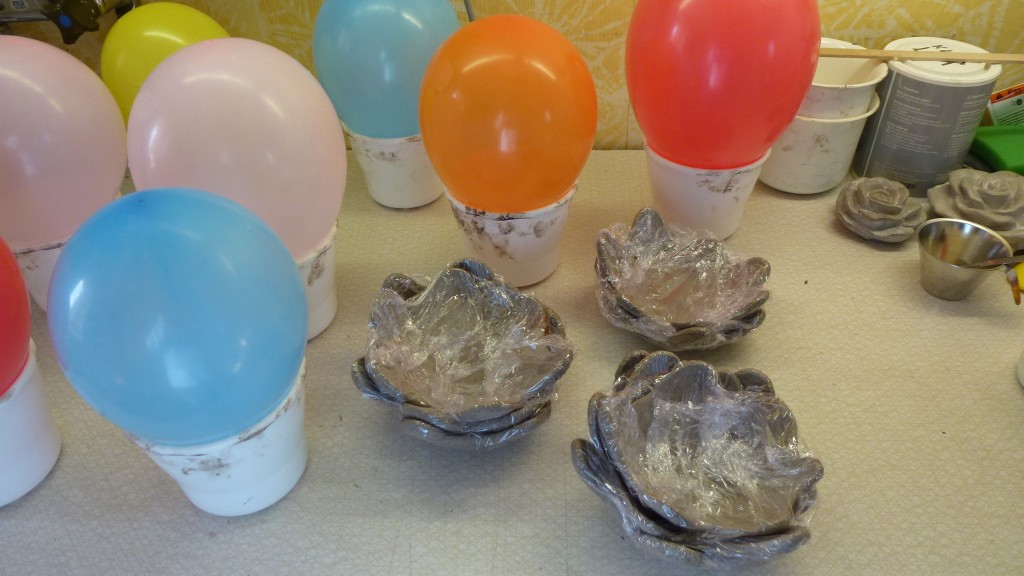
To make the “shells” you also need some balloons and something to put the balloons on to hold them up. I used plastic pots.
Shape the mix to a flat ball and place it on top of the balloon. Hold the balloon and the balloon holder firmly and tap it a couple of times to the table. The mix will start to slowly spread out. Shape the mix to small petals and tap it to the table some more times. Don’t tap it too much, then it will become too thin and will break when handling.
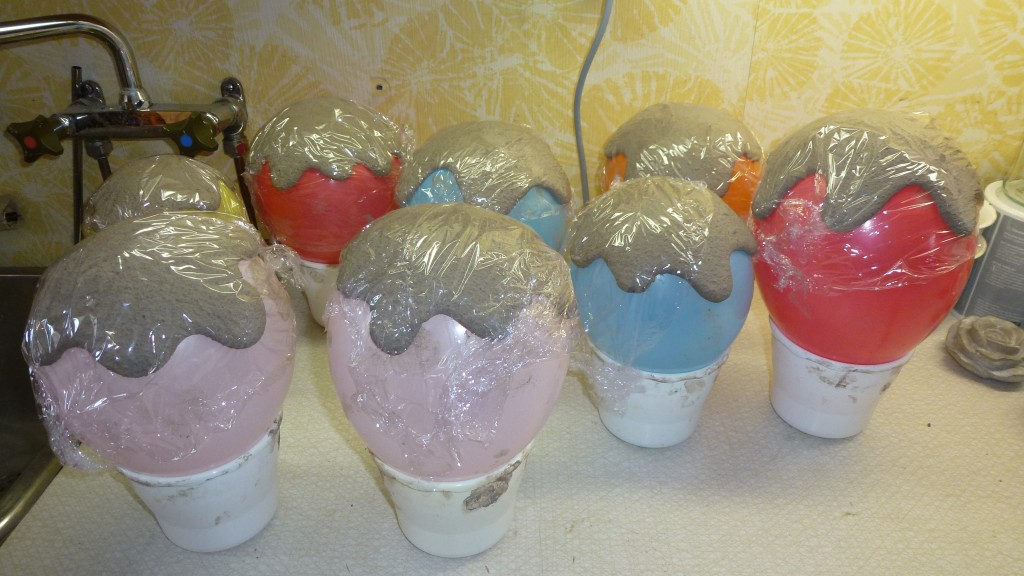
After about an hour you can put a plastic film over it. Leave to cure for one day.
Remove the “shells” from the balloons and wrap them in the plastic film. Leave them to continue cure for another day. You can rinse the balloons in water to wash them and them reuse them.
Now it’s time to give the bowl a base. Form a small ball from the mix and put it on the bottom of the bowl. Gently tap so it will spread slightly. Turn it over and press it gently down on a plastic film. Leave it to cure for a day before you remove it from the plastic.
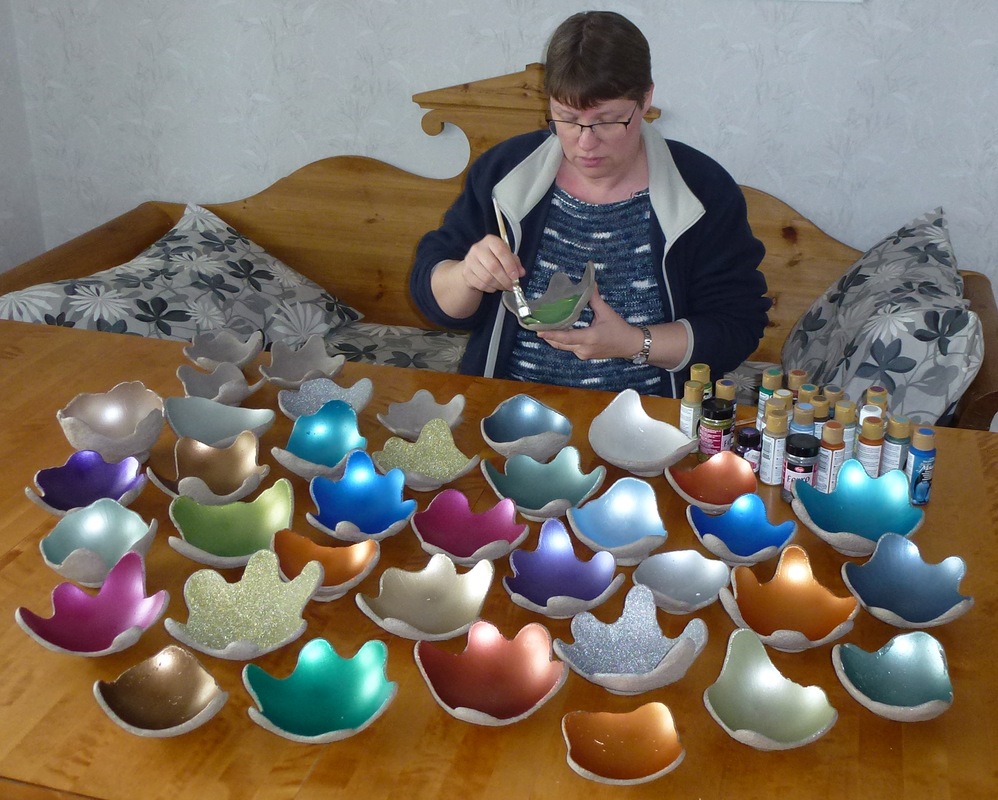
When the bowls have cured for a week you can start painting them. First I painted them with a uncoloured concrete sealer on both the inside and outside before I painted them with metallic paint.
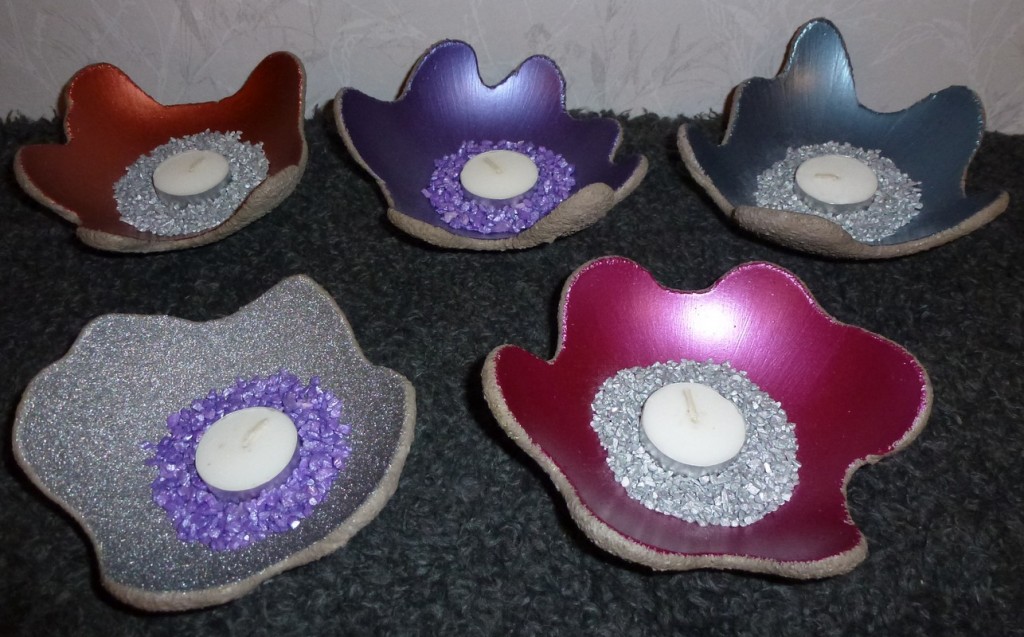
They look very nice with a tealight in.
I have many other casting projects on going and I will post pictures from them later. 🙂
For those who are waiting for new cutting designs, you have to wait a little bit more. I can’t do everything at the same time. 🙂
Monica
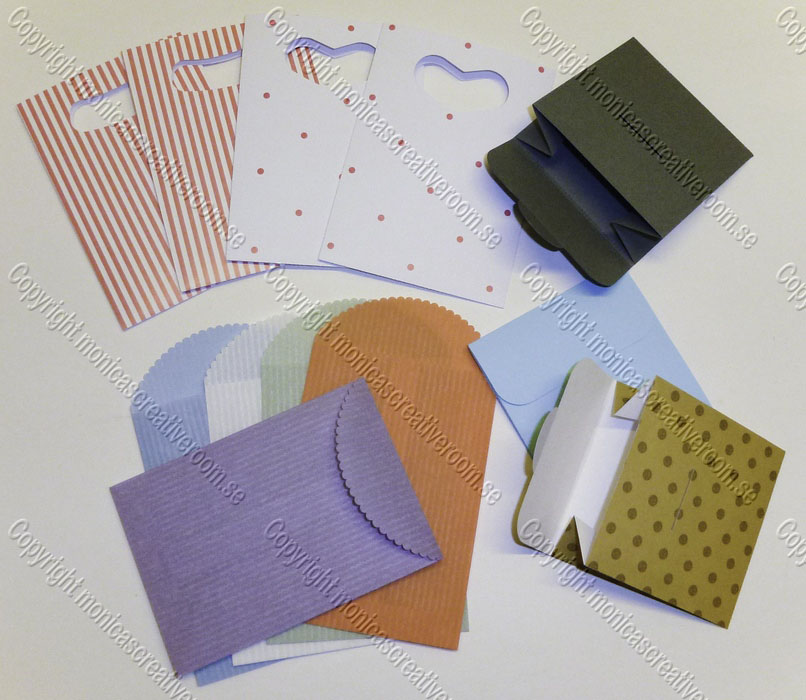
Before Christmas I made these designs but I have not had inspiration to make all the needed files ready until now. Five more cards are added to the collection!
You can find them here.
/Monica

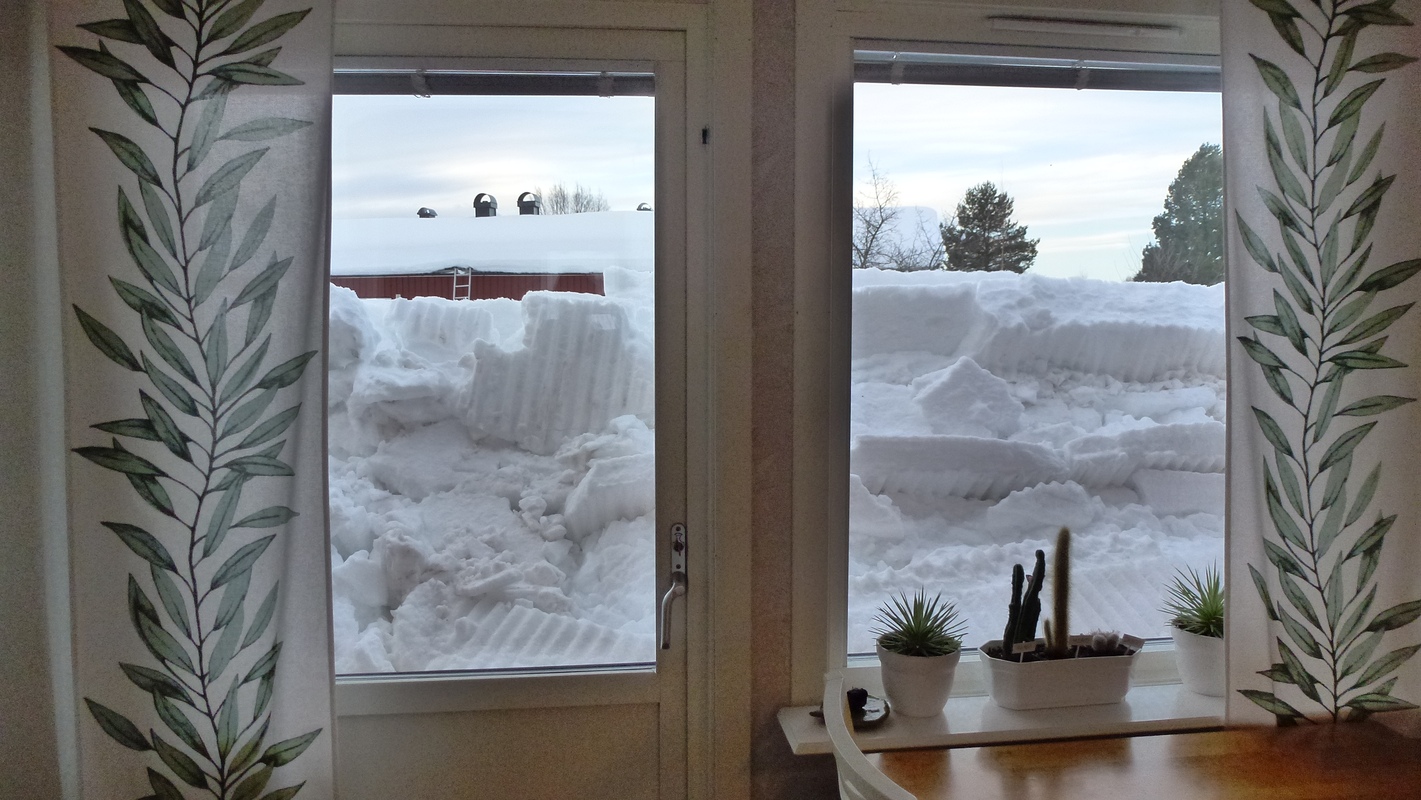
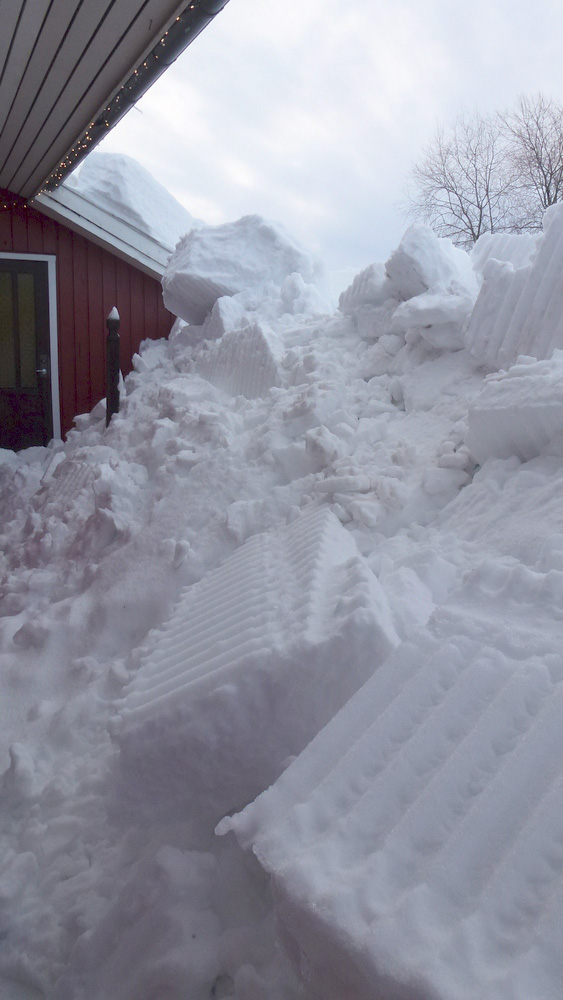
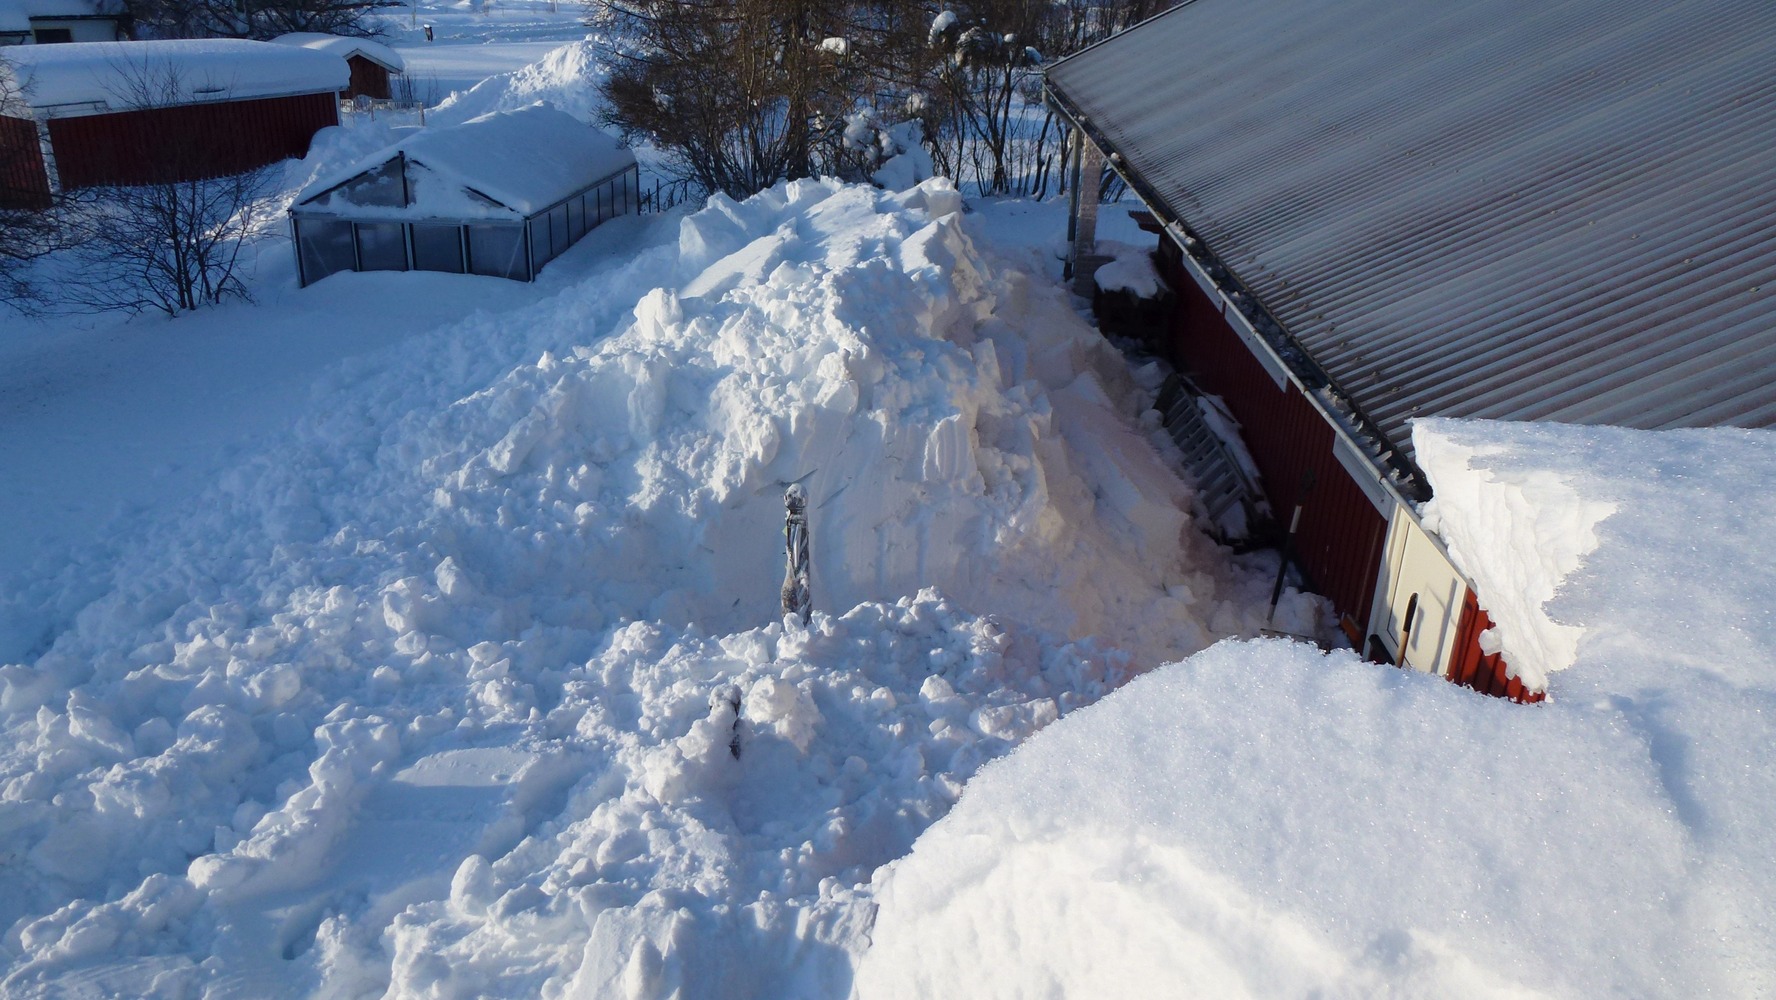
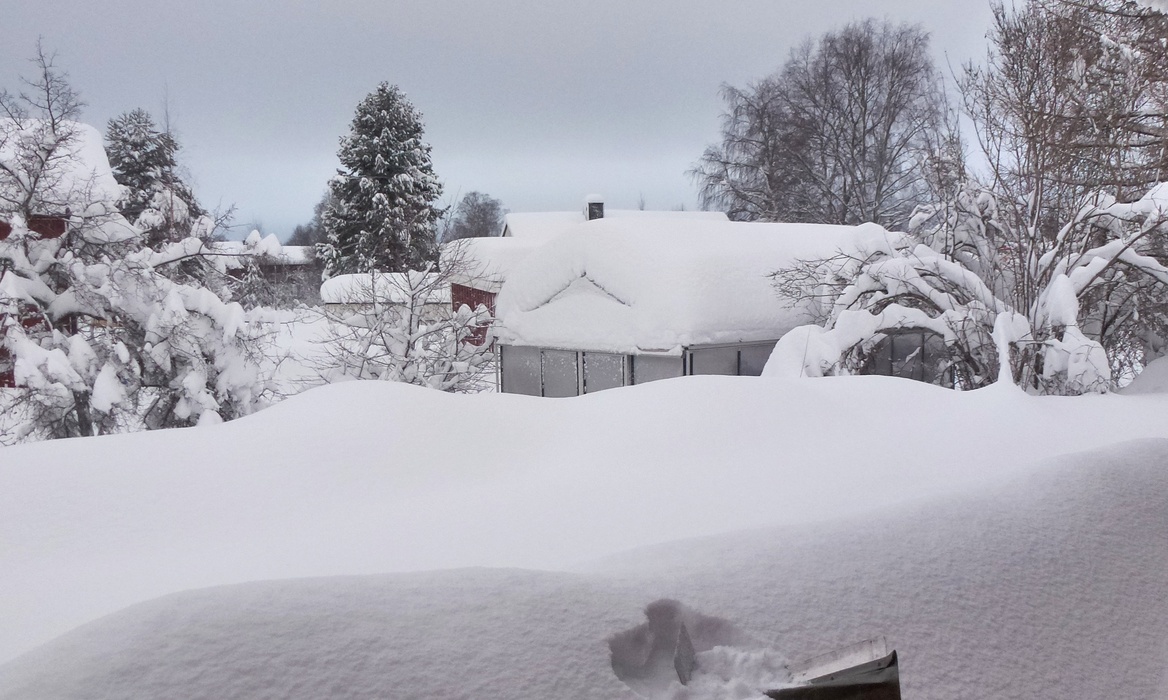
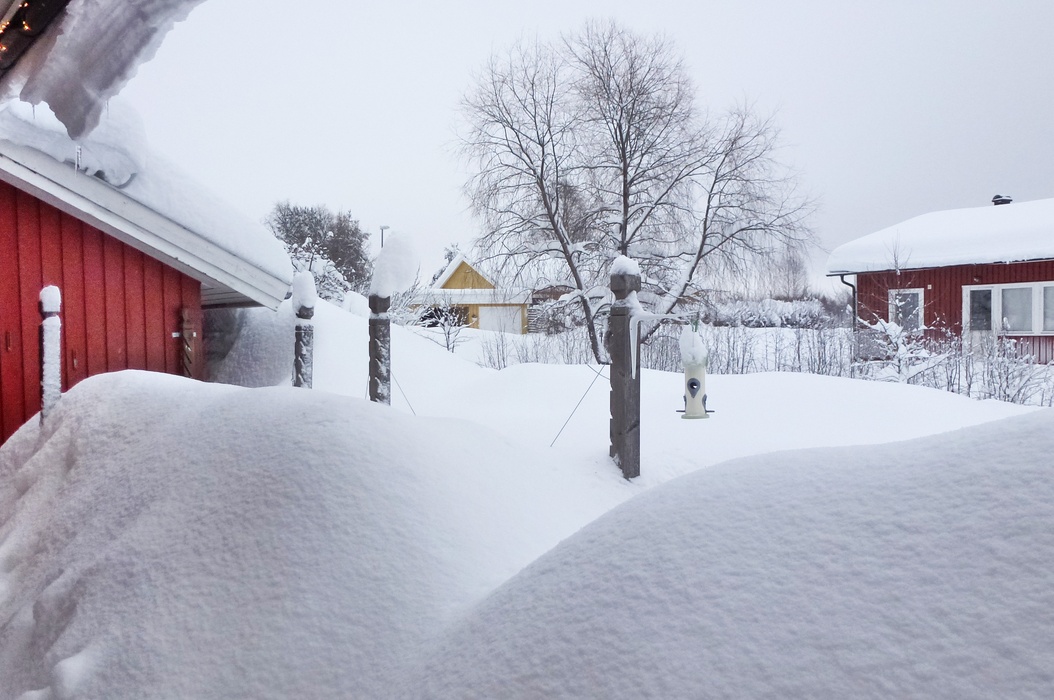
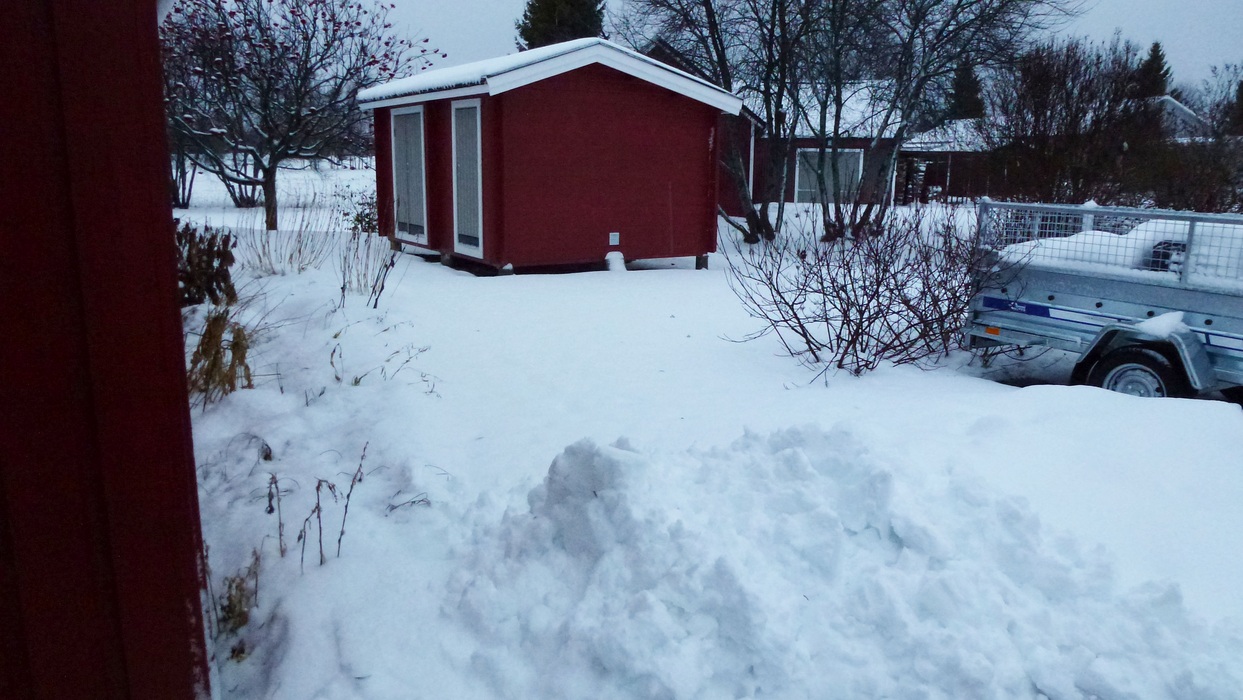
We have had so much snow lately but last night it began to rain and thaw. I woke up early this morning by a huge rumble when all the snow on the south side came down from the roof. A large pile of snow totally blocked the view from the windows. The bird feeders that I had put on one of the poles were nowhere to be seen. Even the poles where gone, buried deep in the snow.
View from the kitchen and living room:

Outside:
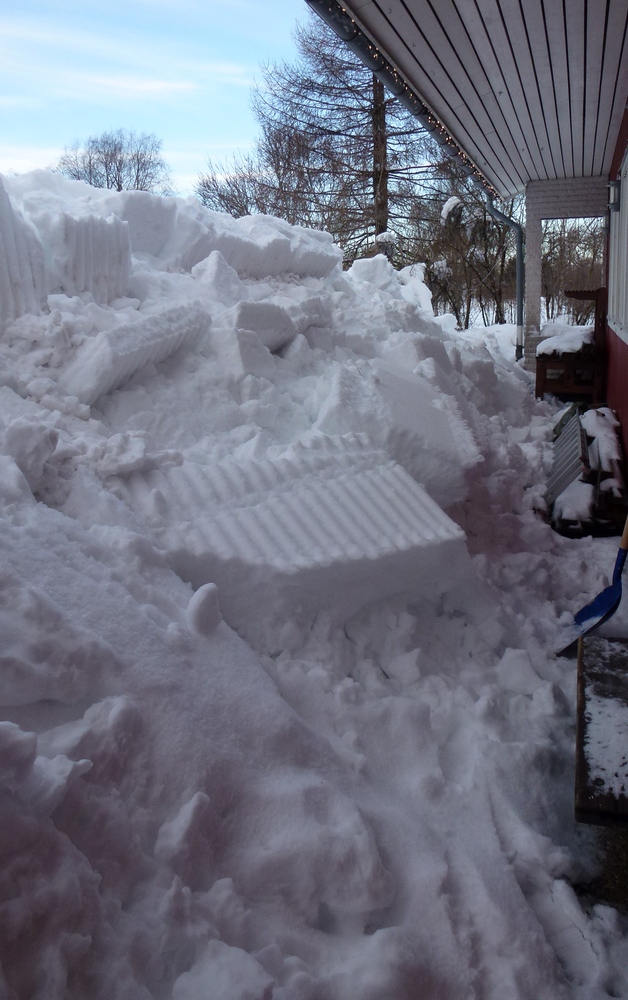
We started to dig for the bird feeders. I had to screw the hangers back as they had come loose. Now the birds can eat their nuts again:

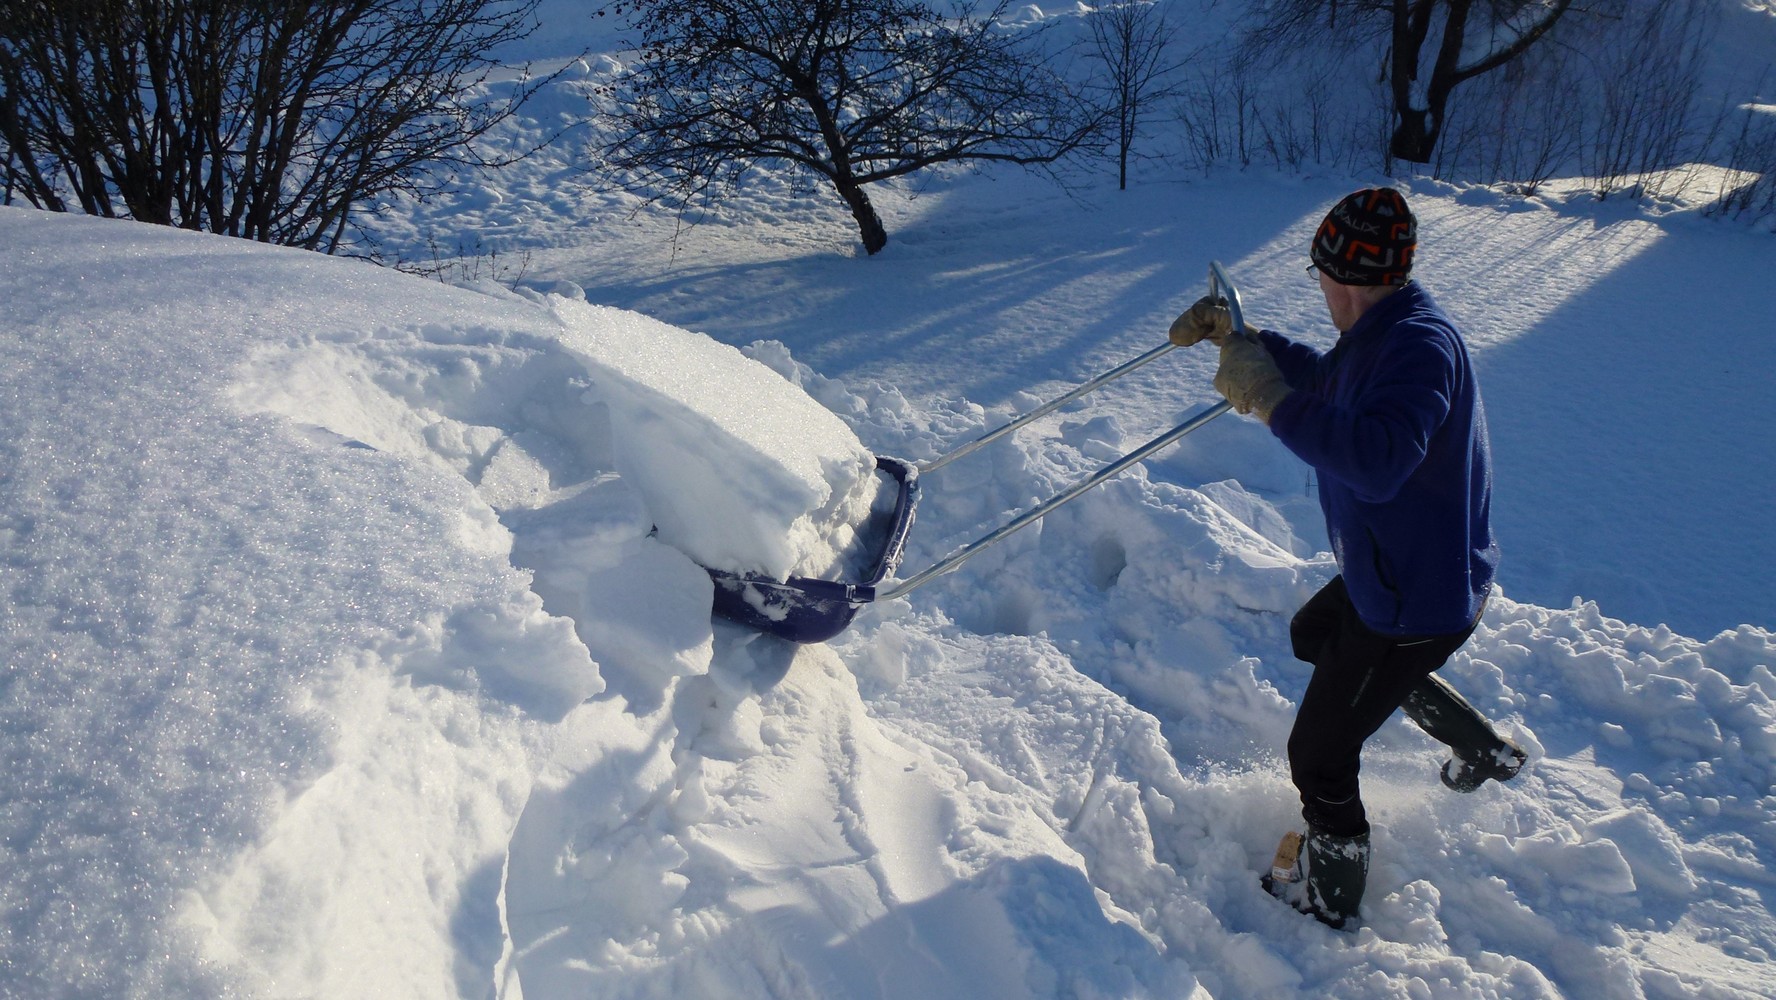
Then we had to dig away some of the snow so we can look out through the windows. Here is my husband shoveling snow from the roof while still standing on the “ground”:
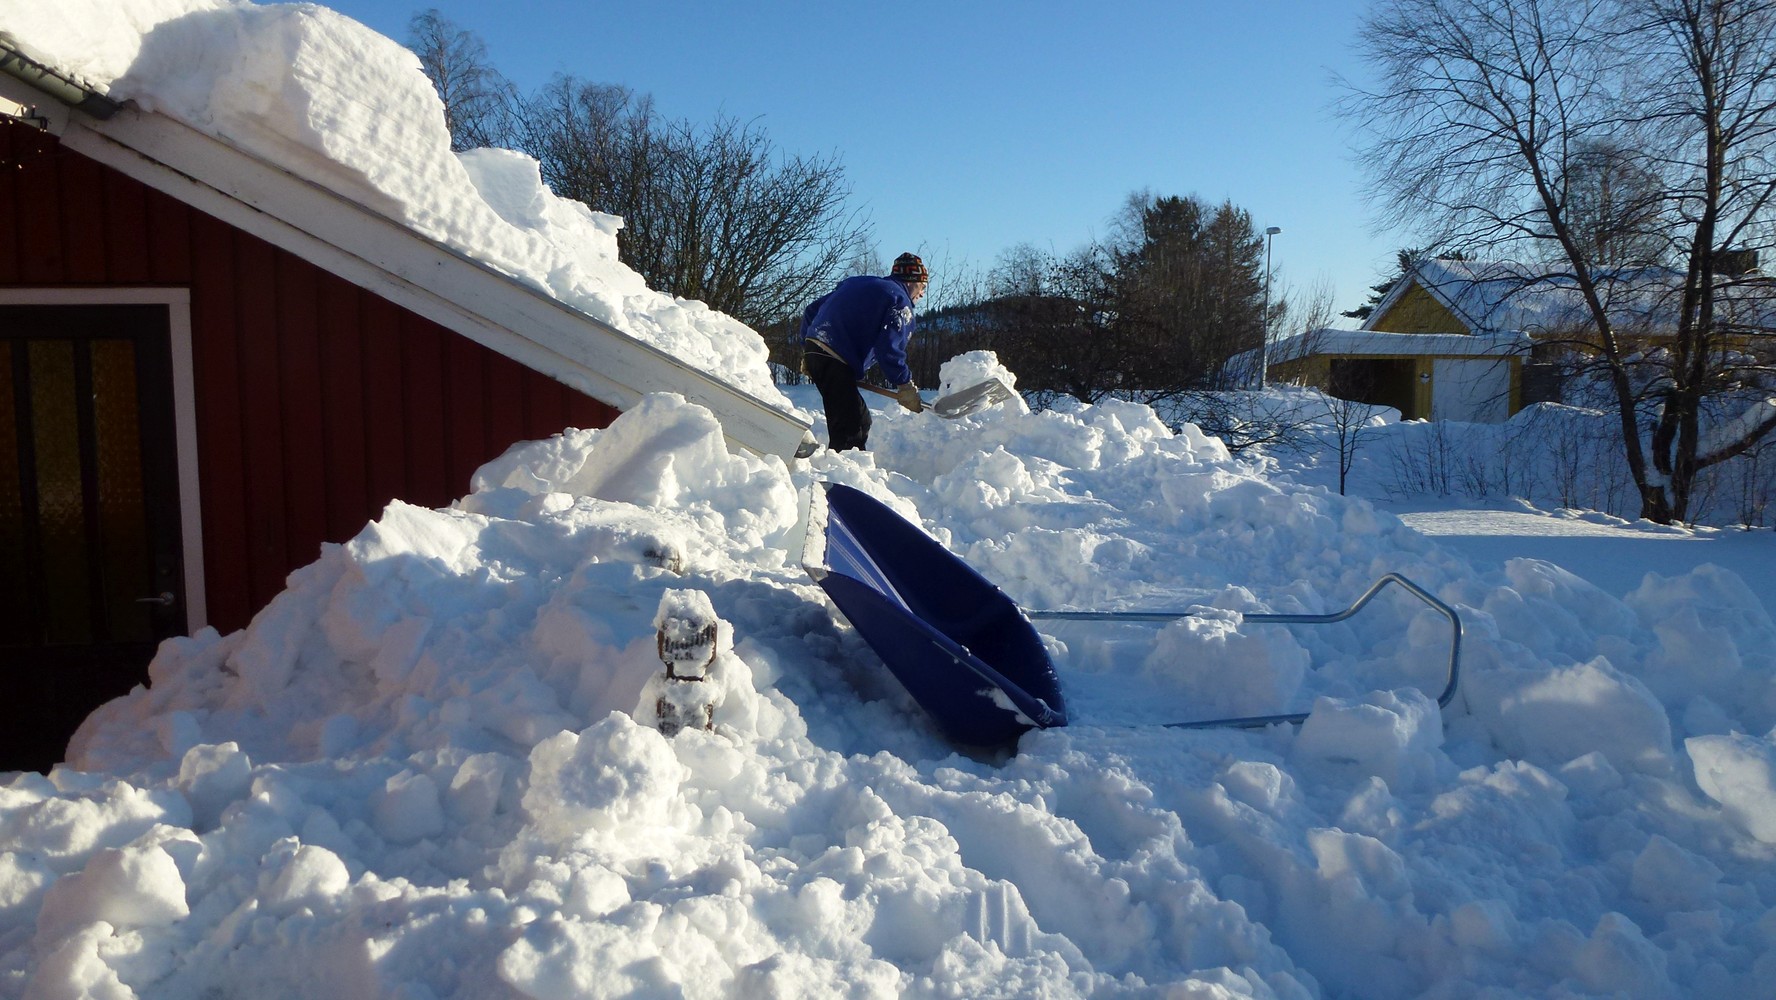
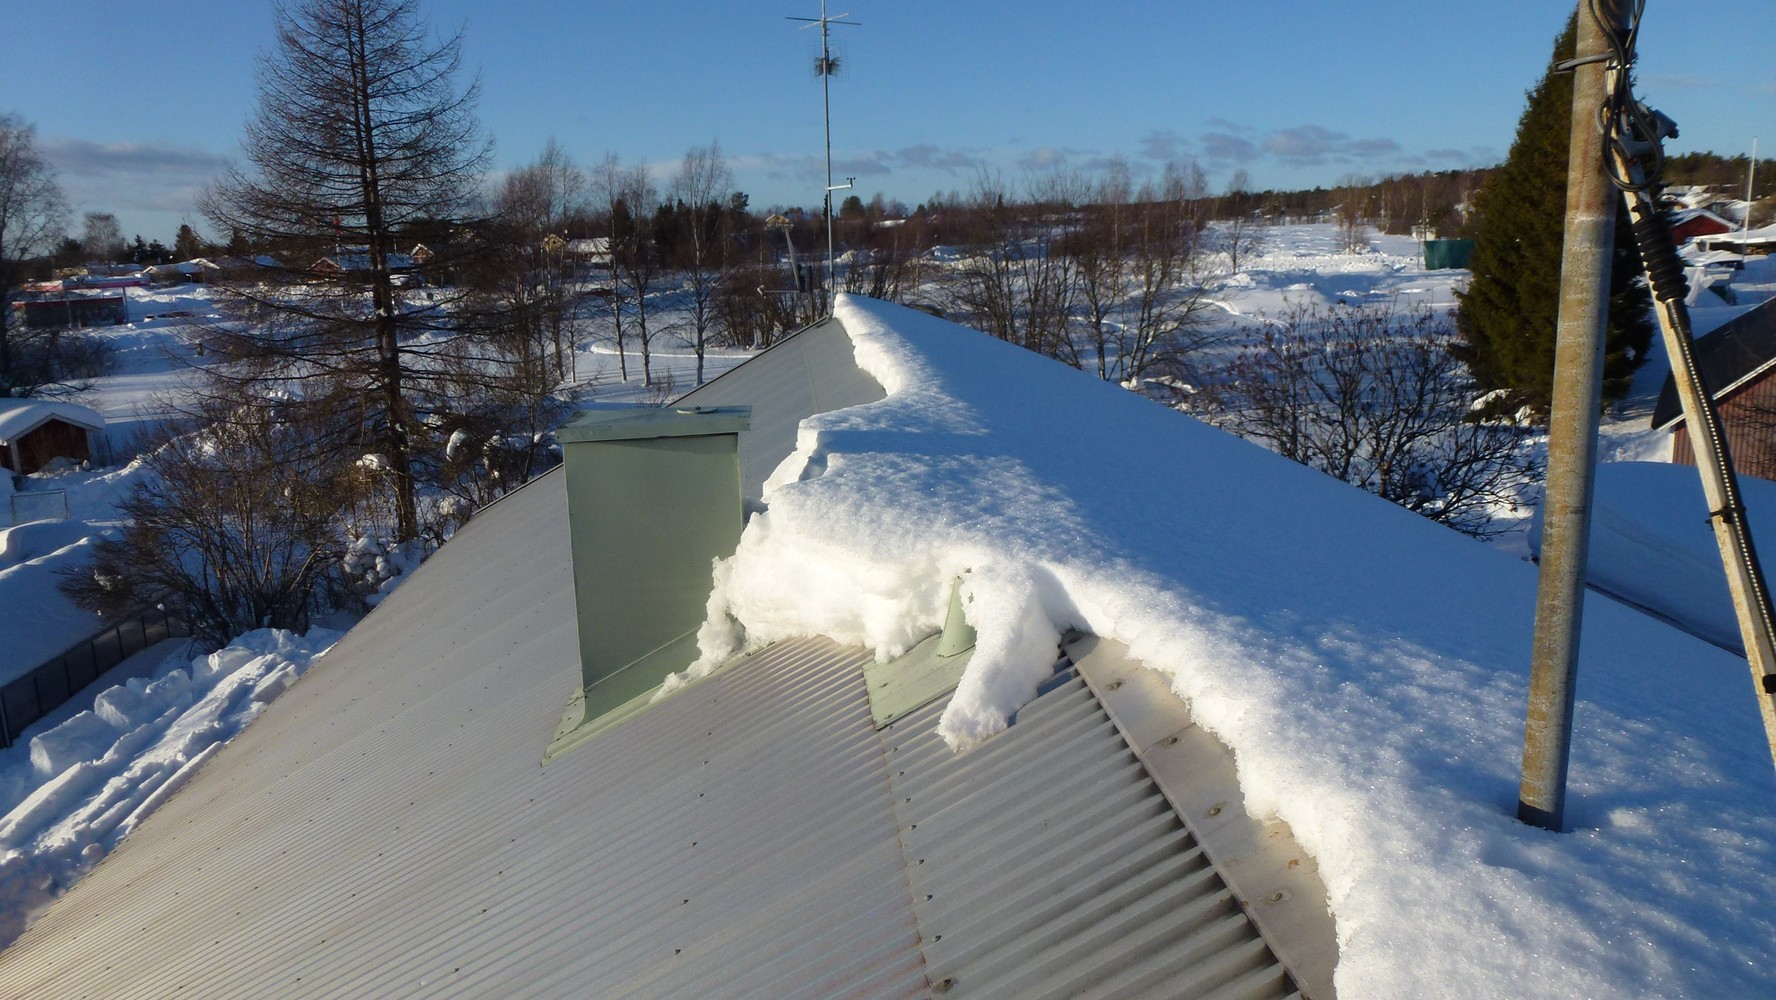
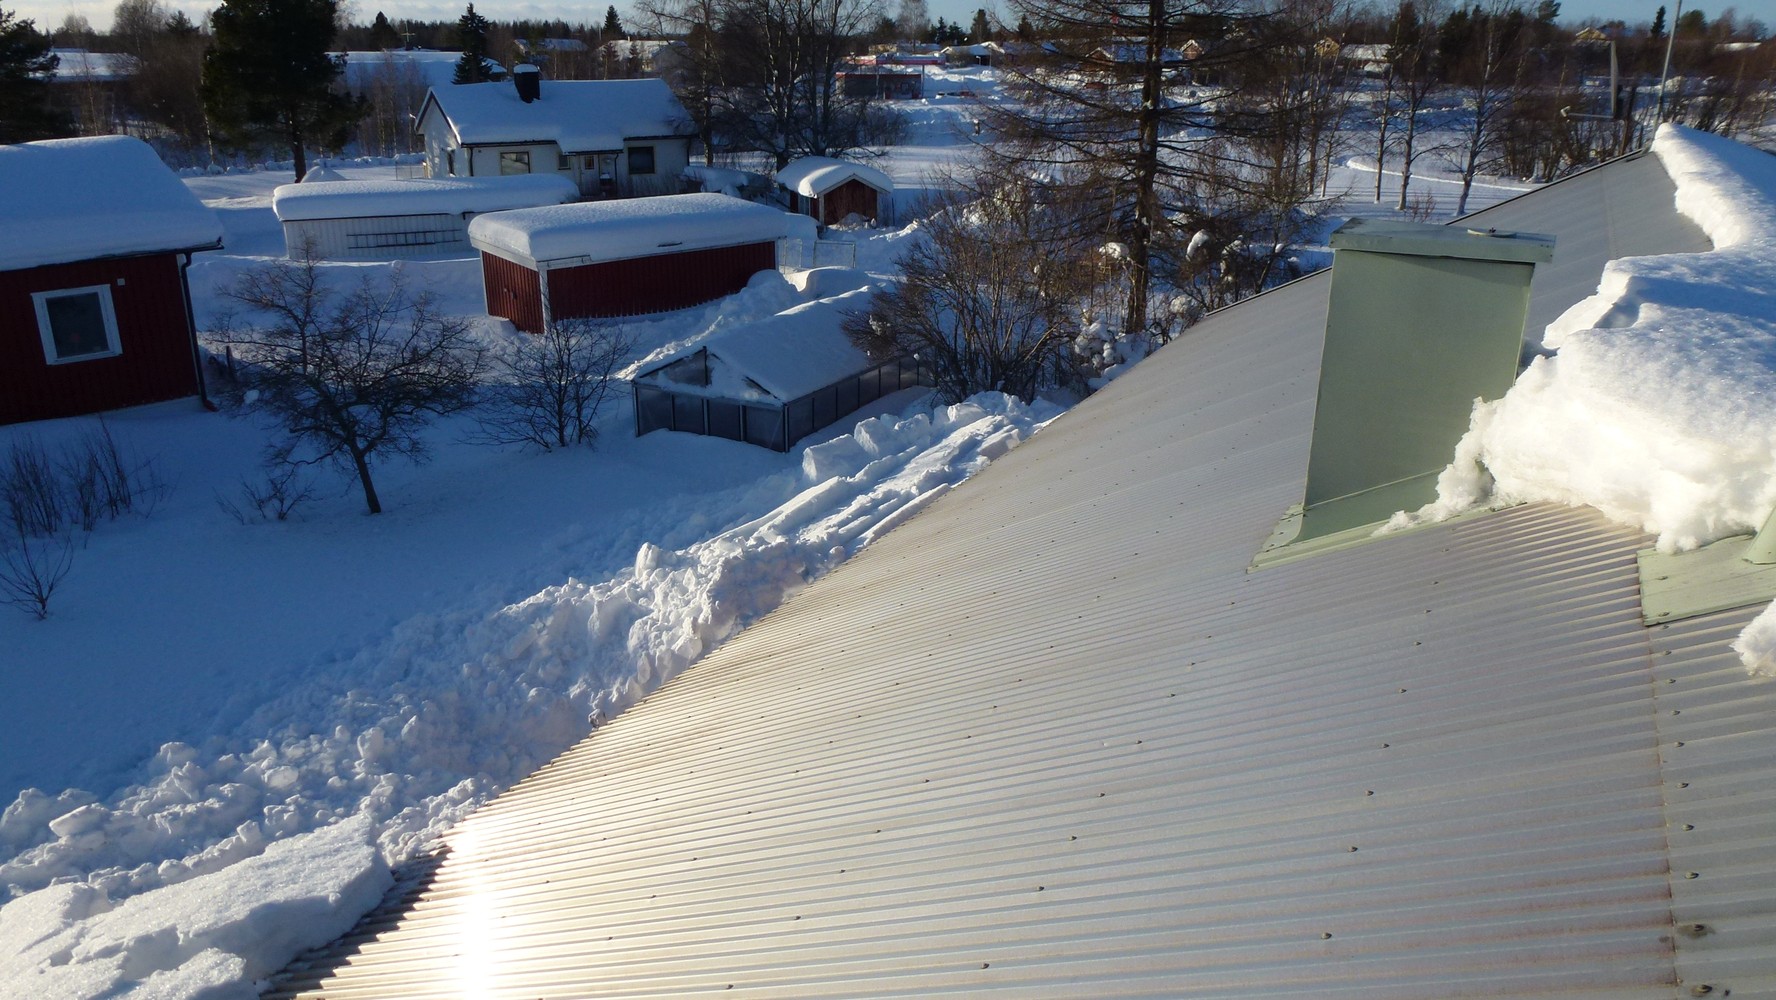
I went up on the roof to take some pictures. It was easy to climb up as the snow was higher than the edge of the roof on the lower part of the house. The last picture is a beautiful view of our neighbours:

We have a storm warning for tonight and the temperature has dropped below freezing again.
I have not had time or inspiration to make new designs lately because of all the work the snowing have caused, and because of some other things that have occupied my mind for the past few weeks. But I will soon be back with some new designs, I hope.
Take care,
Monica
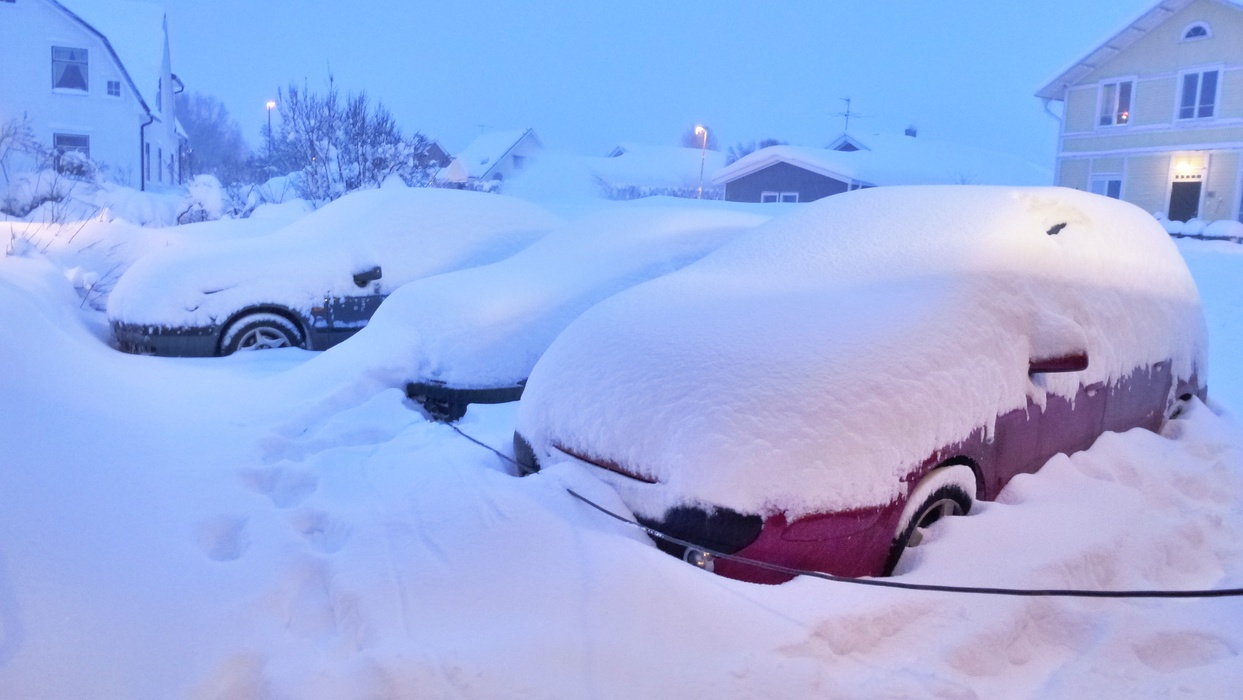
Over the past two days we have got a huge mass of snow. Nearly 50 cm (20″), and we have shoveled like idiots. Last night we also shoveled the roof of the greenhouse. I was getting pretty worried that it would not survive the enormous mass of snow. It was quite difficult to even get to the greenhouse when it was one metre (40″) of snow on the ground. Each step was a pain to take, because the snow reached my waist. My arms and shoulders are aching!
Today we are resting but it will start snowing again late in the evening and it will continue snowing for at least two more days.
PLEASE, we don’t need more snow now!!!
Monica
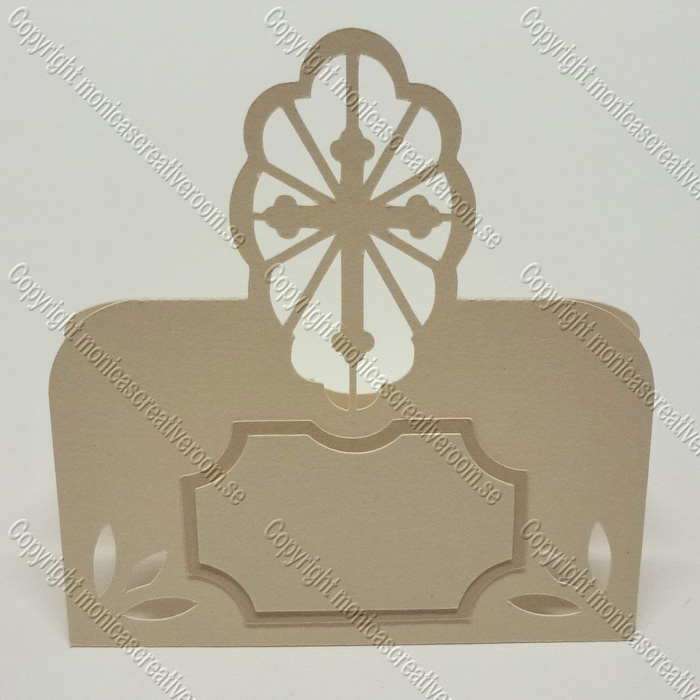
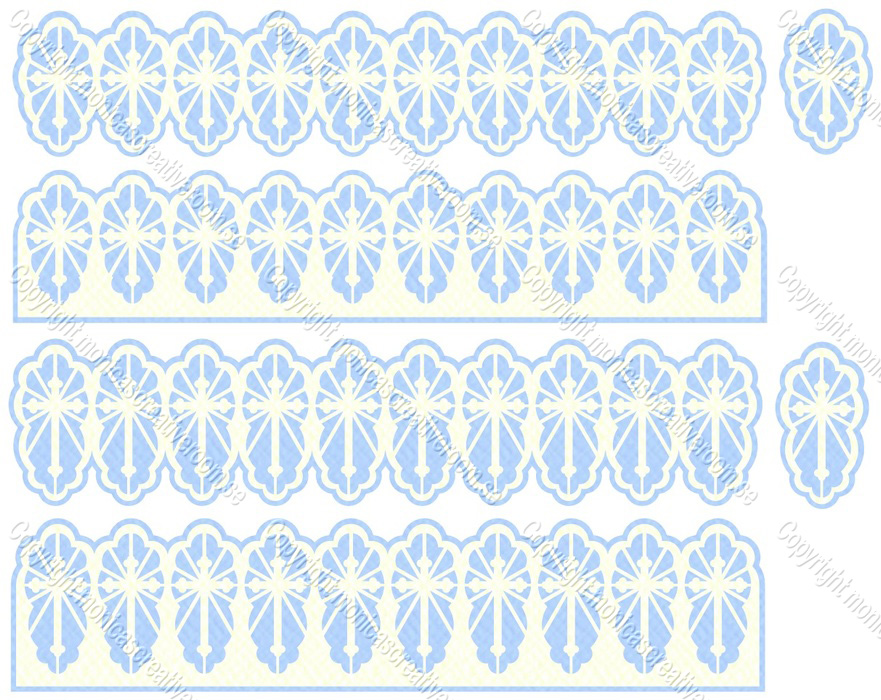
Here are some boxes that are made from the earlier Christmas Crackers designs. I made these designs before Christmas but I have not had time or inspiration to make the sets ready to publish until now. I know that they are too late for Christmas but they are useful for many other occasions. I hope you like them!
You can find the new files here.
Monica
The recent days have been quite cold here. In the morning it was -28C. We had plan to go out shopping so we had prepared the car so it had the engine heater on for more than three hours before we were to go. That was good, otherwise I don’t think the car would have started. Now at least, I have all the ingredients I need to make a delicious sandwich cake (smörgåstårta) for New Year’s Eve.
The sun is still absent most of the day. It only rises just above the horizon for a couple of hours before it goes down again. I very much long for the longer days to come!
I wish you all a Happy New Year!
Monica
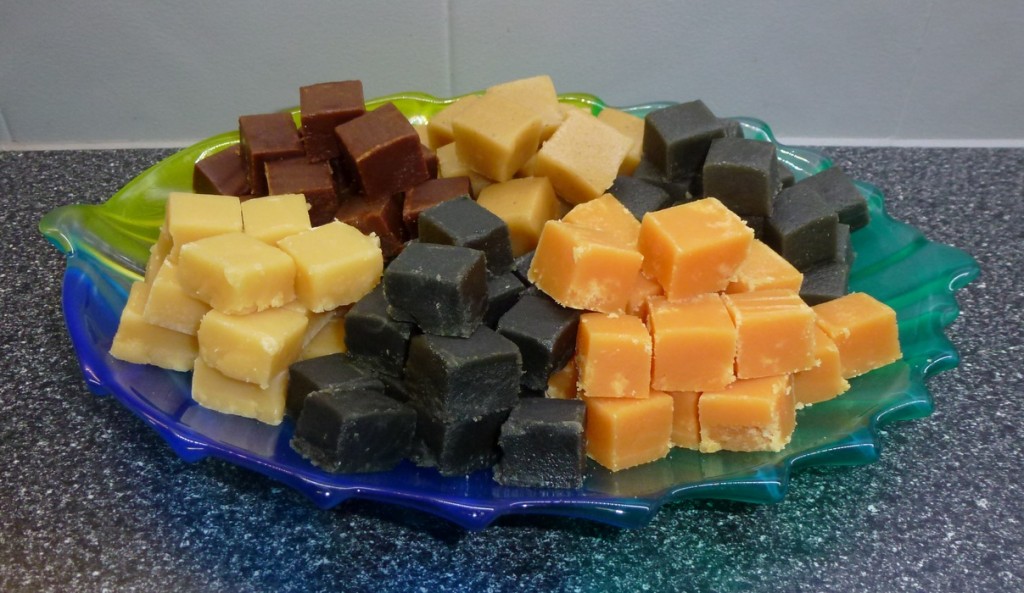
Some days before Christmas I started to make candy, lots of candy. I love to make fudge as it is so easy to make and tastes so good.
This year I made six different fudges, salt and sweet liquorice fudge, cream caramel fudge, chocolate fudge, orange fudge and rum/arrack fudge.
450g white caster sugar
200g double cream
150g butter
50g glucose syrup
50g syrup
Sweet and/or salt liquorice: Mix 2 tbsp licorice powder and 1 tbsp ammonium chloride in the sugar before the wet ingredients are poured in. Exclude the ammonium chloride if you want sweet licorice.
Chocolate: Mix 100g chopped dark chocolate before boiling.
Vanilla/orange/rum etc: Stir in after boiling 1 tsp of the desired taste. Add more if you want stronger taste.
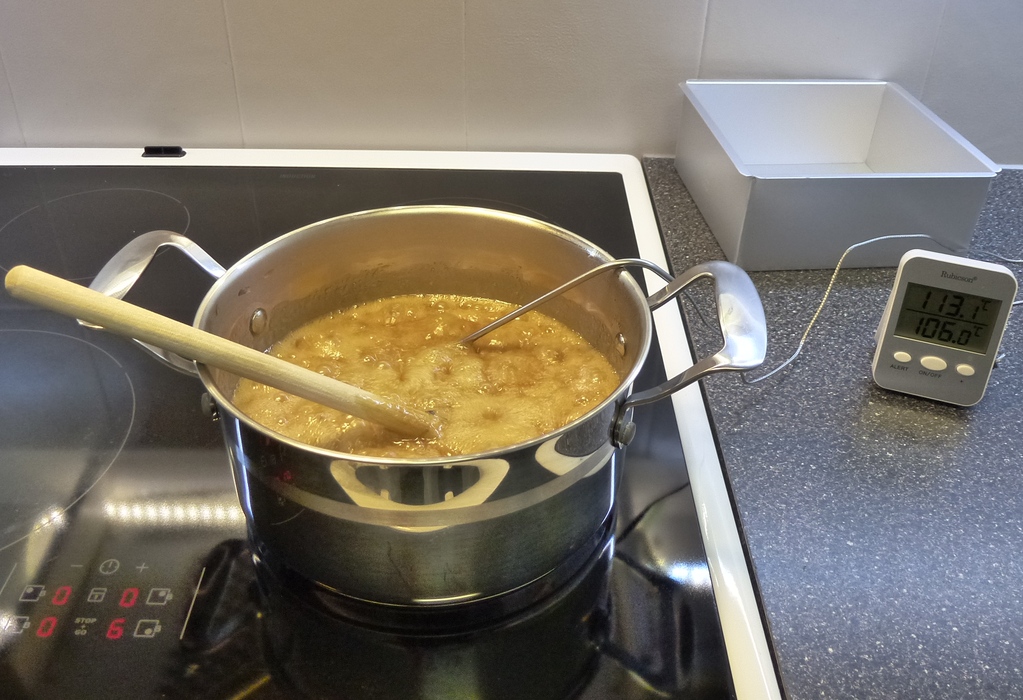
Mix all ingredients in a saucepan and bring to a boil, stirring all the time. Put a sugar thermometer in the pan and keep on boiling until the mixture reaches 116C. This usually takes 15-20 minutes.
These treat holders will be the last files before Christmas. I hope you will enjoy using them as much as I have enjoyed designing them.

You can find the new files here.
Merry Christmas to you all!
Monica
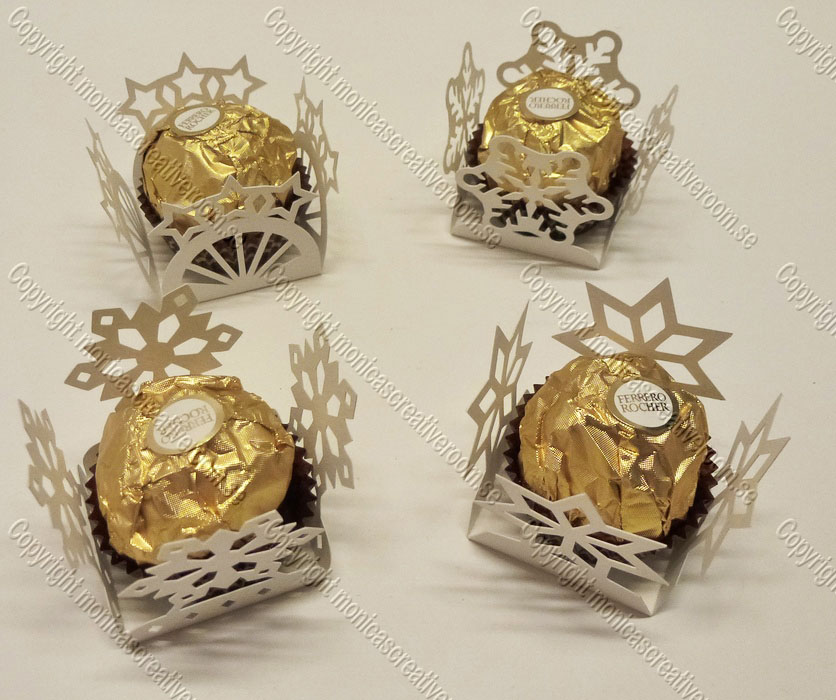
I hope you like the treat holders because here are some more of them 🙂


You can find the new files here.
Monica
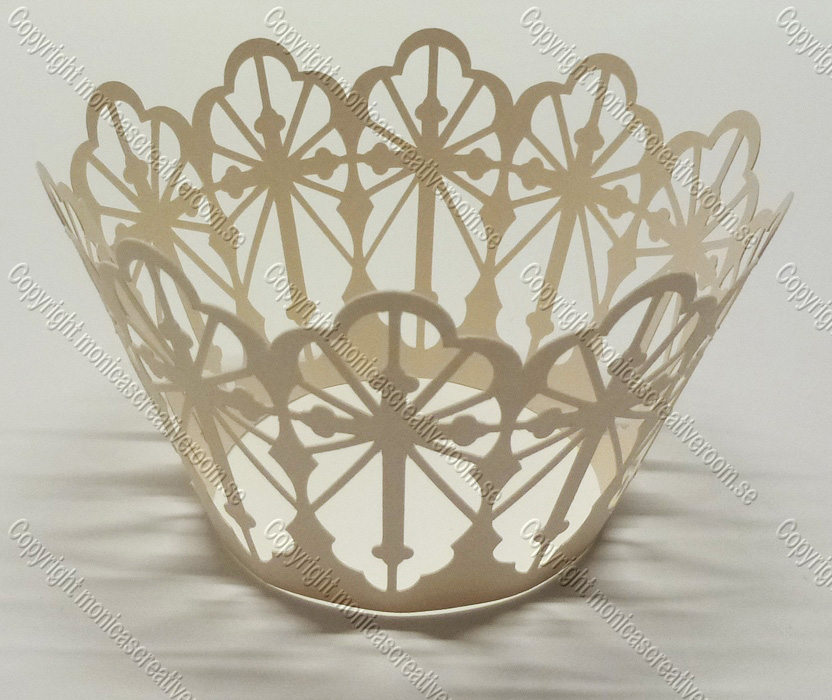
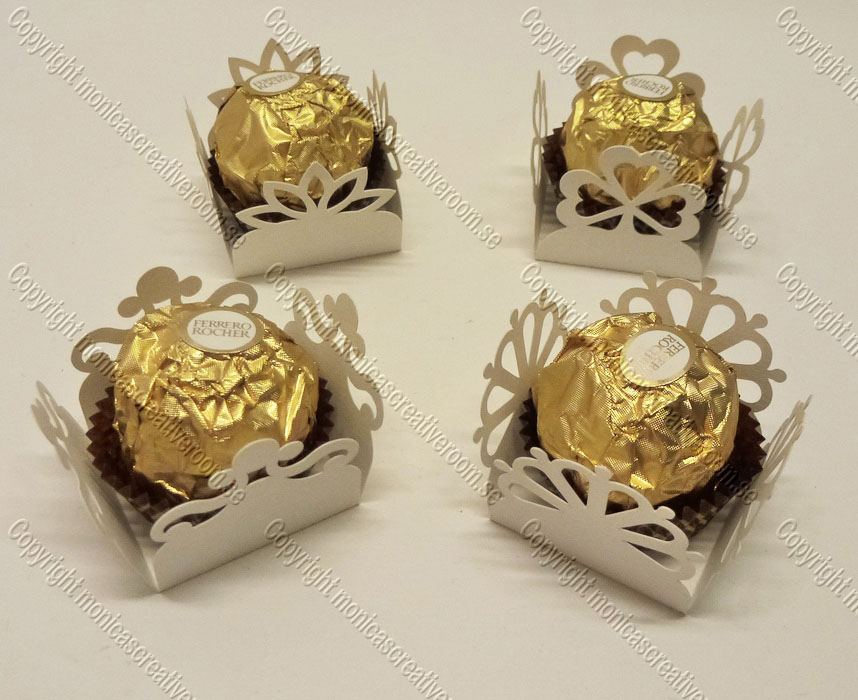
These treat holders are perfect for small treats like Ferrero Rocher, but of course you can resize them to fit bigger treats.
I have made them in sets of four different designs in each file.

You can find the new files here.
Monica
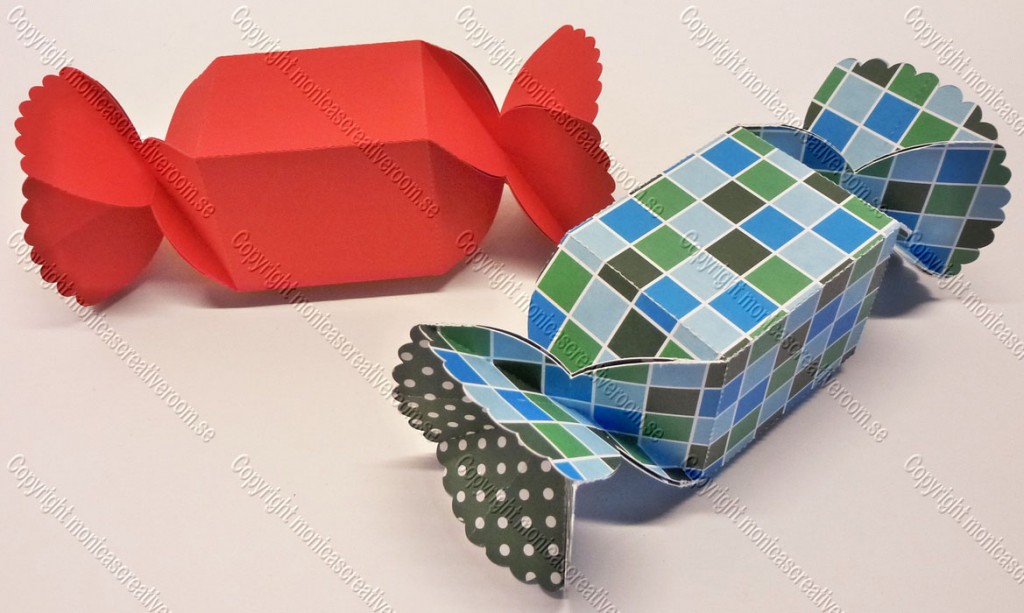
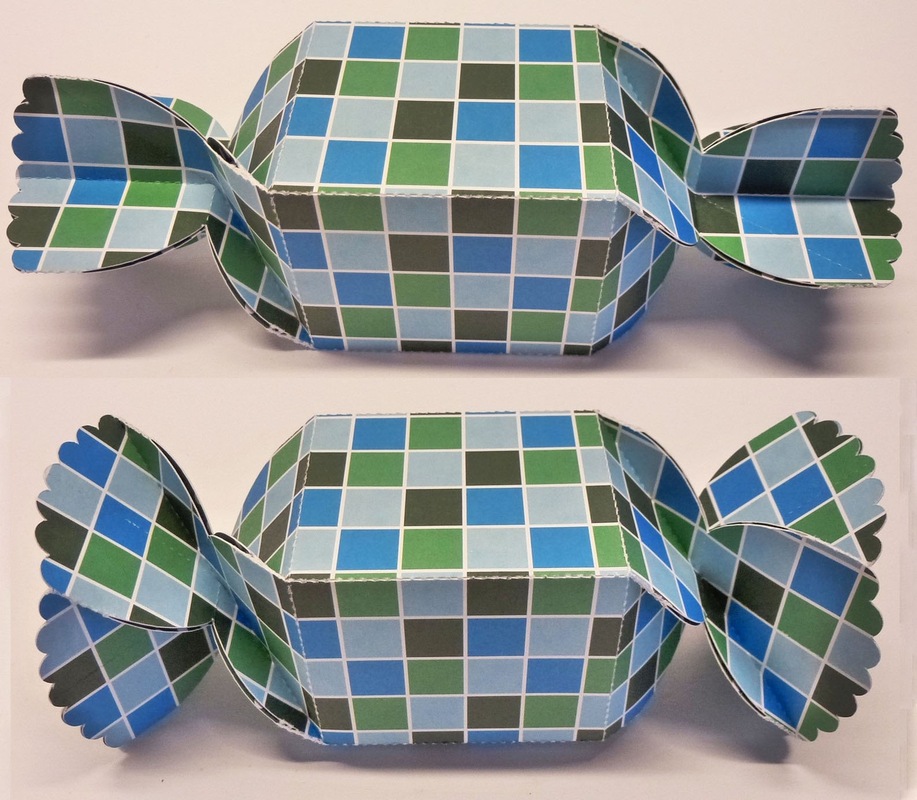
This is another type of cracker that is a little bit harder to fold but it looks amazing.
You can find the new file here.
Monica
(click on the pictures to enlarge)
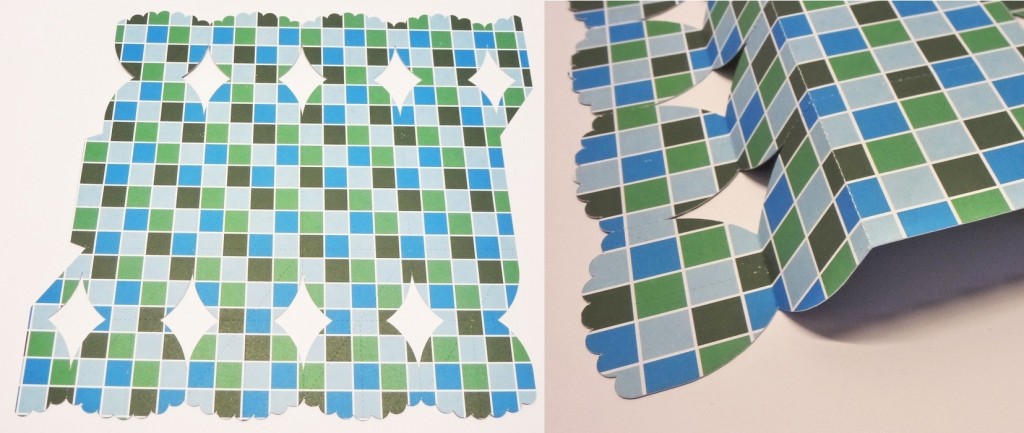
Cut out the design an fold as in picture.
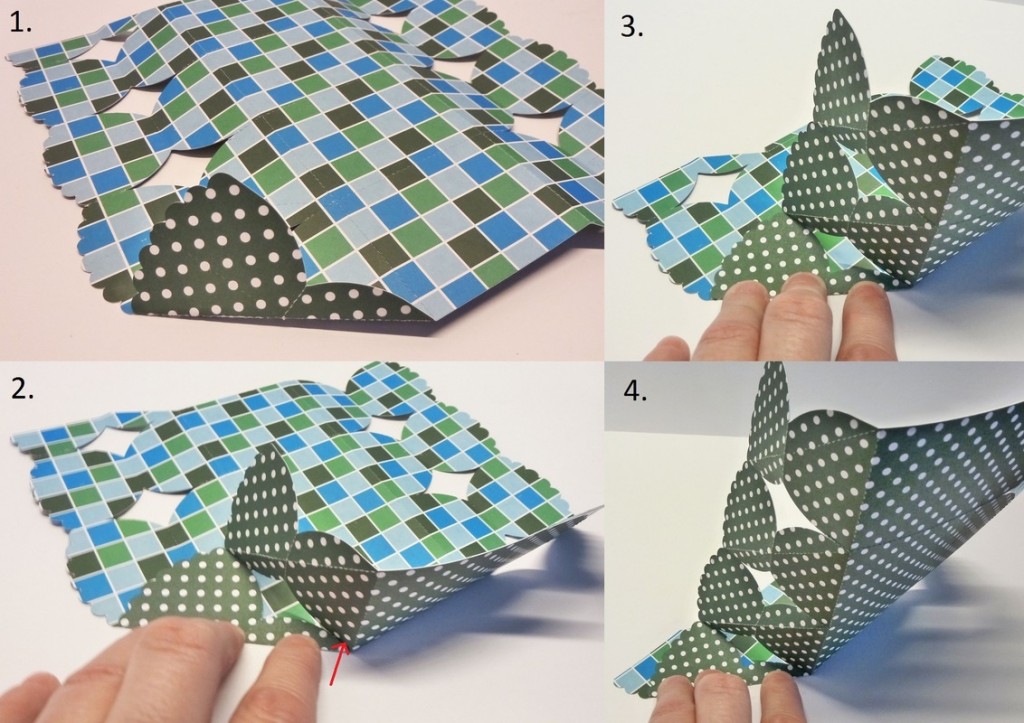
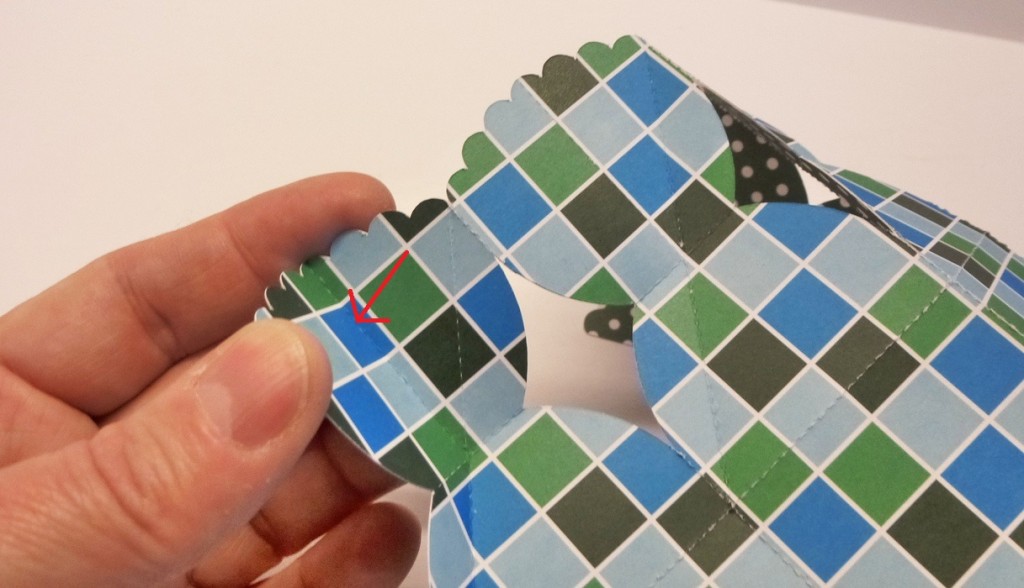
Now it’s time to fold the diagonal lines, these lines must be folded sharply. To be able to fold the diagonal lines you must bend the other folds as in pictures. Be careful so you don’t tear the the edge at the red arrow in picture two.
Fold the centre line just slightly. It doesn’t have to be sharp.
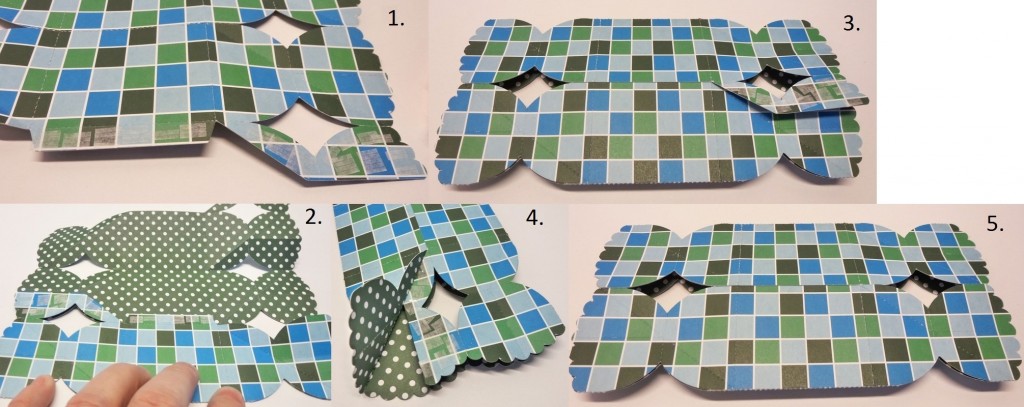
Now put glue or double sided tape on the tabs and fold it together.
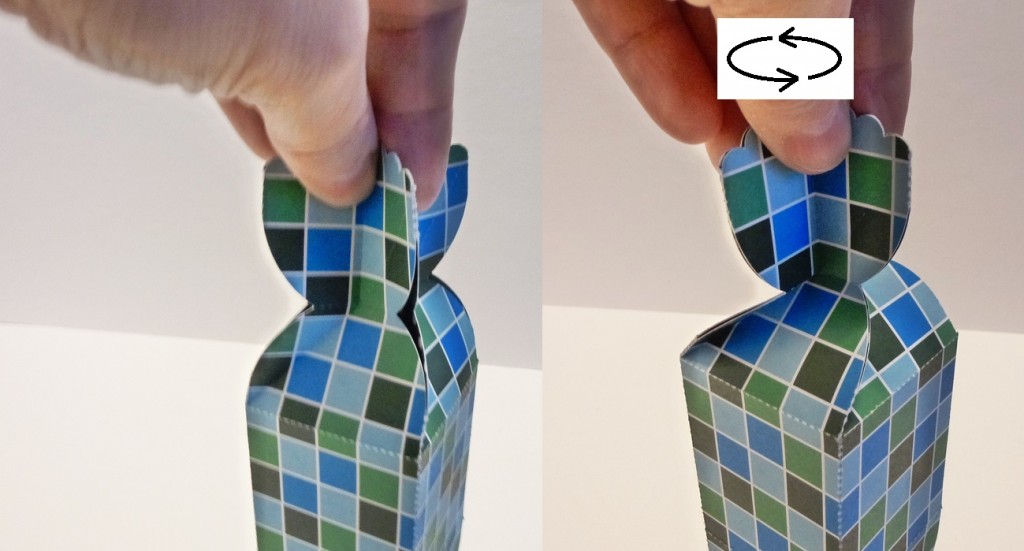
Now it’s time for the “twisting”. Hold the cracker with a finger on each side like in the picture and twist it counter-clockwise just slightly and it will twist in place.
Twist the other side and then flatten the centre folds out and it’s ready.
These stars are easy to put together, no glue needed. Cut two pieces out, fold them and then thread them together.
This star can also be used as a box for small gifts. Just put the gift in the middle before closing the star. You can hang them in a garland and put numbers on them and you have an advent calendar.
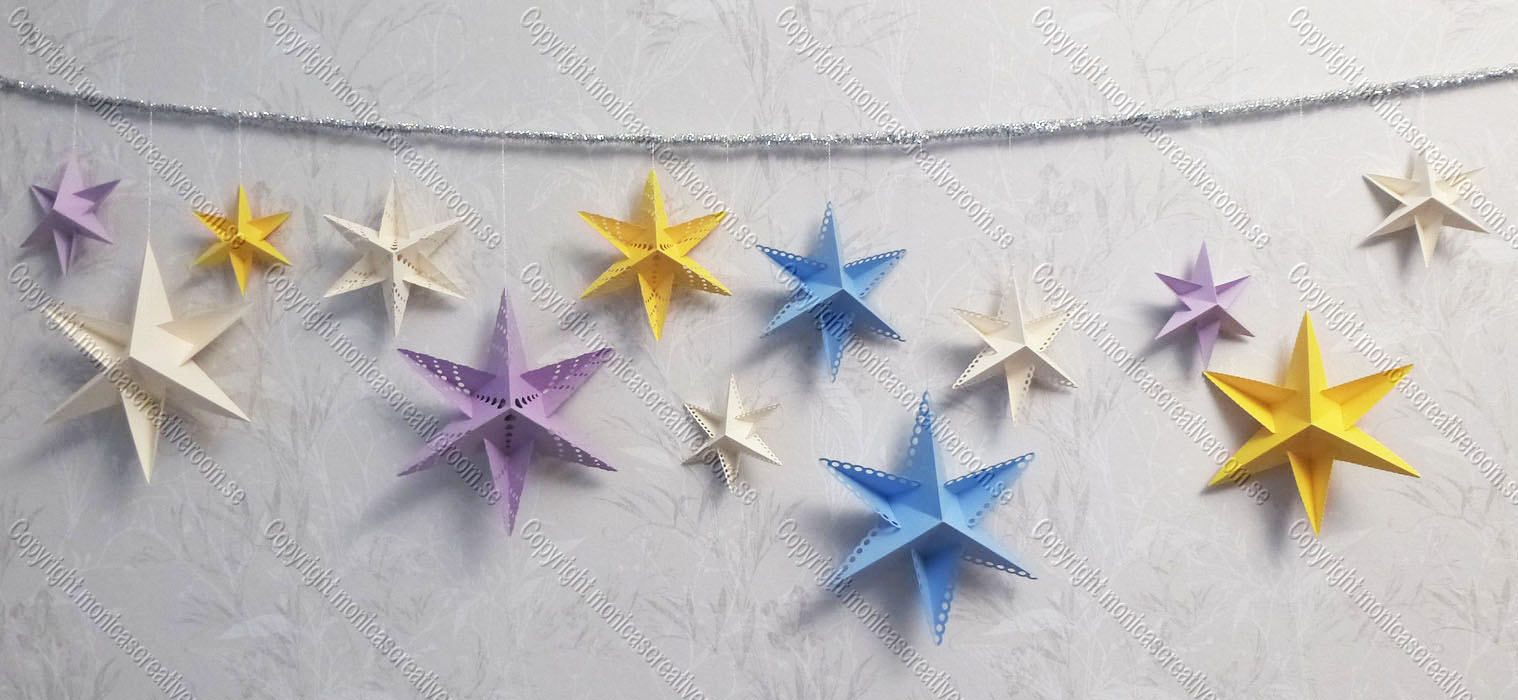
You can find the new files here.
Monica
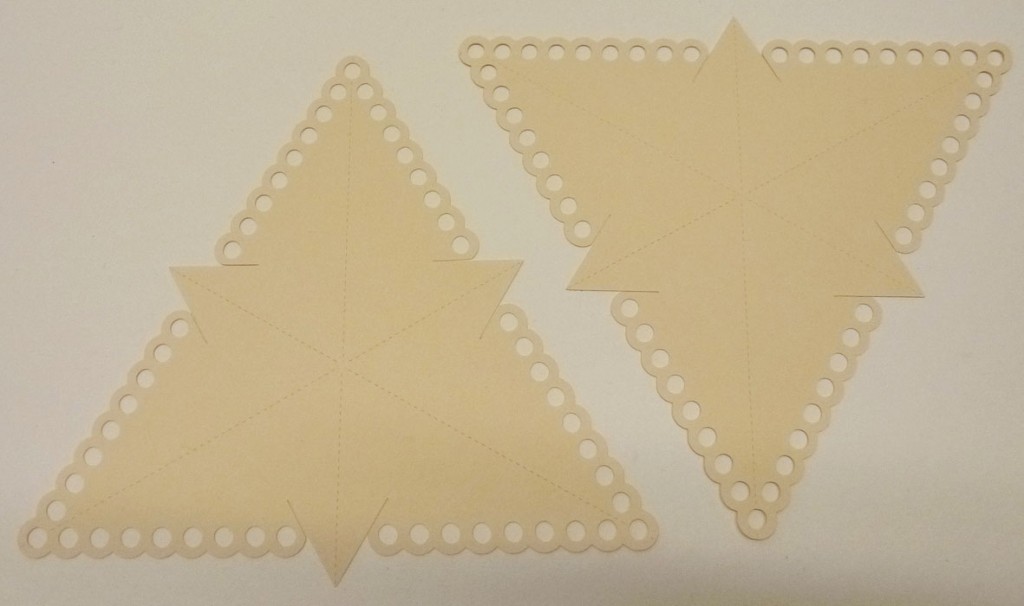
Cut two pieces out.
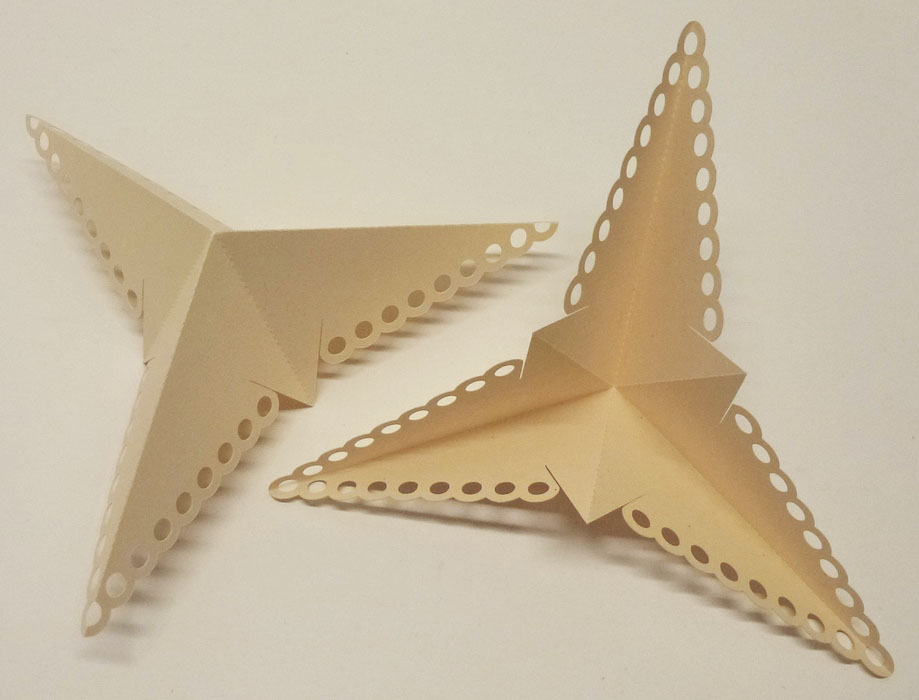
Fold them like this.

Thread them together in the slits.
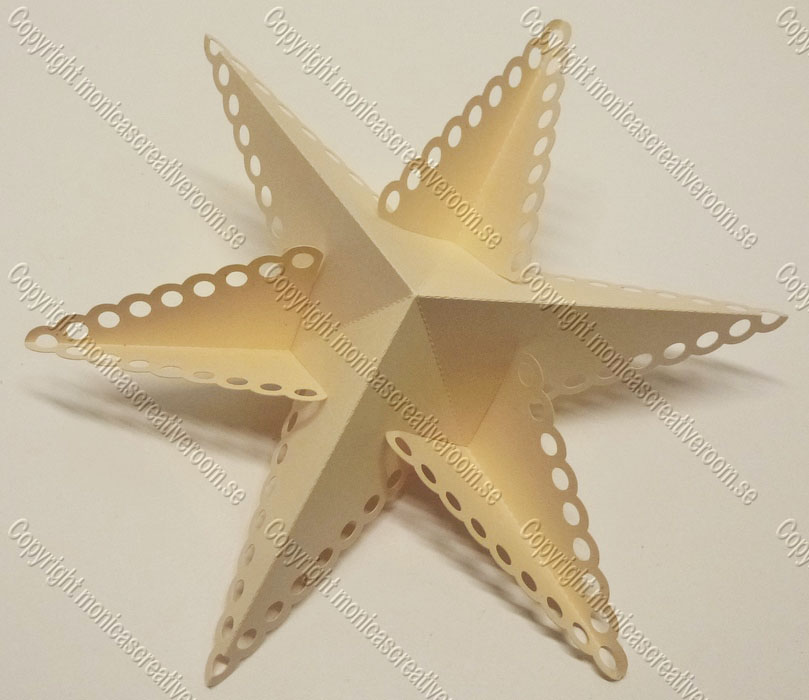
Done!
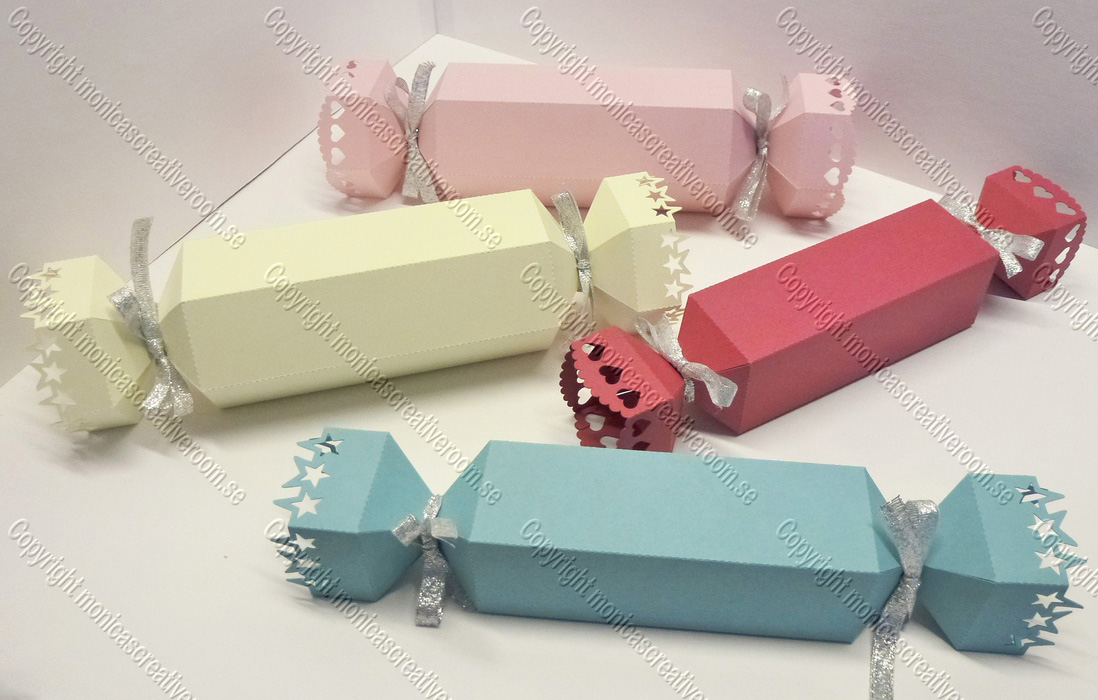
I decided to make some shorter crackers too. For smaller gifts, perhaps!
Hope you like them.
You can find the new files here.
Monica
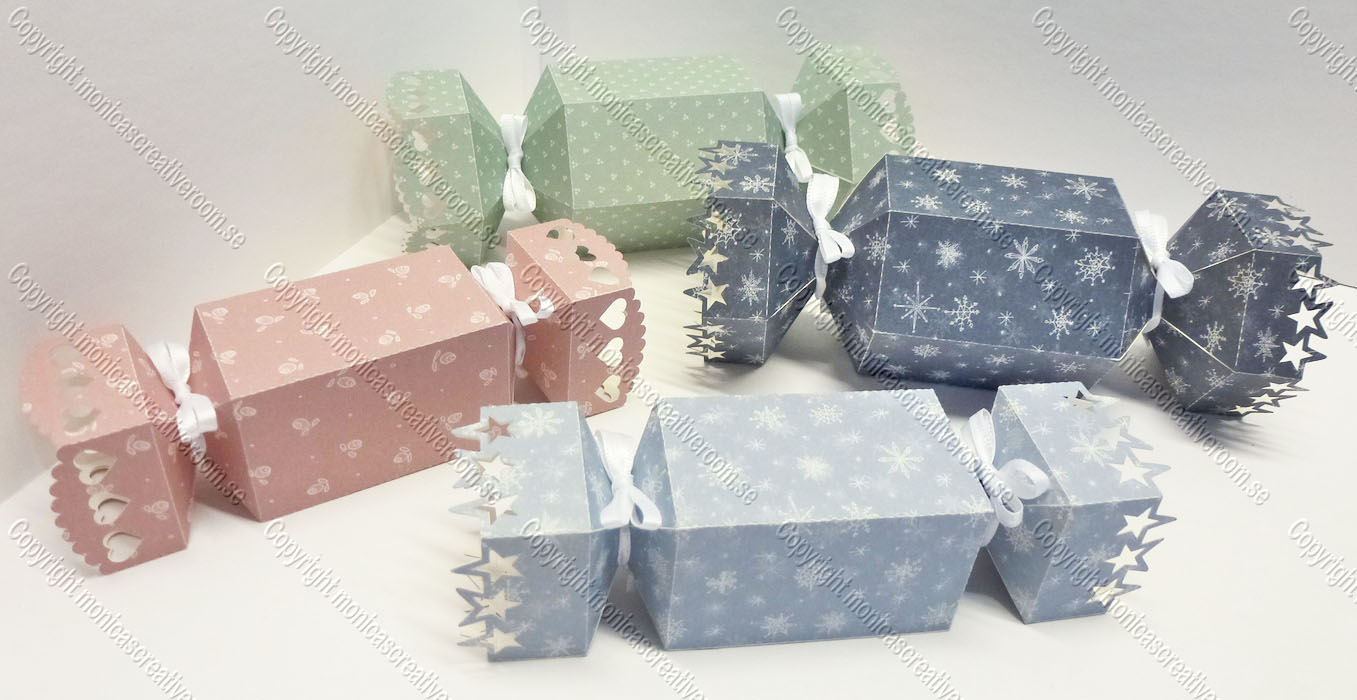
I’ve recently seen a lot of really nice Christmas crackers and felt that I had to try to make my own version of them.
Here are the models I made.
You can find the new files here.
Monica
I’m starting to really get Christmas feeling now that the ground is white, and the air is fresh and cold. The days have become much shorter, and for every week that passes the daylight disappears more and more. In December, the sun will be just above the horizon for only about three hours a day when it is darkest.
It’s fun to make boxes and here are some new ones for you.
You can find the new files here.
Monica
Here are the first set of new boxes that I think will be perfect for treats.
Resize them to match the treat you want to put into them.

You can find the new files here.
Monica
Edit: Here is a short video showing how to fold the top.
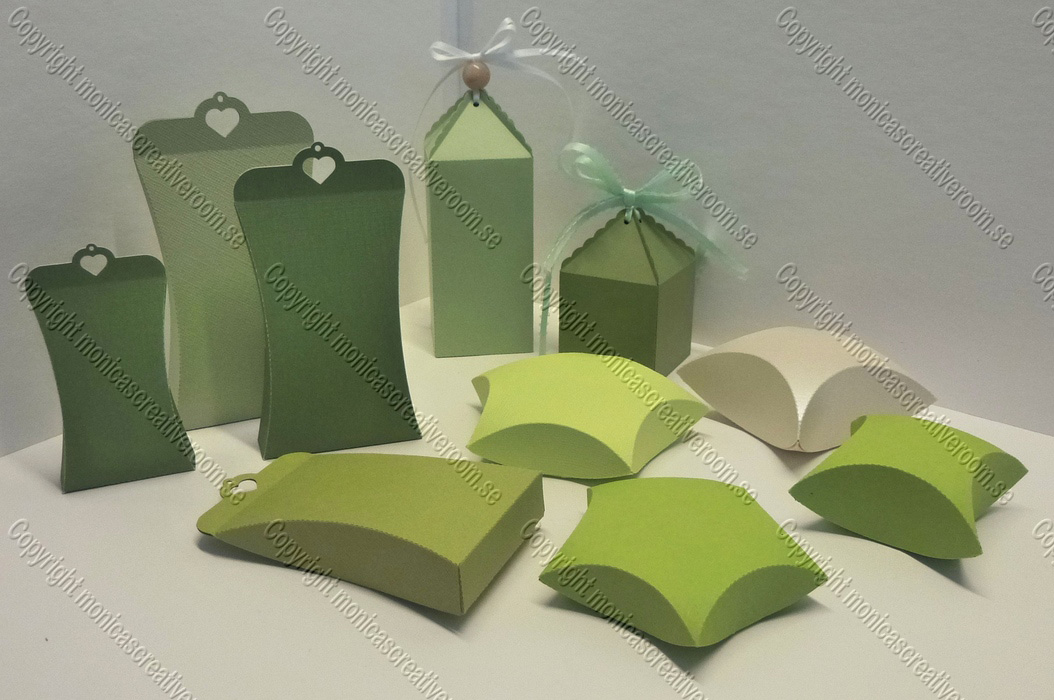
Lately I have been busy making some new bags and boxes. Some of them will be useful for Christmas, I hope.
Still, I have some work left on the boxes before I can post them, but here are the new bags anyway.
You can find the new files here.
Monica
All the snow has melted for now. We’ll see when we get more. I really want some snow because it gets so much brighter, now when daylight disappears more and more each day. The only thing I don’t like with the snow is to shoveling it and when I have to sweep off the car in the mornings.
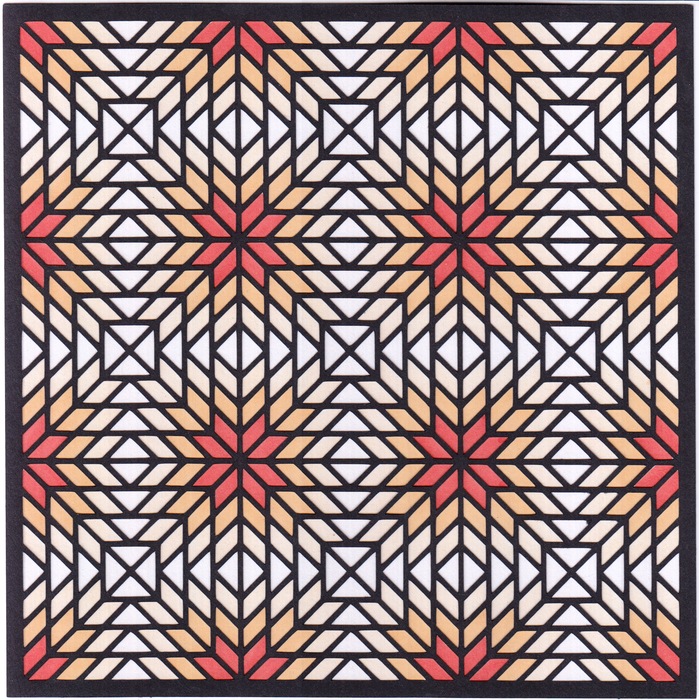
Some days ago I got my new Promarkers. 31 new colours added, so now it’s a joy to colour my lattice patterns with them. Some of the patterns gets a quite different look when coloured, like the brownish one that looks like three dimensional.
You can find the new lattice patterns here. (The pictures in the file section do not have the colouring)
/Monica
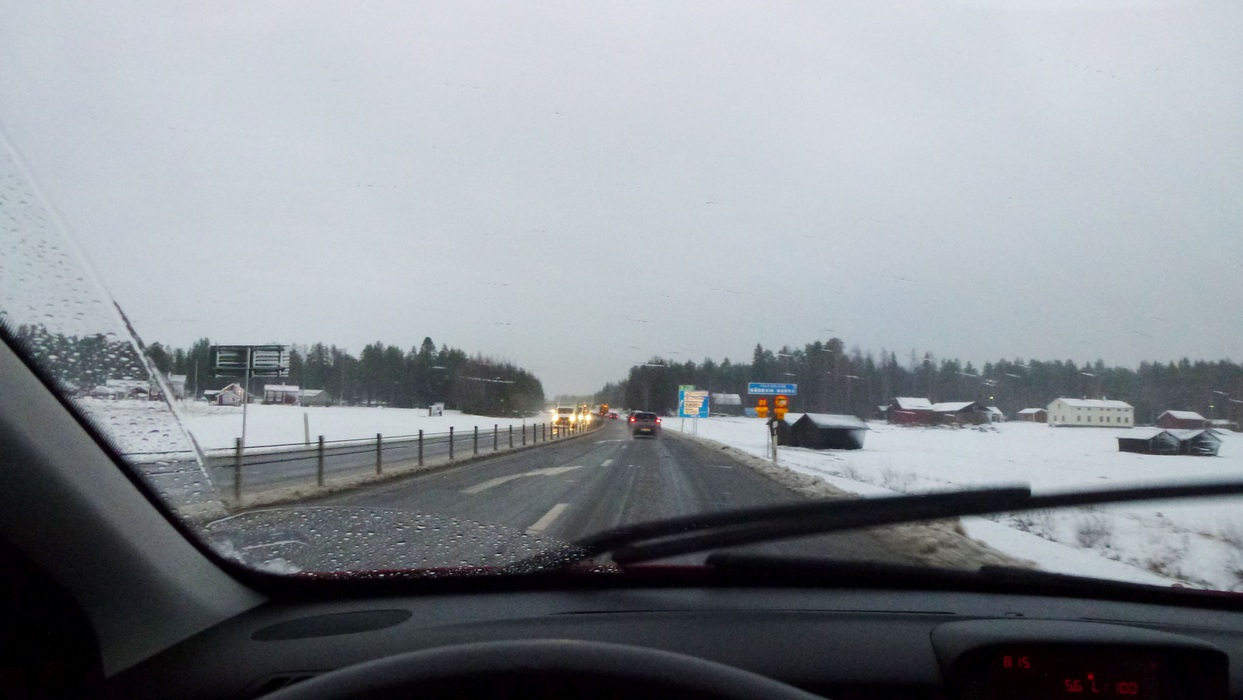
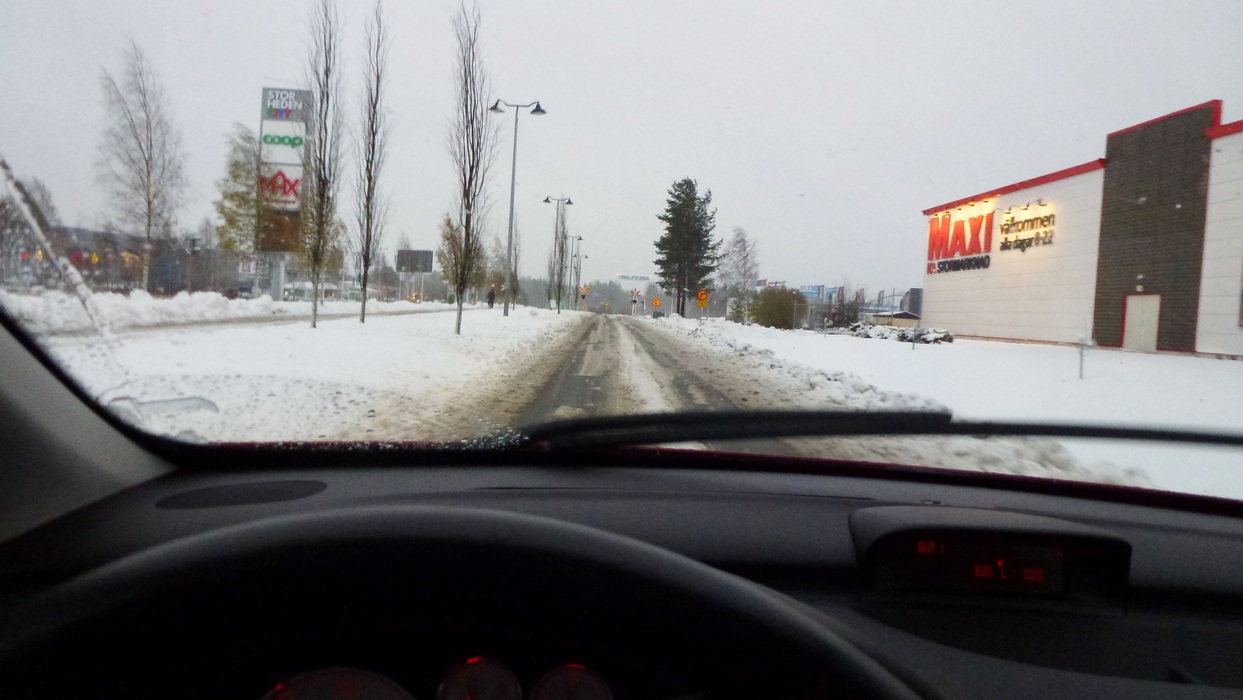
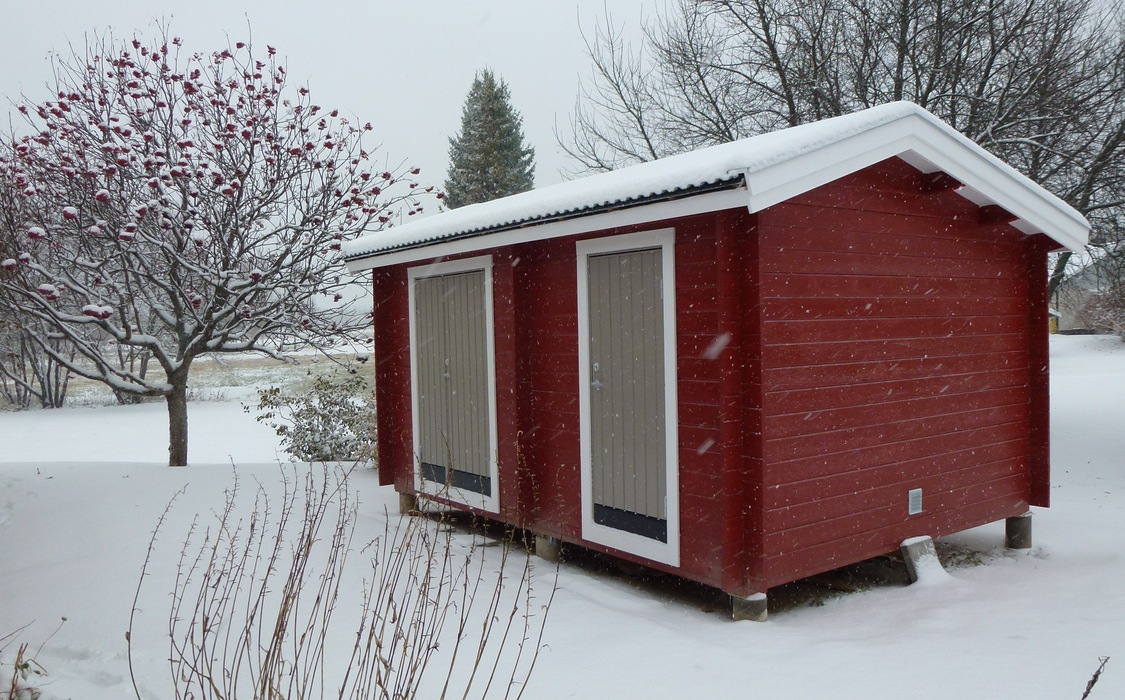
The snow that came last weekend didn’t melt away and yesterday evening it started to snow again. During night it had snowed almost 15 cm (6″). Now it’s raining and it will turn warmer during weekend.
My heart was in my mouth as I drove to work this morning.
/Monica
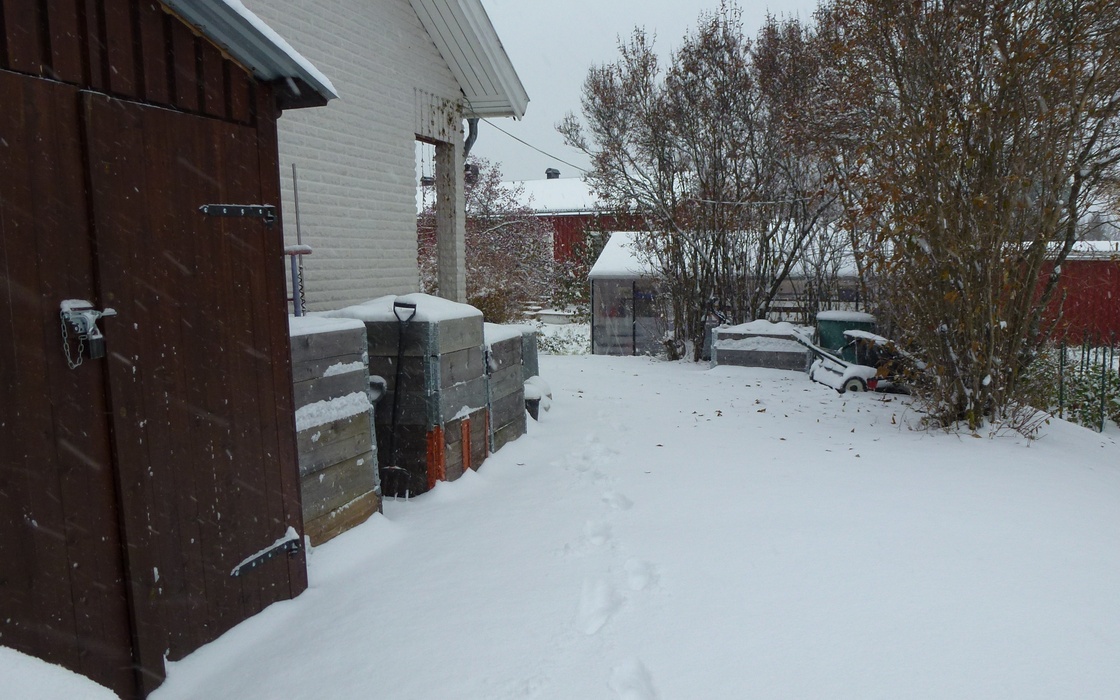
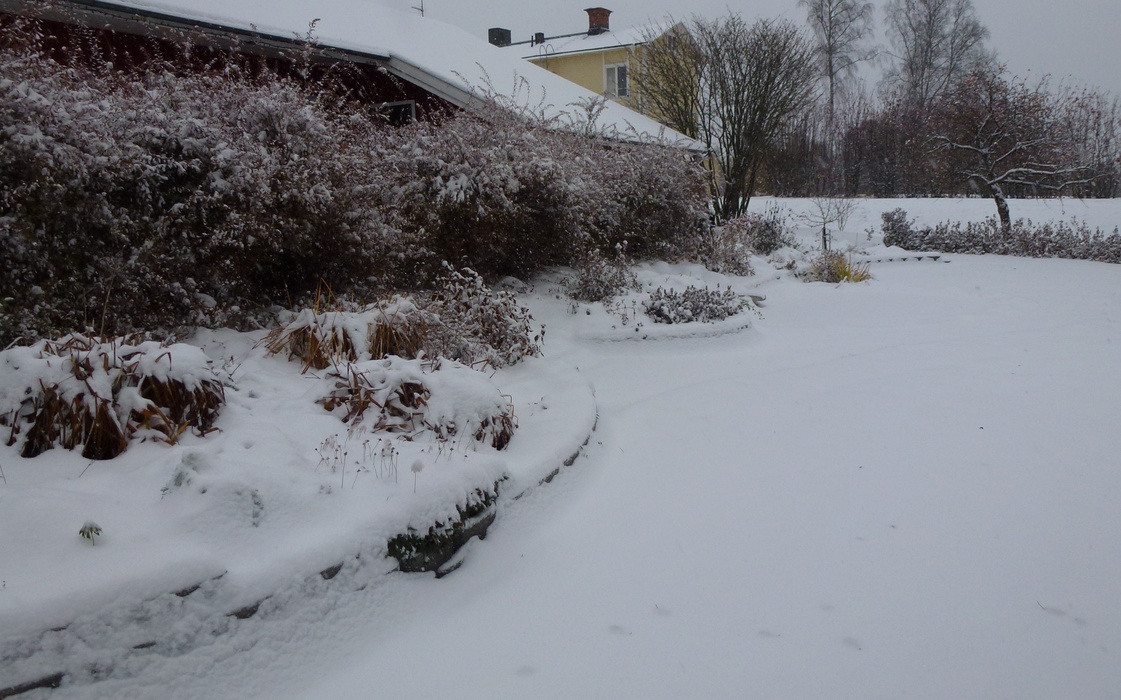
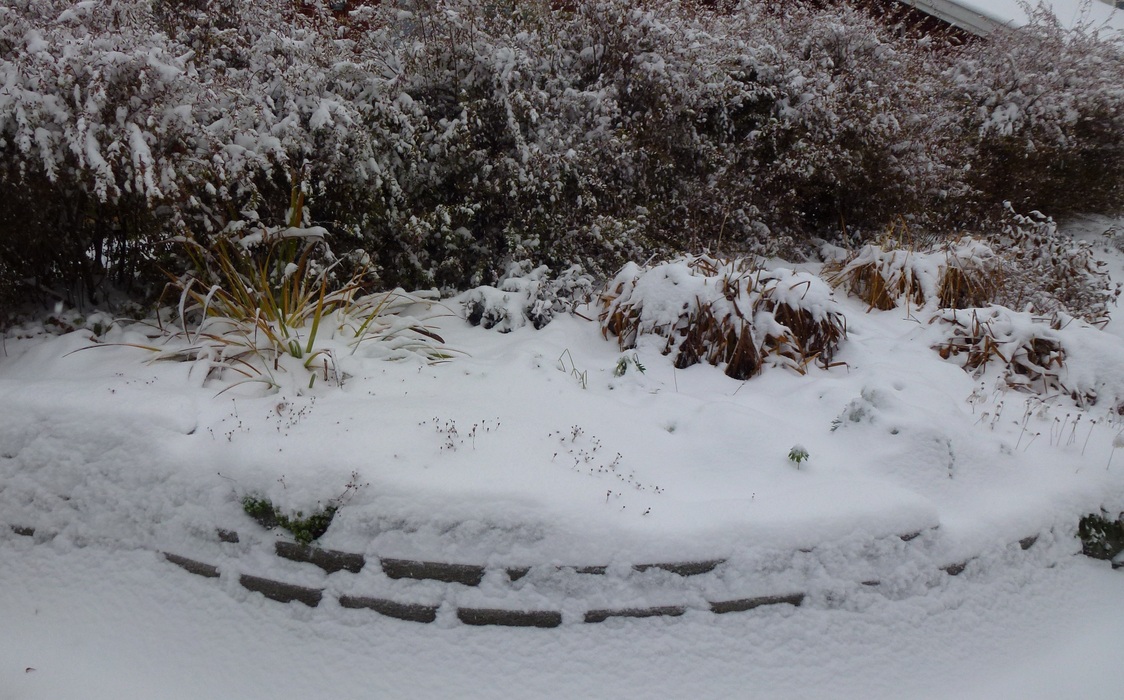
When I woke up this morning the world had turned white. It has been freezing cold for a couple of weeks now and yesterday when we where out in the garden collecting leaves I saw that the pond had frozen so I could even walk on it without cracking the ice.
It’s still snowing and we have got about 11 cm (4.5 inches) of snow so far. I think it will turn over to rain in the evening. We will see.
/Monica
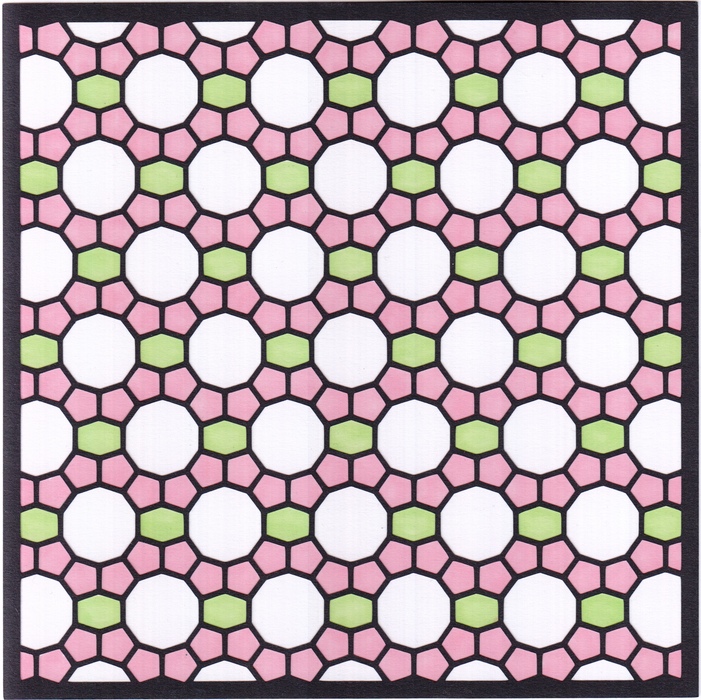
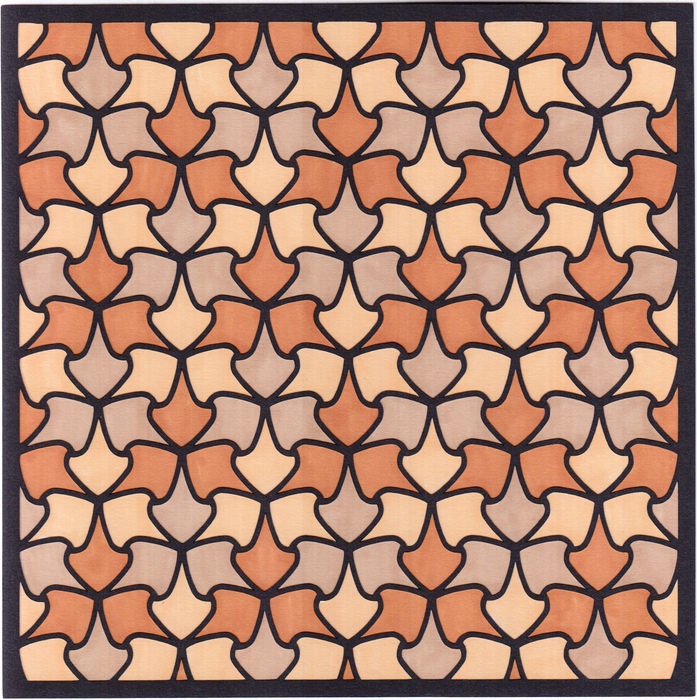
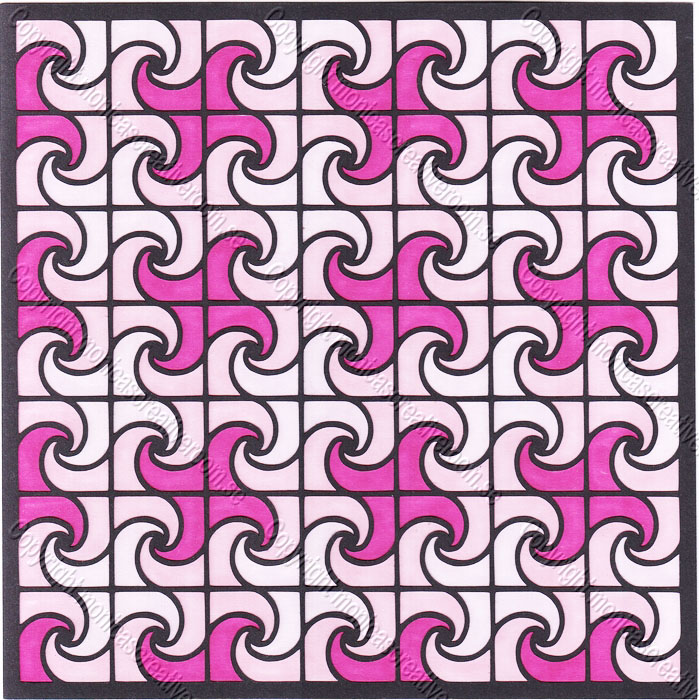
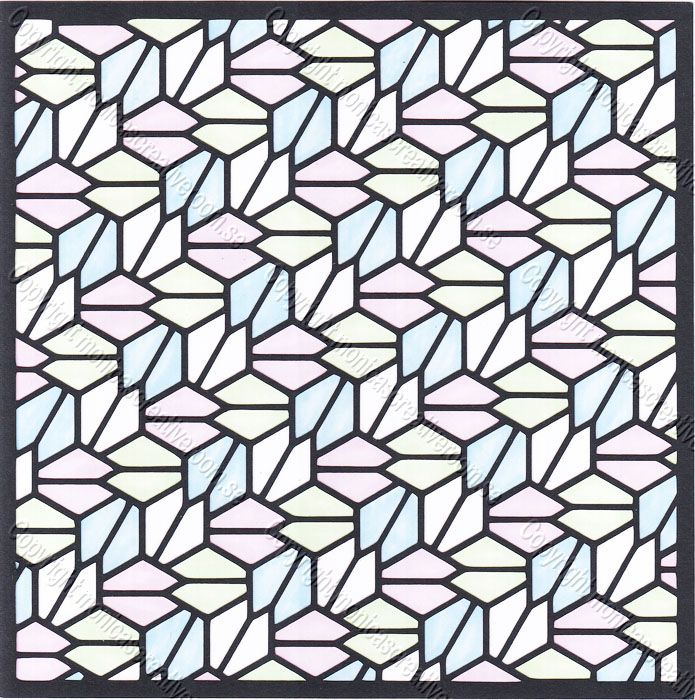
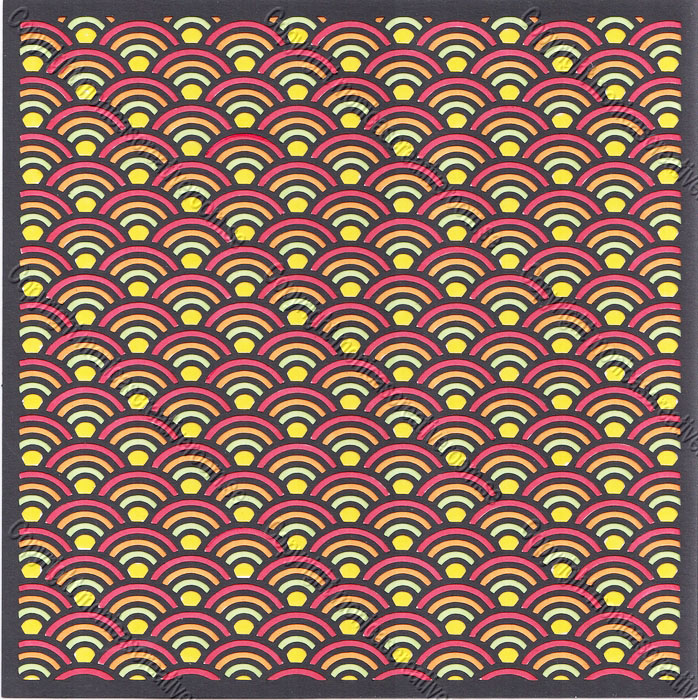
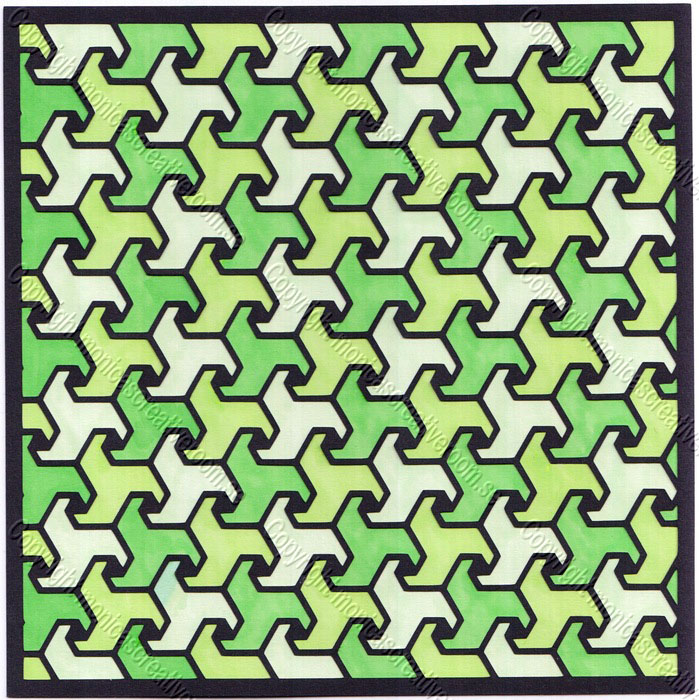
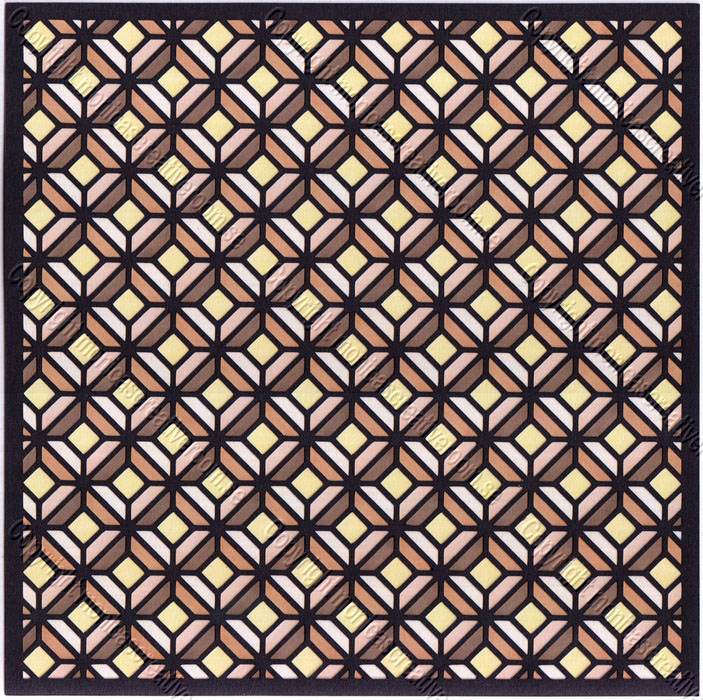
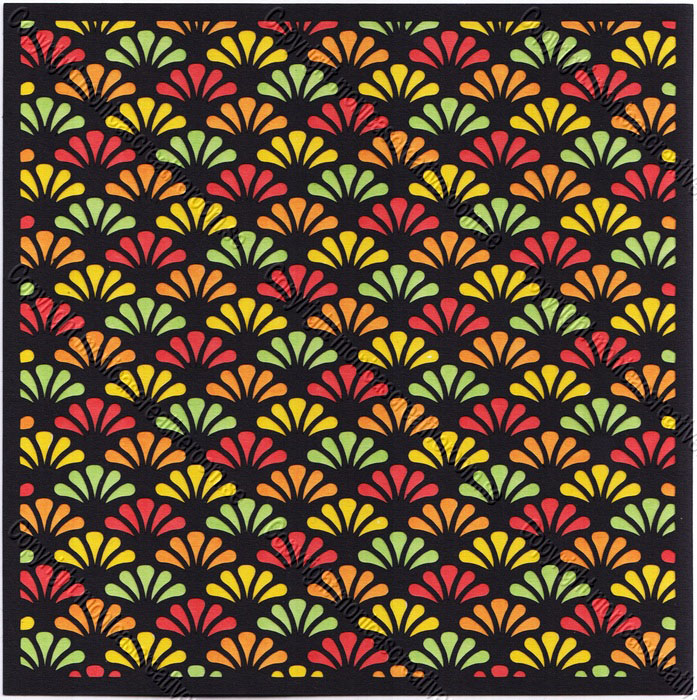
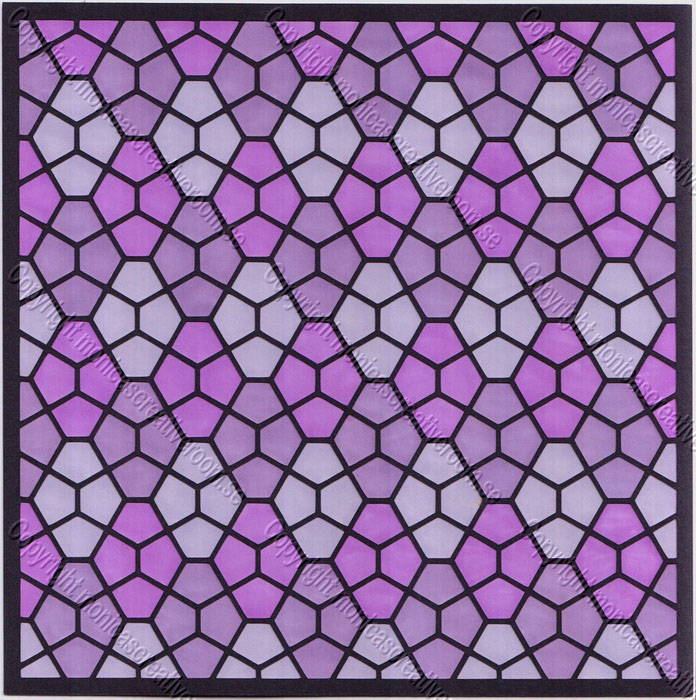
These type of patterns can be varied endlessly and I find them very amusing to make. I have coloured these but you can naturally use them as they are.
I thought I had many colours of Promarkers, but now I realized that I need more…
You can find the new lattice patterns here. (The pictures do not have the coloured areas)
/Monica